Welcome everyone to day 1 of the Old School BOM 2021! If you missed all the beginning info you can find out all about this Block of the Month HERE. I’m the first quilt designer to share a block tutorial on this block of the month journey. I want this to be an opportunity for all quilters to learn different ways to do techniques and to have a little fun along the way! 
Basic Knowledge
There are a few basics you should know how to do for this quilt along. Instead of me reinventing the wheel I will link you to sites that share some great info to get you going. If it’s still not clear please reach out and I’ll do my best to help you!
- Sew a 1/4″ seam. – all seams should be sewn at a 1/4″ unless otherwise indicated.
- A tool that will help you sew 1/4″ seam – Perfect Piecing Seam Guide by Perkins Dry Goods
- Set Your Seams – I did a tutorial about this a few years back. Not everyone is on board with seam setting but I was taught to do this from day one and it’s worked for me ever since.
- Press don’t Iron your Seams
- Nest your Seams – some like to press all their seams open – that’s personally not my favorite – I’m definitely a quilter that nests my seams.
- Right/Wrong Side of the fabric. Most fabrics have a right and wrong side. The right side is the pretty side of the fabric and the wrong side is the less pretty side of the fabric. Some fabrics like batiks and solids may not have a right or wrong side of the fabric.
Patched Friendship Star Block Tutorial
Click -> Patched Friendship Star Block Tutorial <- for the downloadable PDF. It will be free until February 11th and then their will be a small fee associated with it.
One of the earliest things I learned in my quilting carrier was a really cool way to make a four patch block. Now – you could just cut out all the squares and sew them together to make a four patch or you could use the following method.
Cutting Instructions
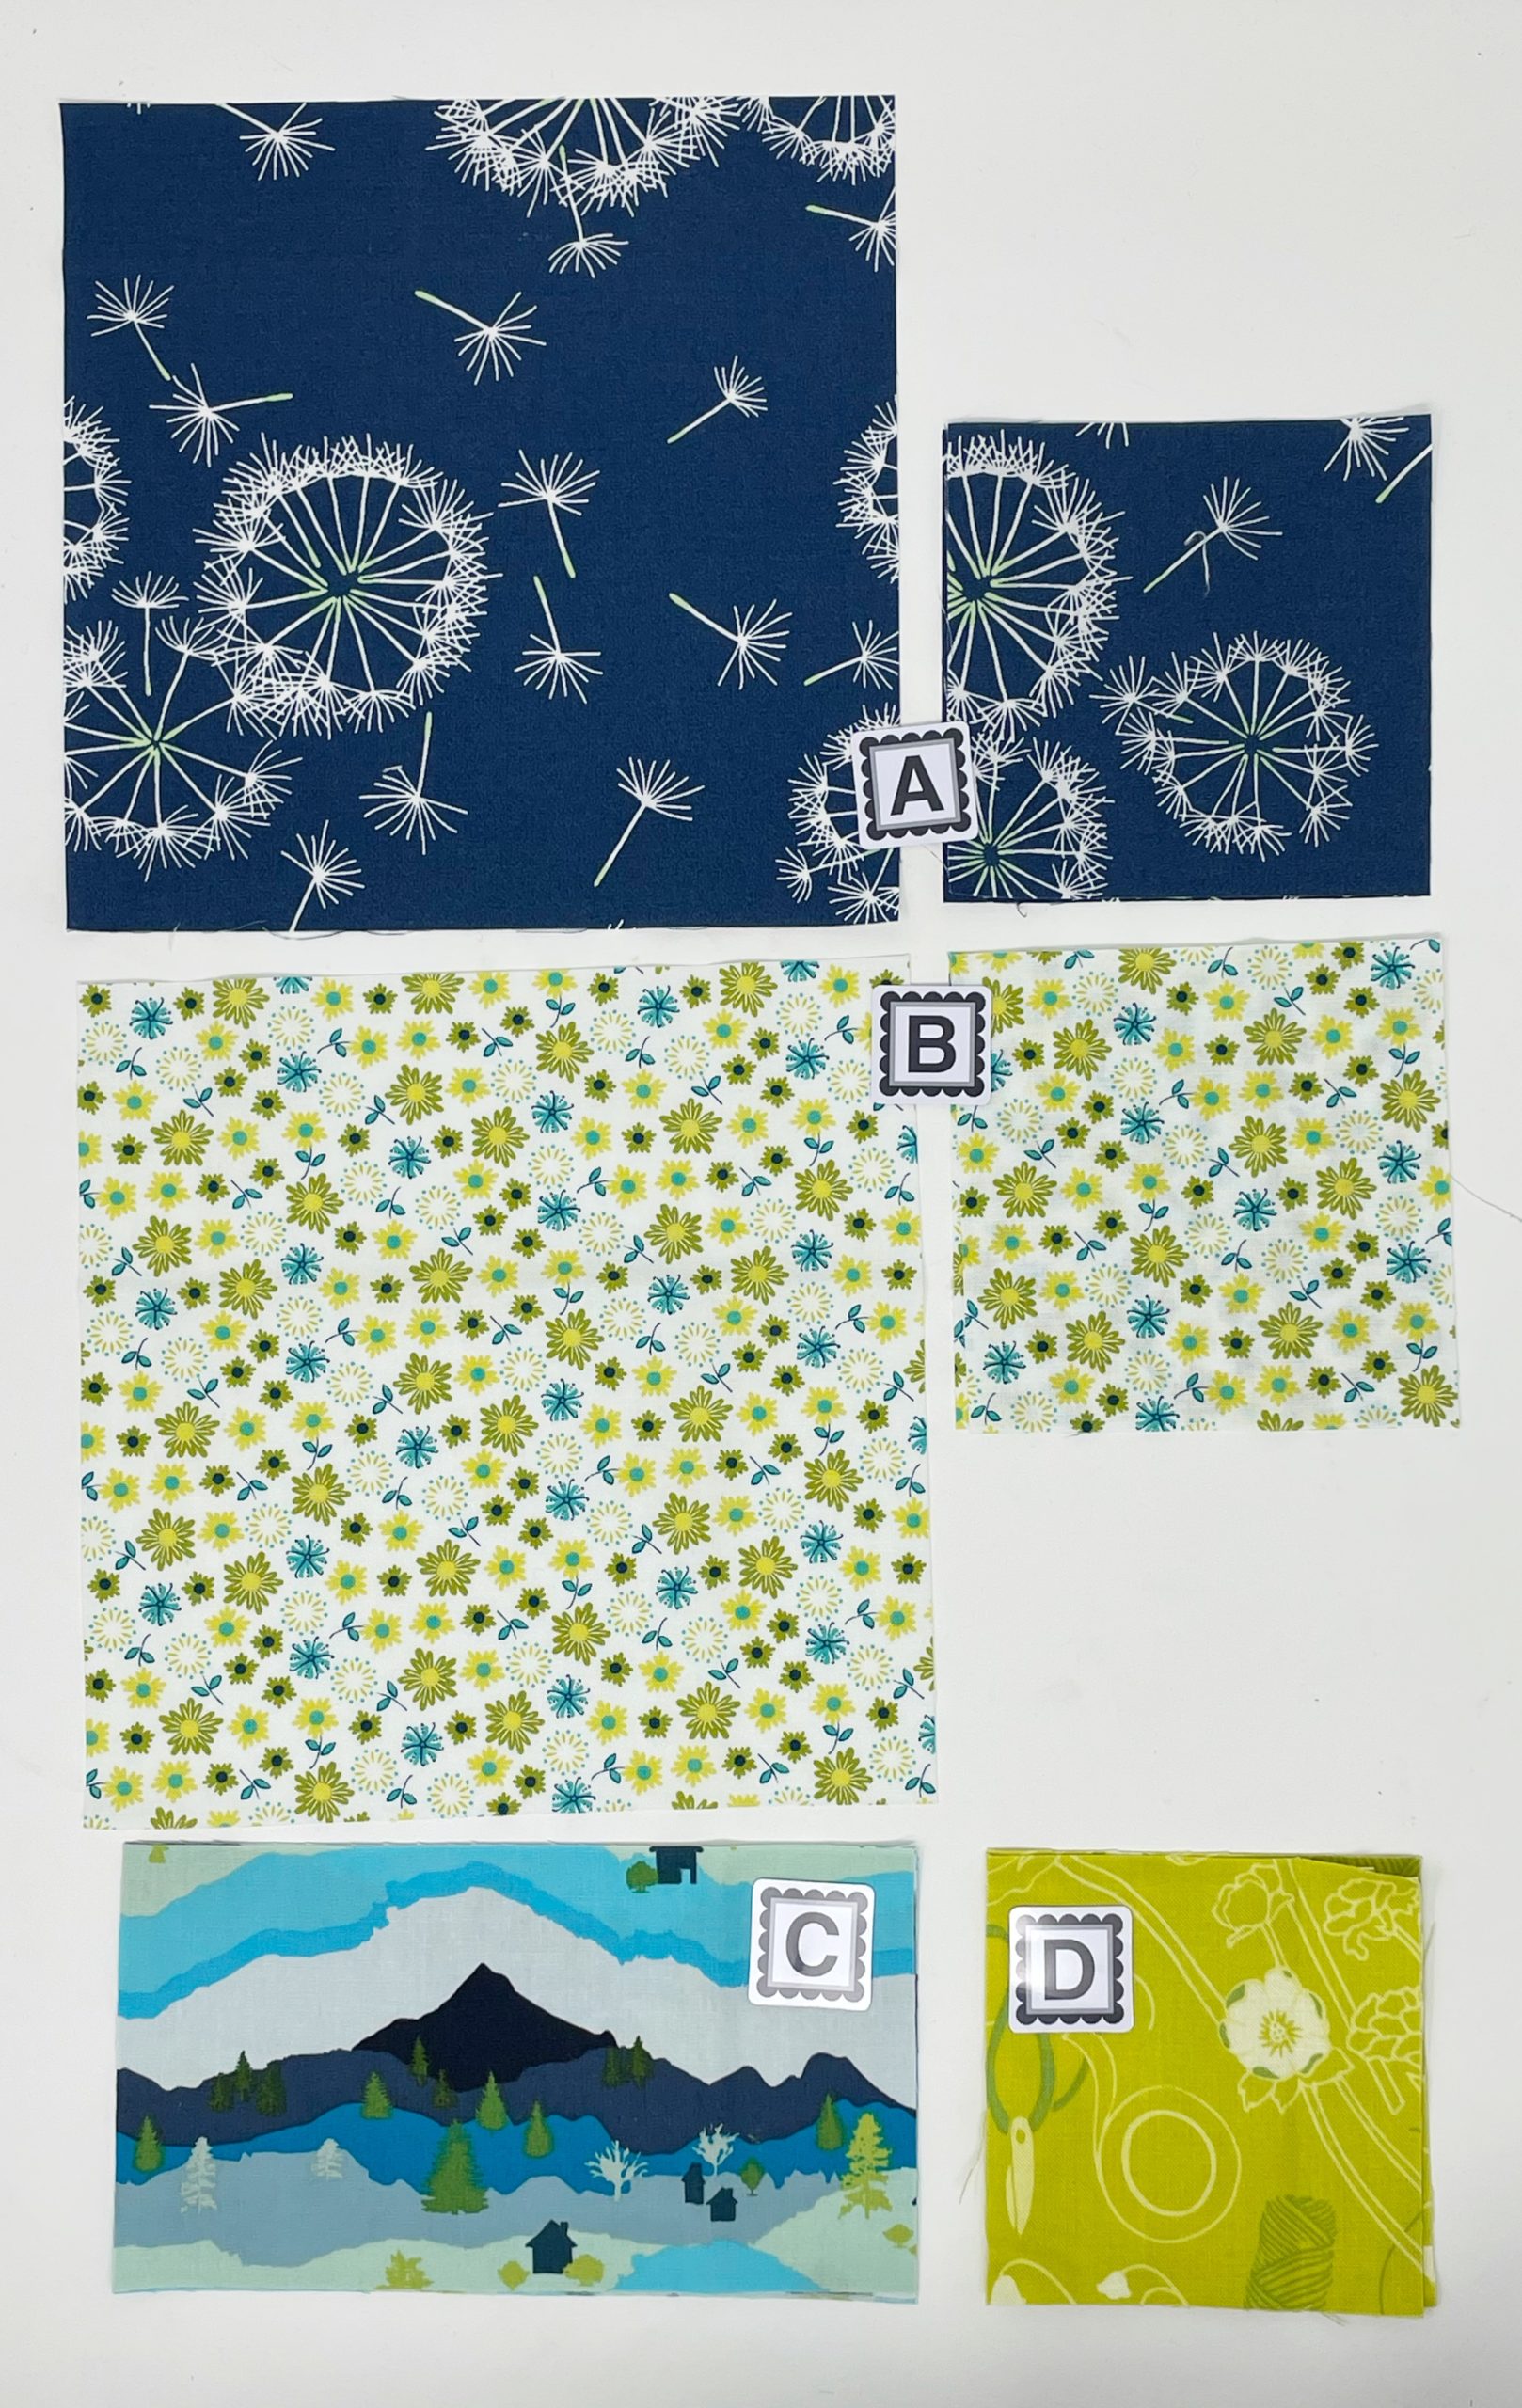
I used Alphabitties from the Fat Quarter Shop to help me with this tutorial.
Fabric A (I used a navy blue dandelion print)
(1) 7.0″ square
(2) 4.0″ squares
Fabric B (a white floral print)
(1) 7.0″ square
(2) 4.0″ squares
Fabric C (landscape print)
(4) 3.5″ x 6.5″ rectangles
Fabric D (lime green print)
(4) 3.5″ squares
Directions
Construct a Four Patch Unit
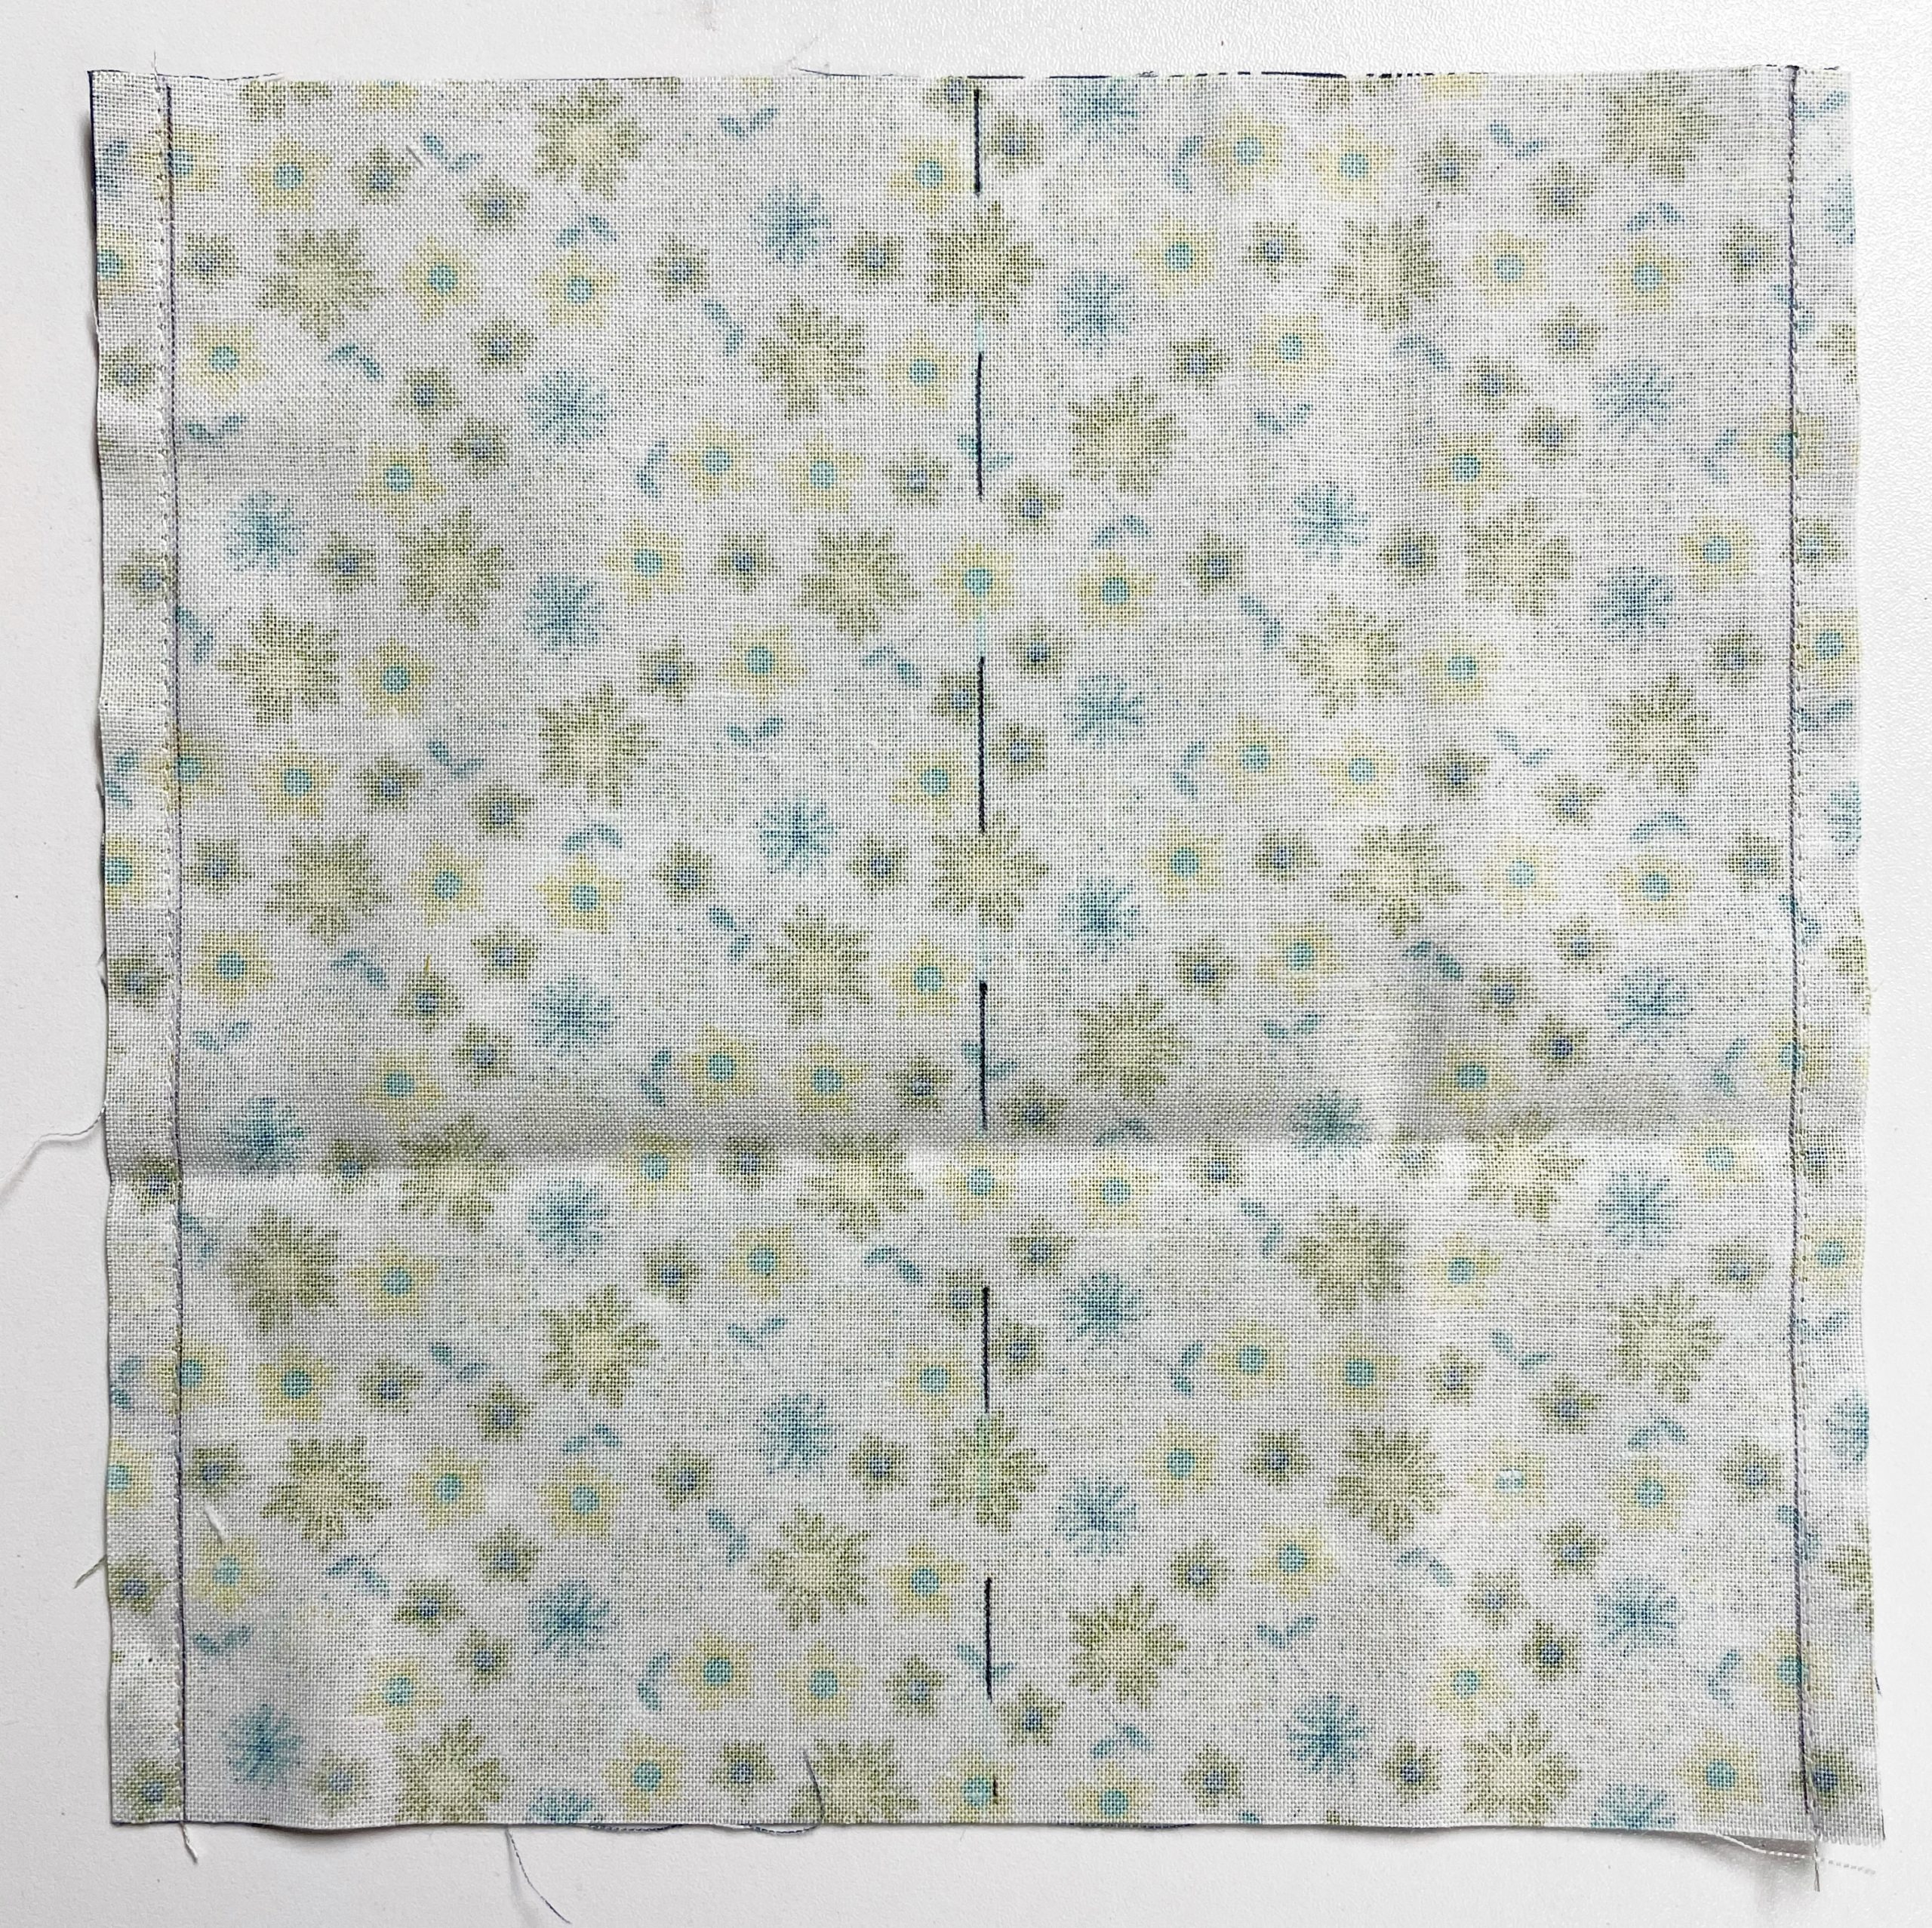
Place a 7.0″ square of Fabric A and a 7.0″ square of Fabric B right sides together. On both edges of the blocks sew a 1/4-inch seam as indicated by the solid line drawn.
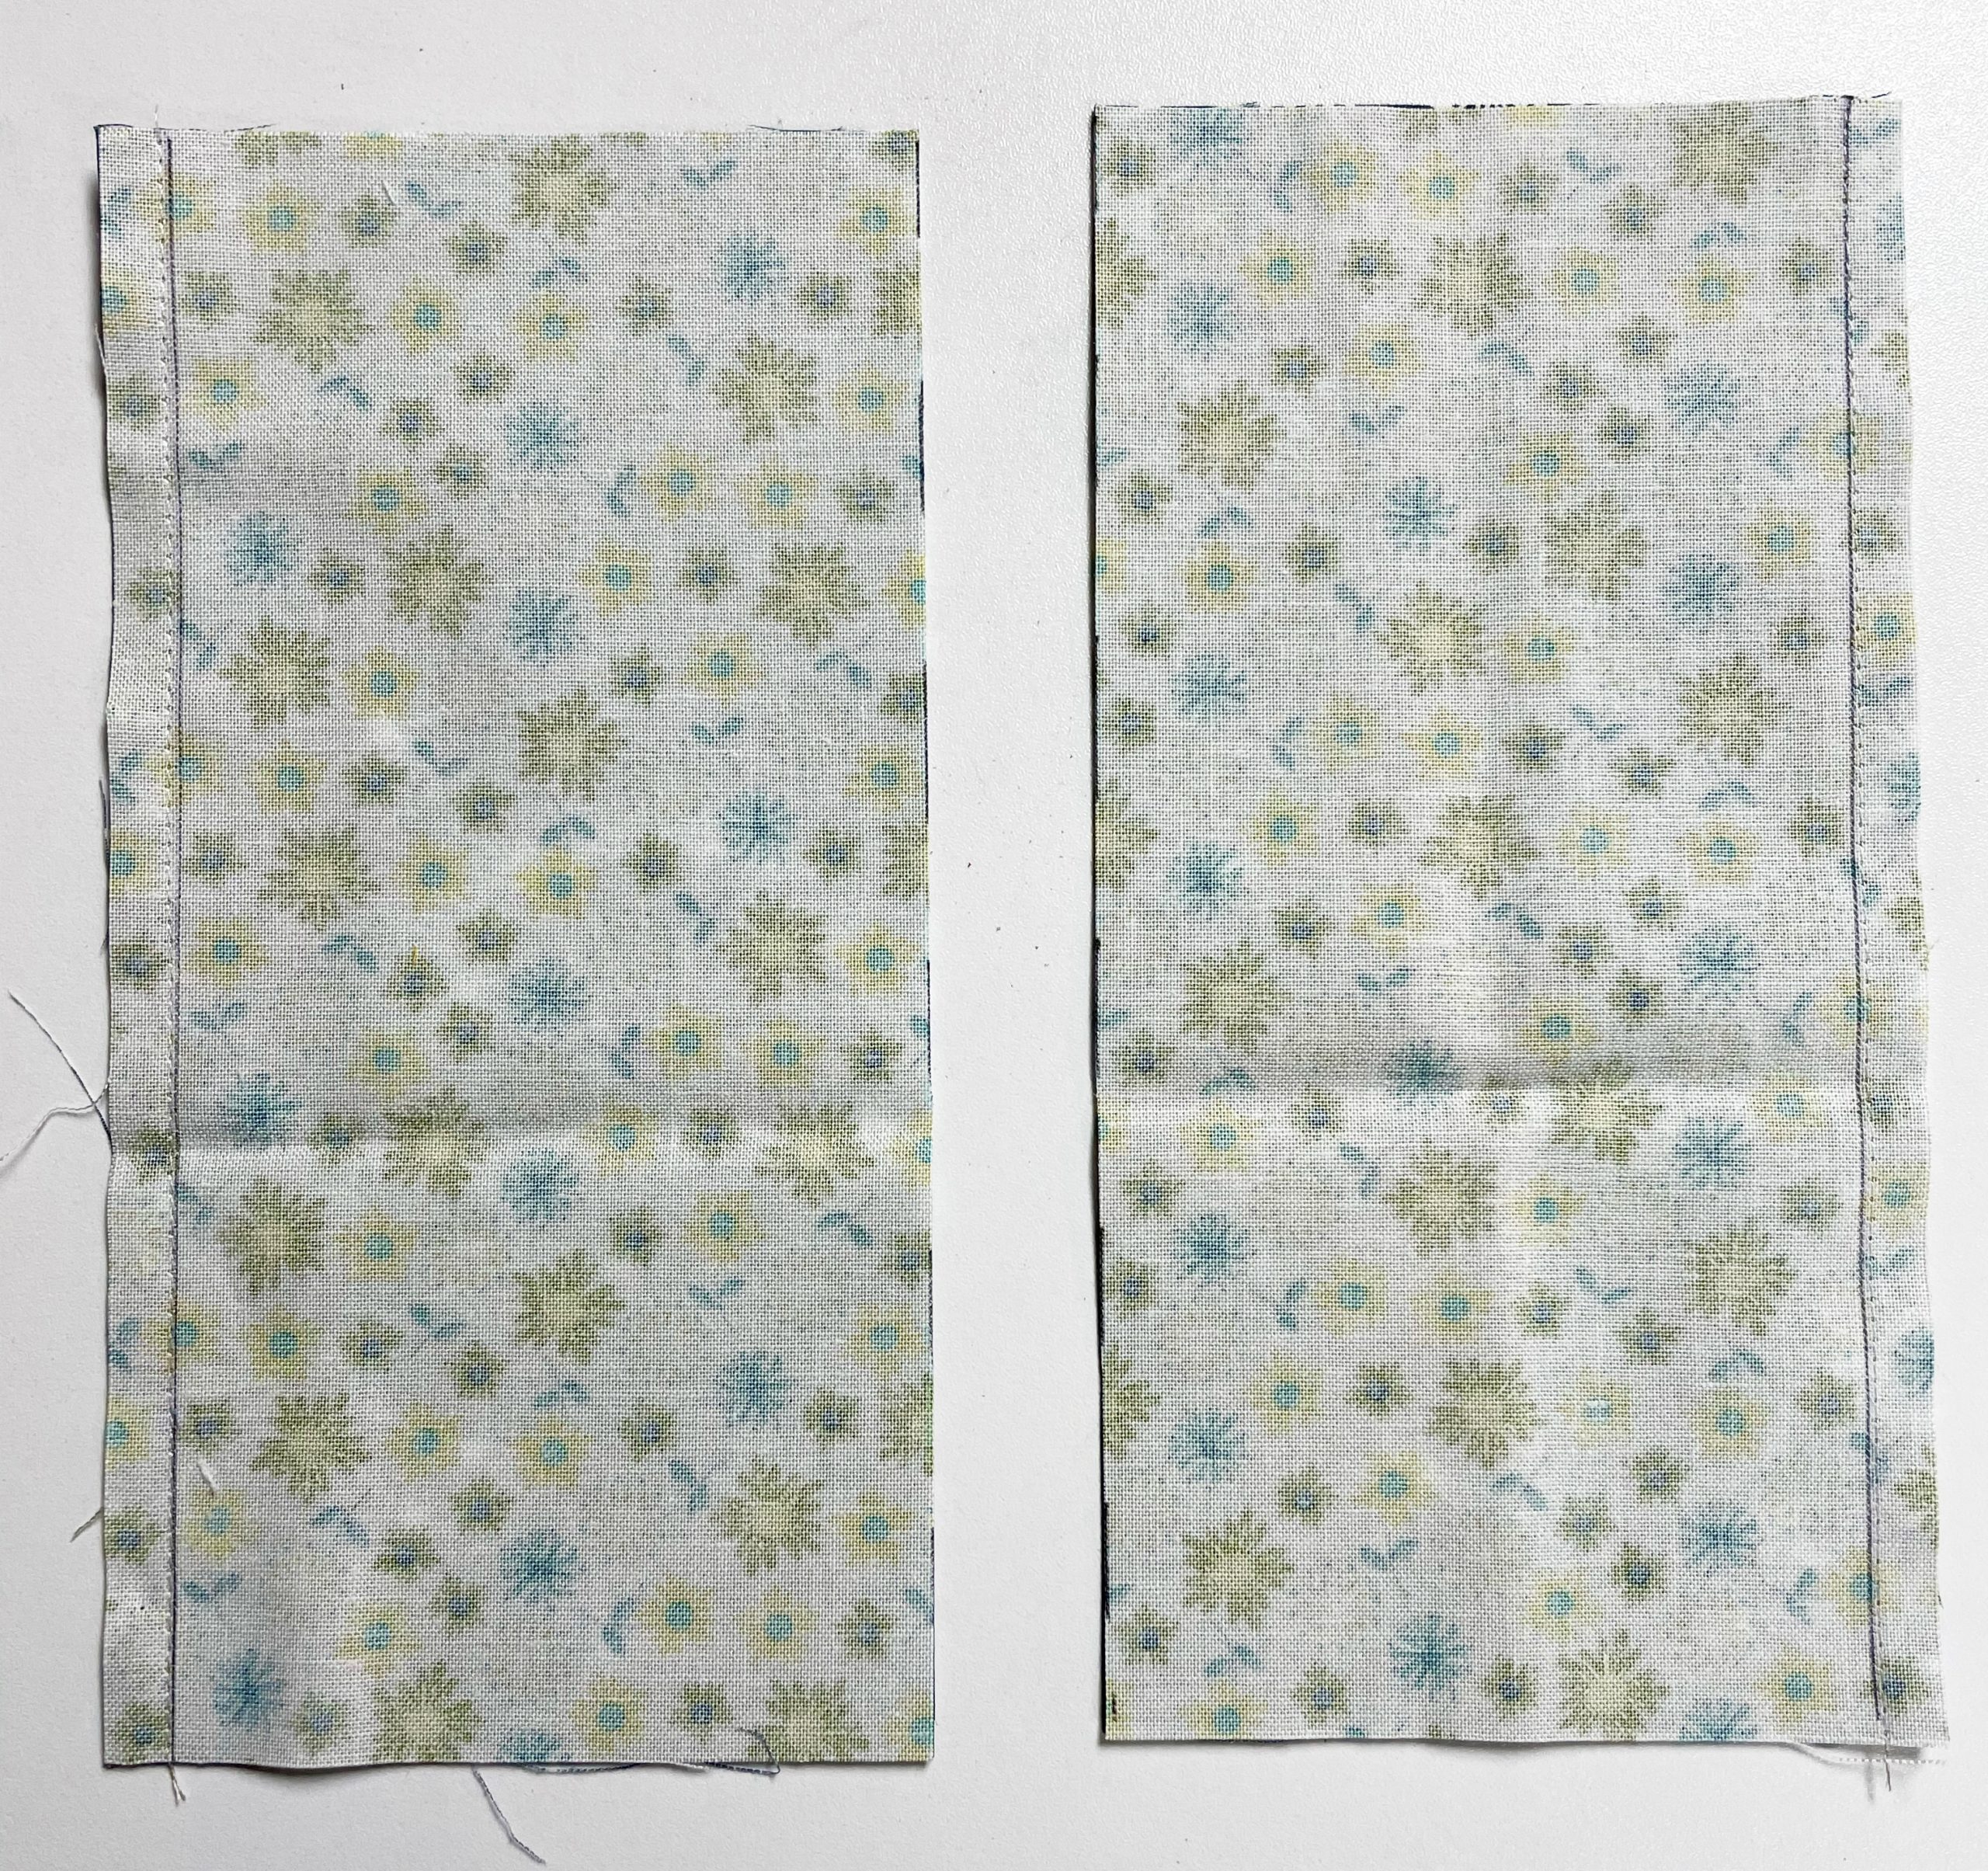
Cut the 7.0″ square in half parallel to the sewn seams – you will be left with two 3.5″ x 7.0″ rectangles.
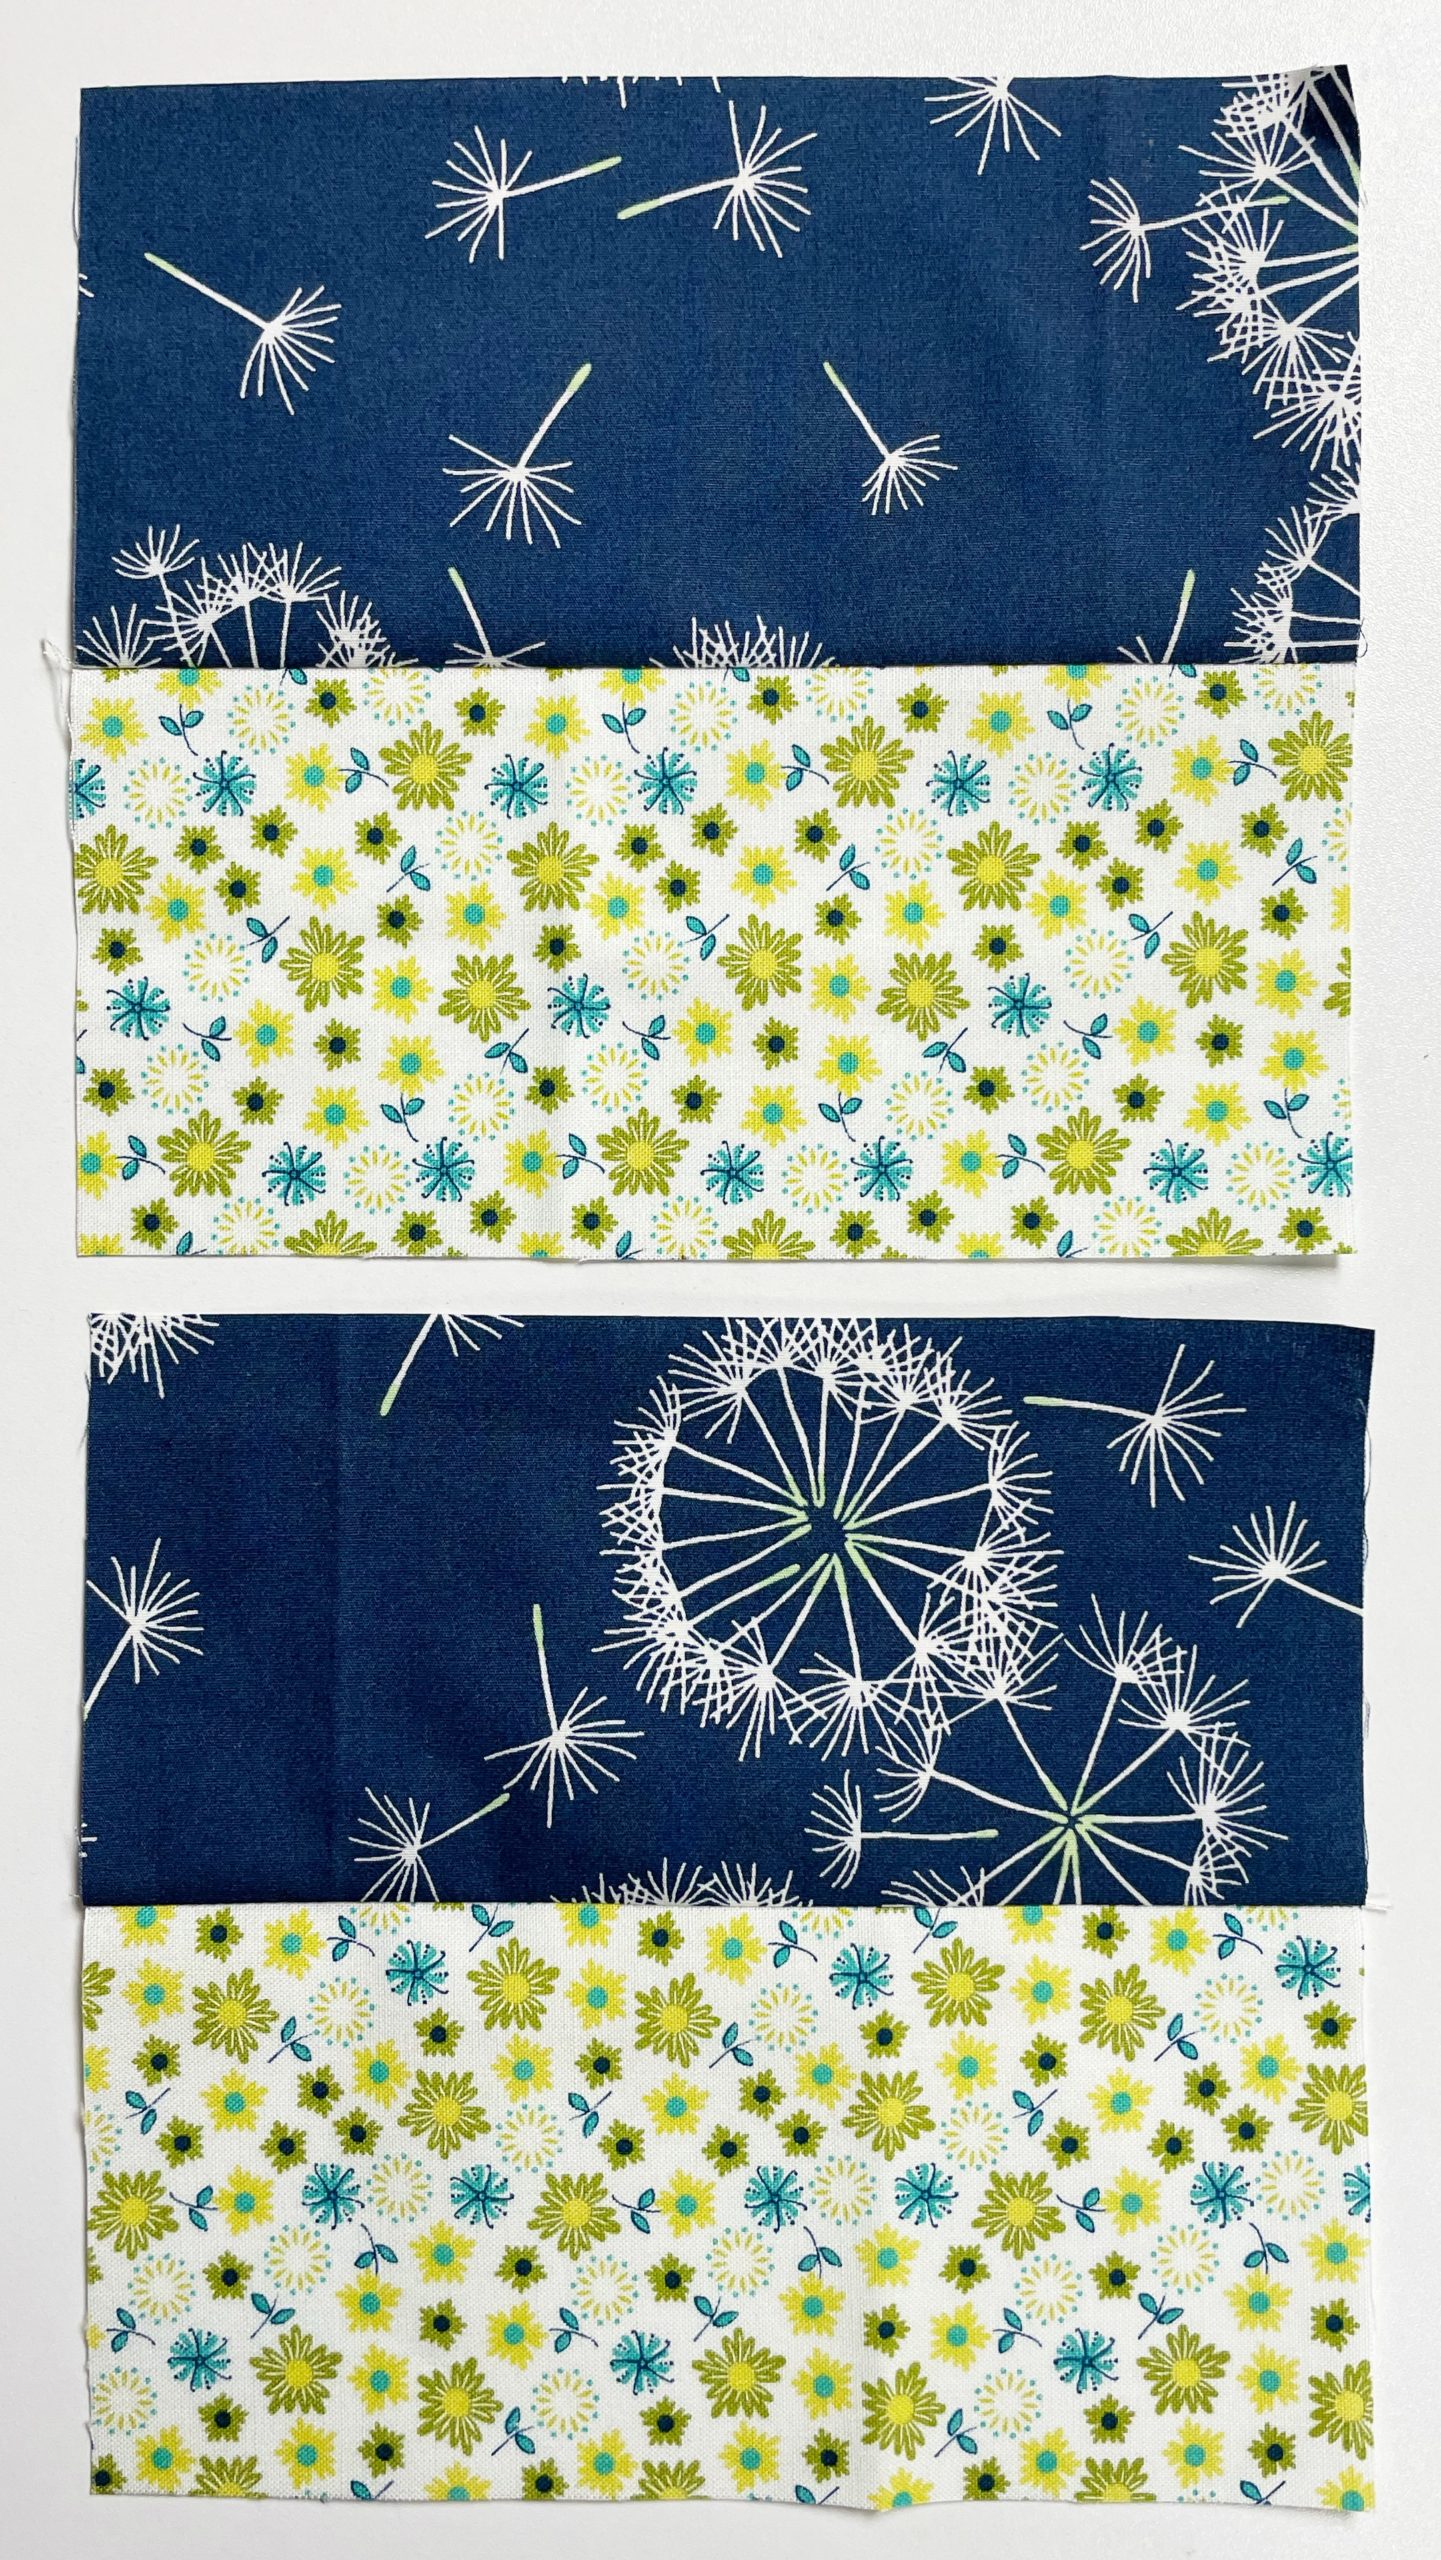
Set your seams and then press towards the darker fabric.
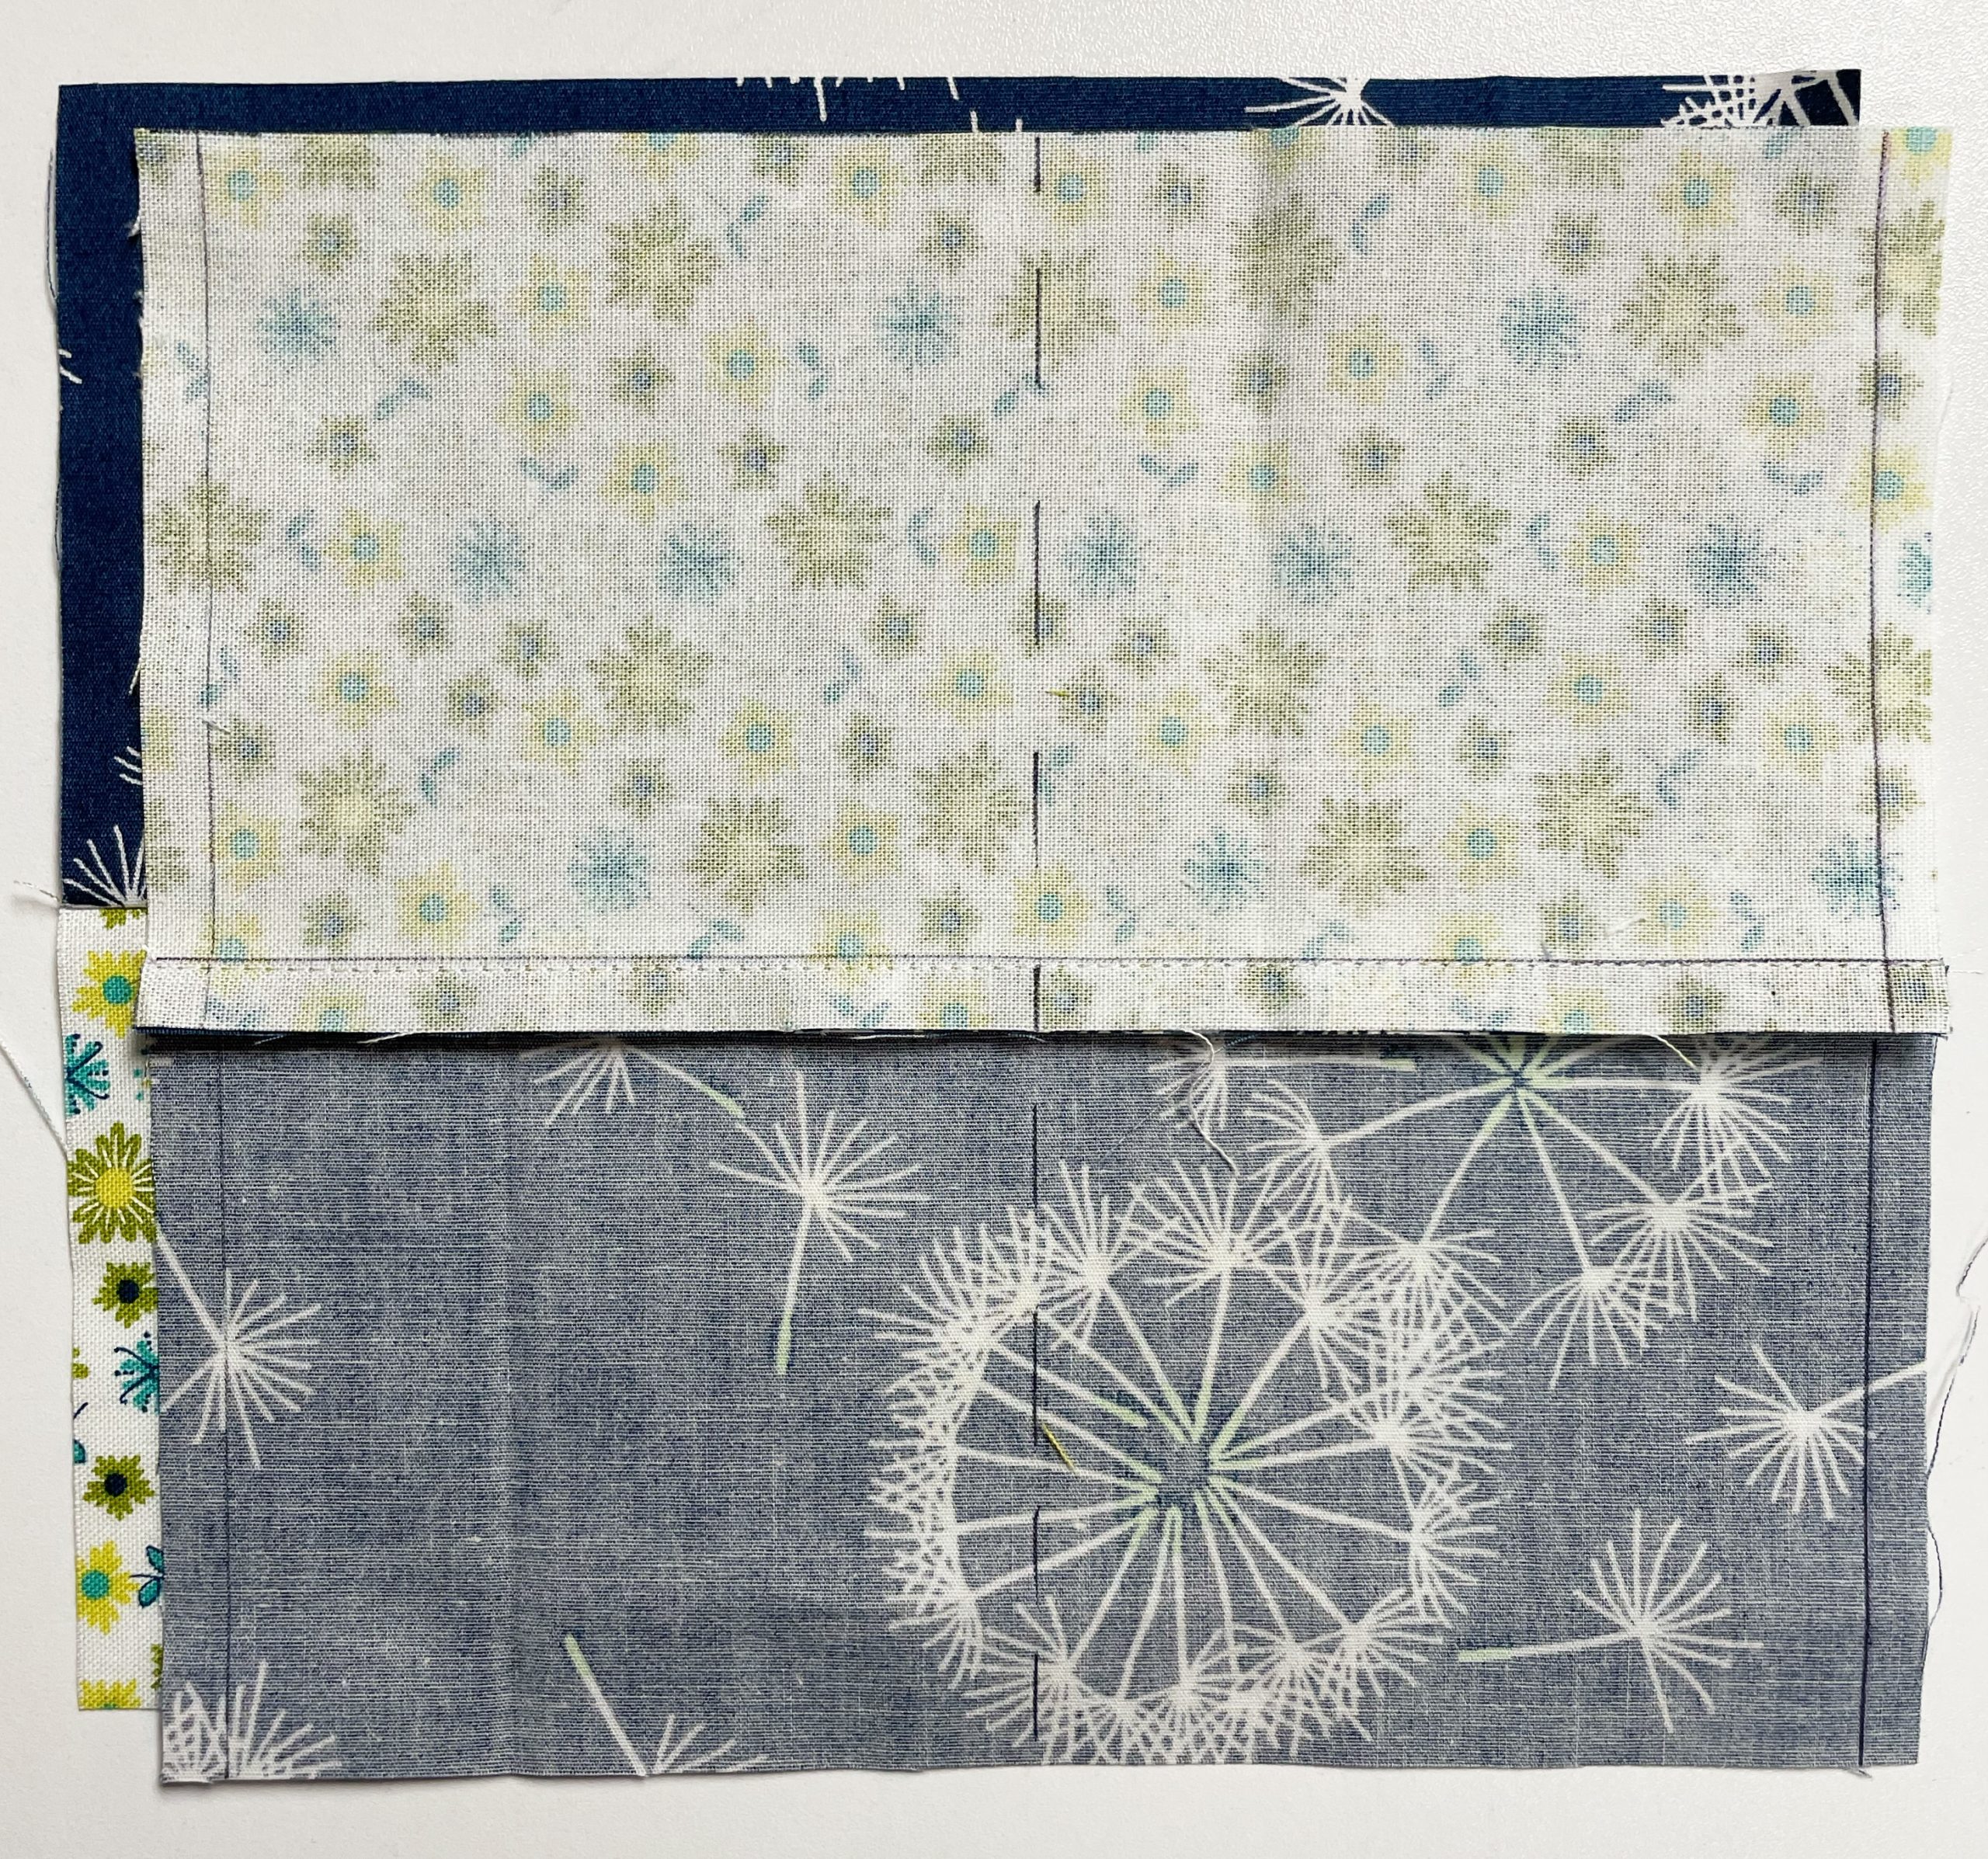
Place your squares right sides together so Fabric A is against Fabric B. The seams will match in the middle – I just offset the squares so you could see how they should go together.
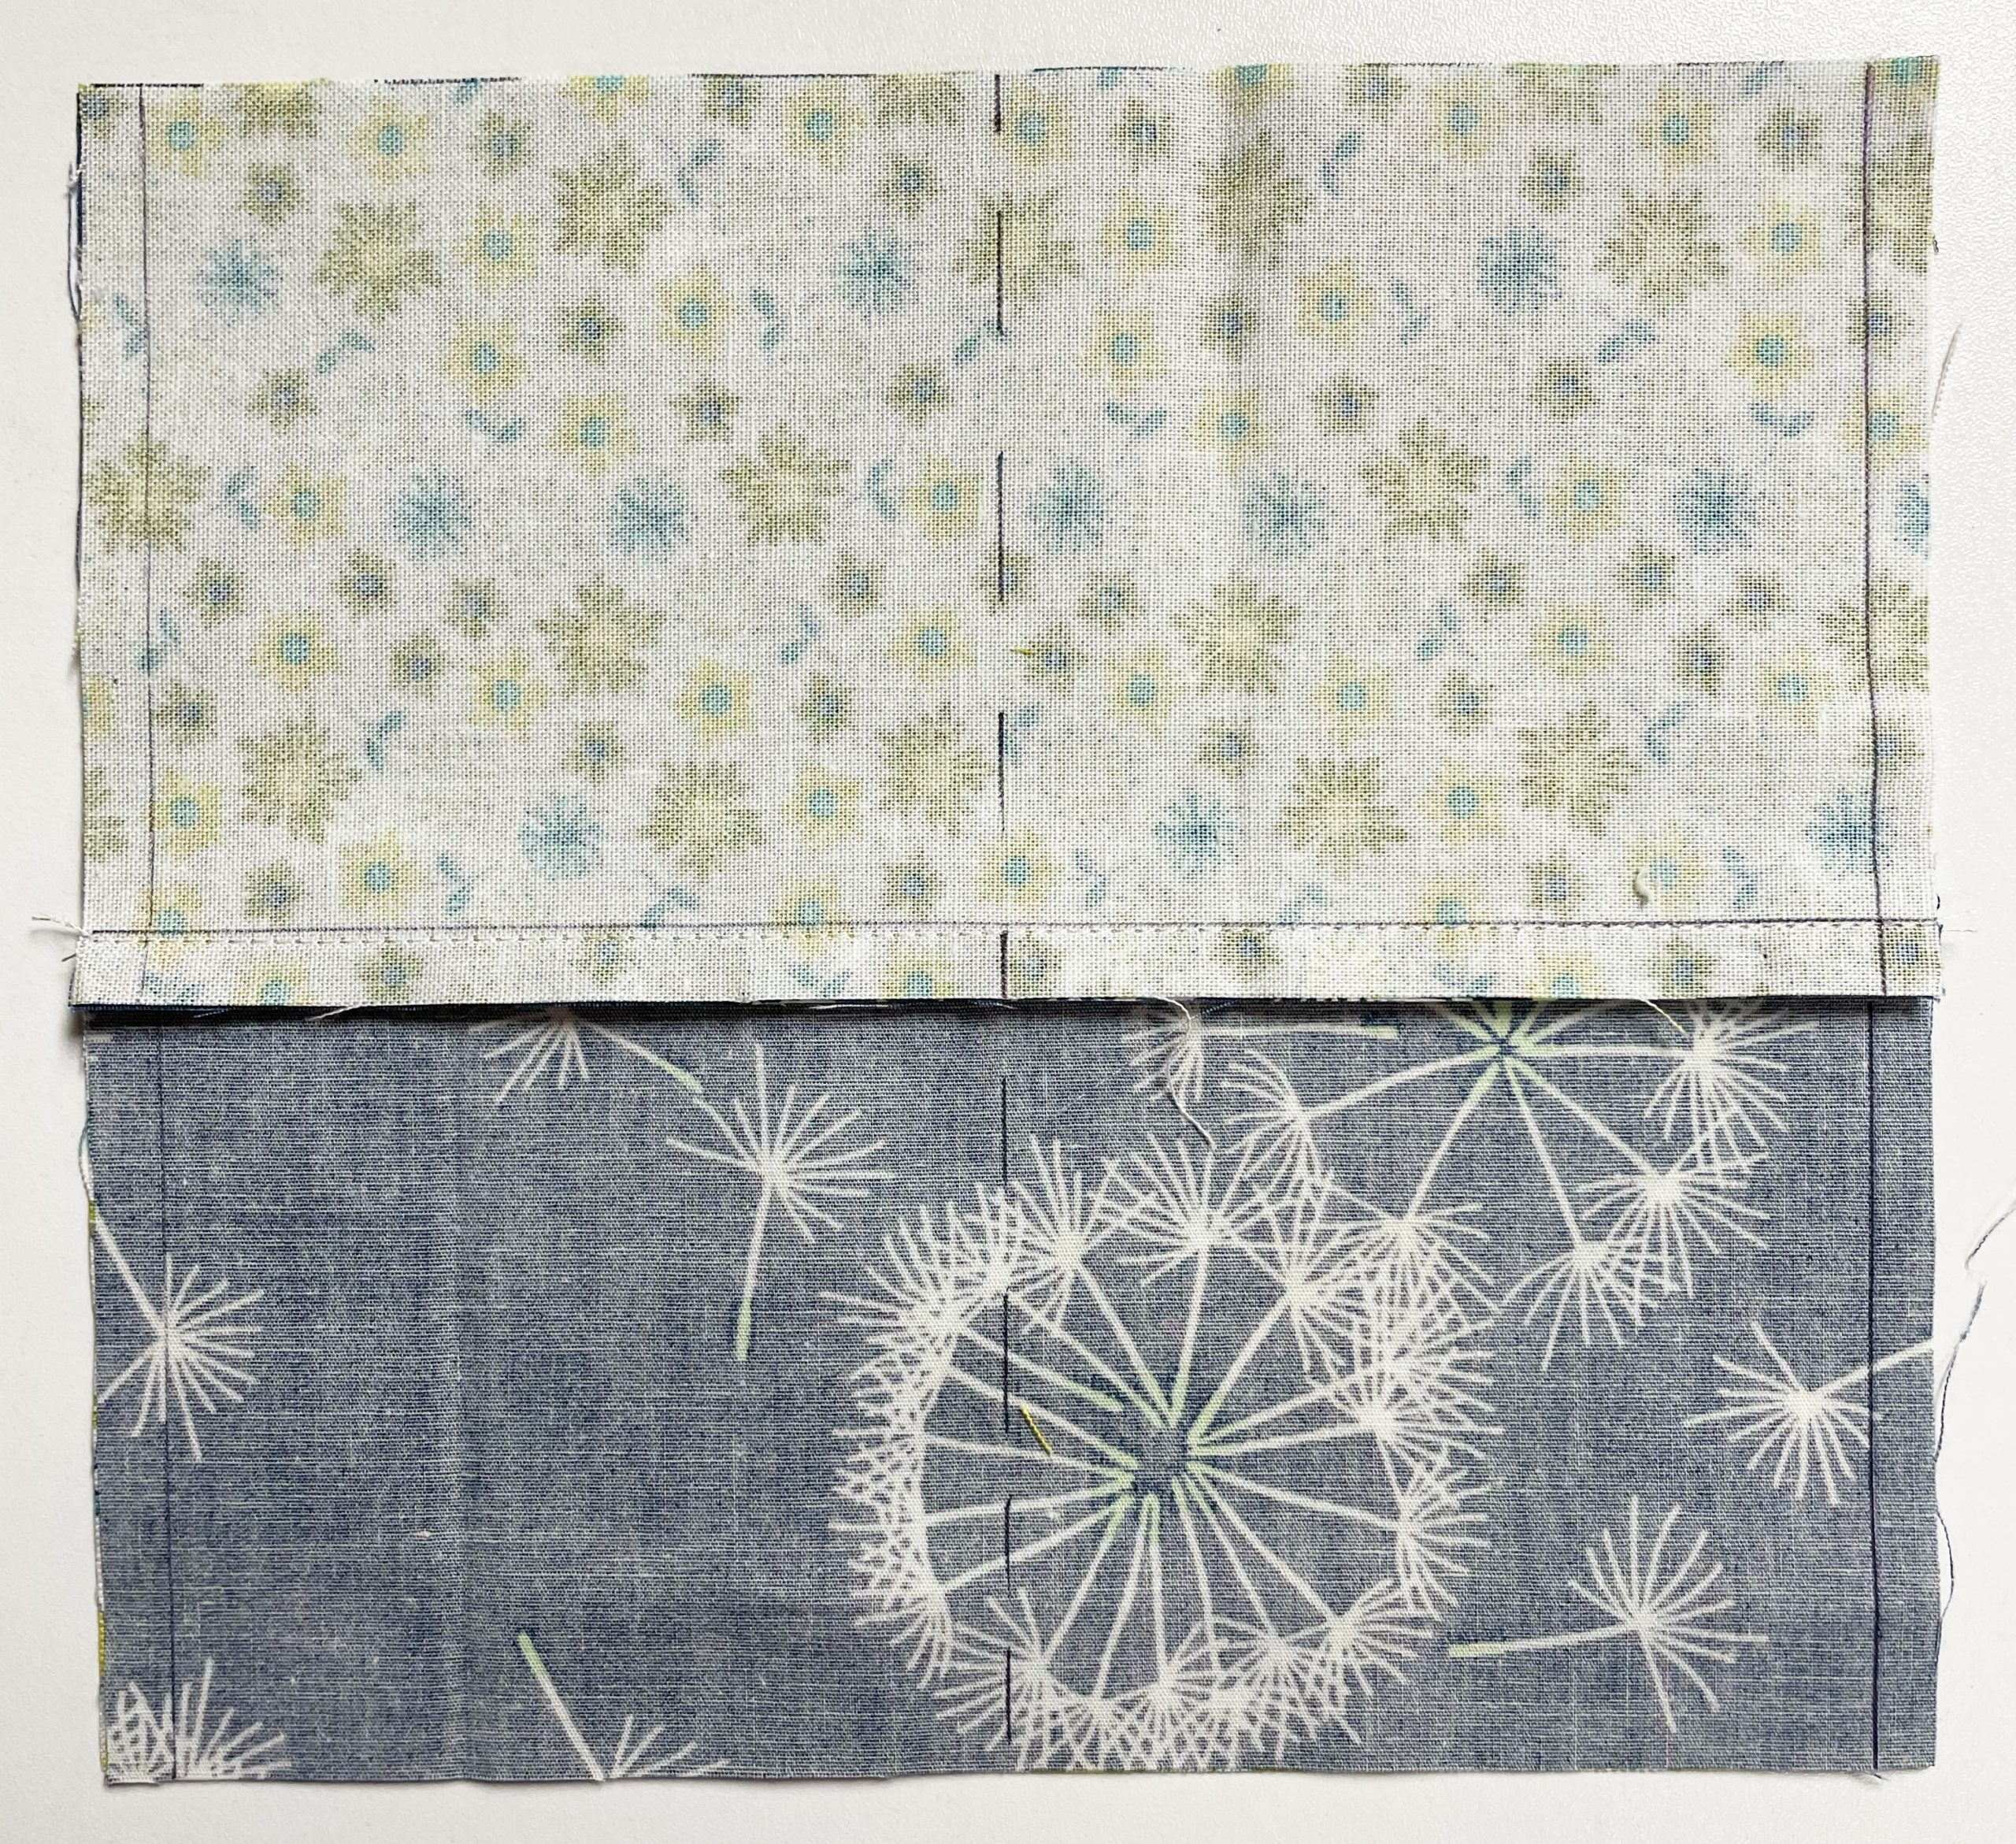
Sew a 1/4″ seam on both sides of the square – perpendicular to the first seam as shown by the solid line.
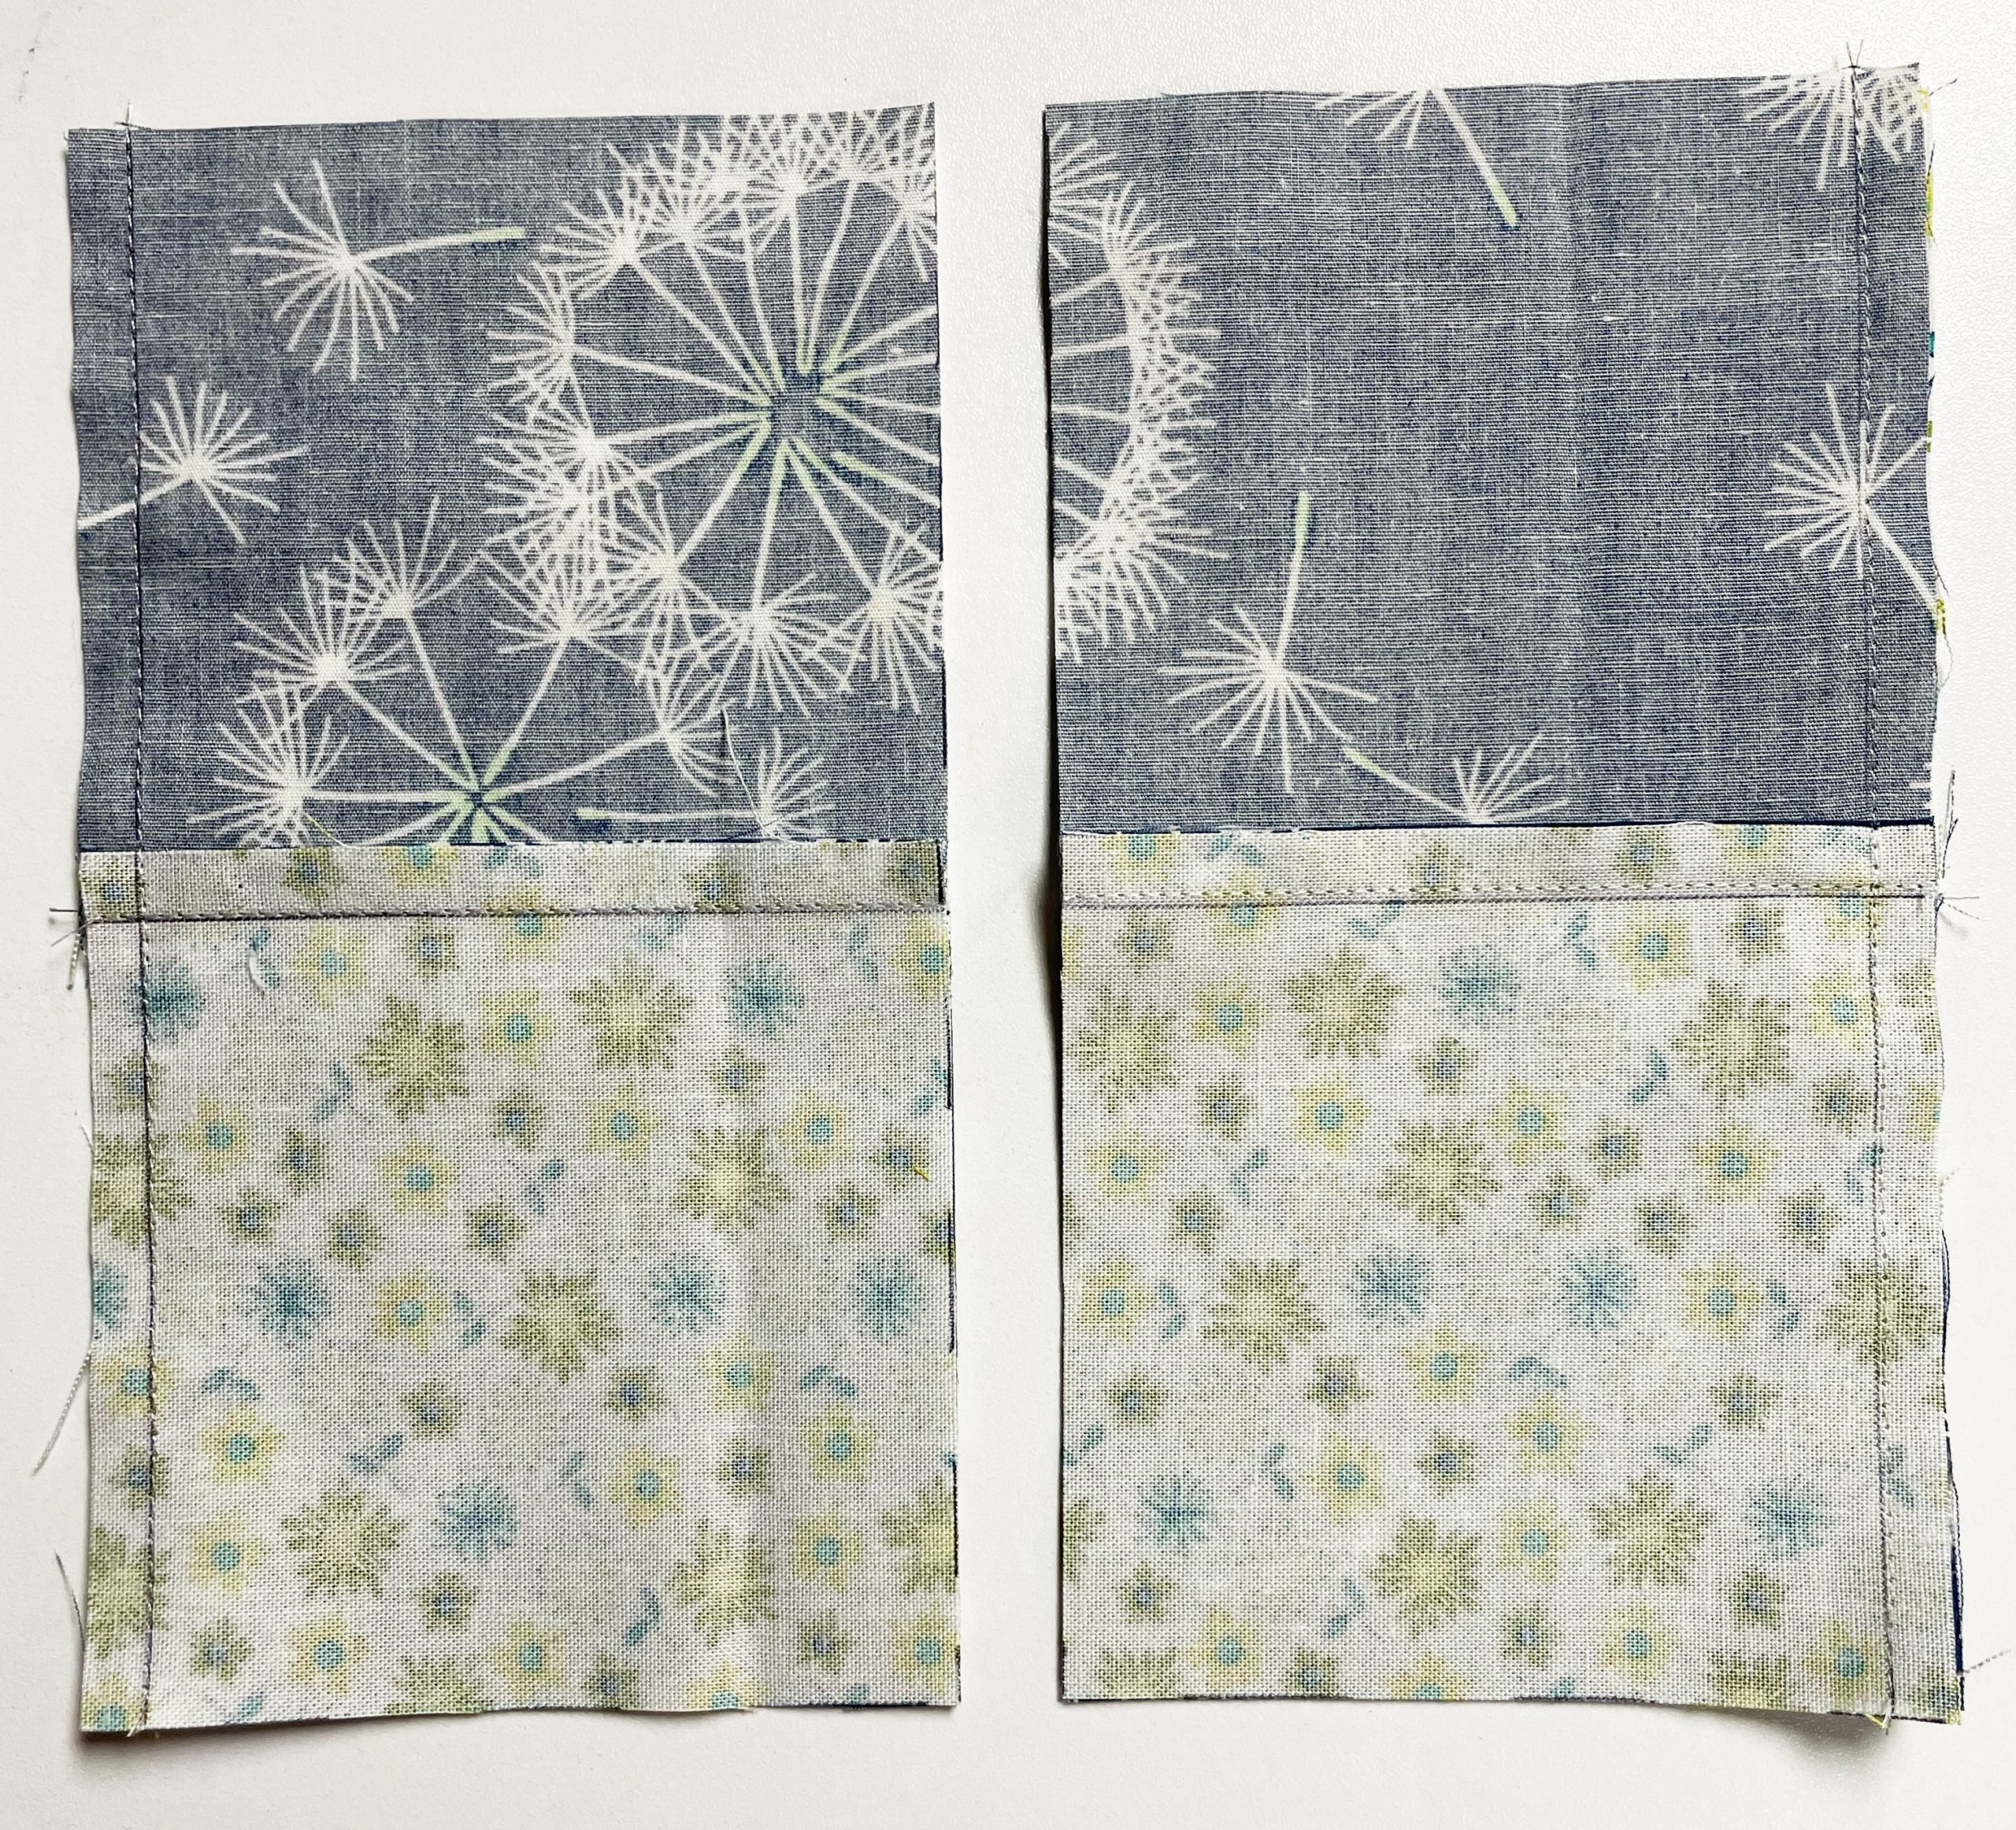
Cut the square in half – you will be left with two 3.5″ x 6.5″ rectangles. Press to one side. (Either side in this case is just fine!)
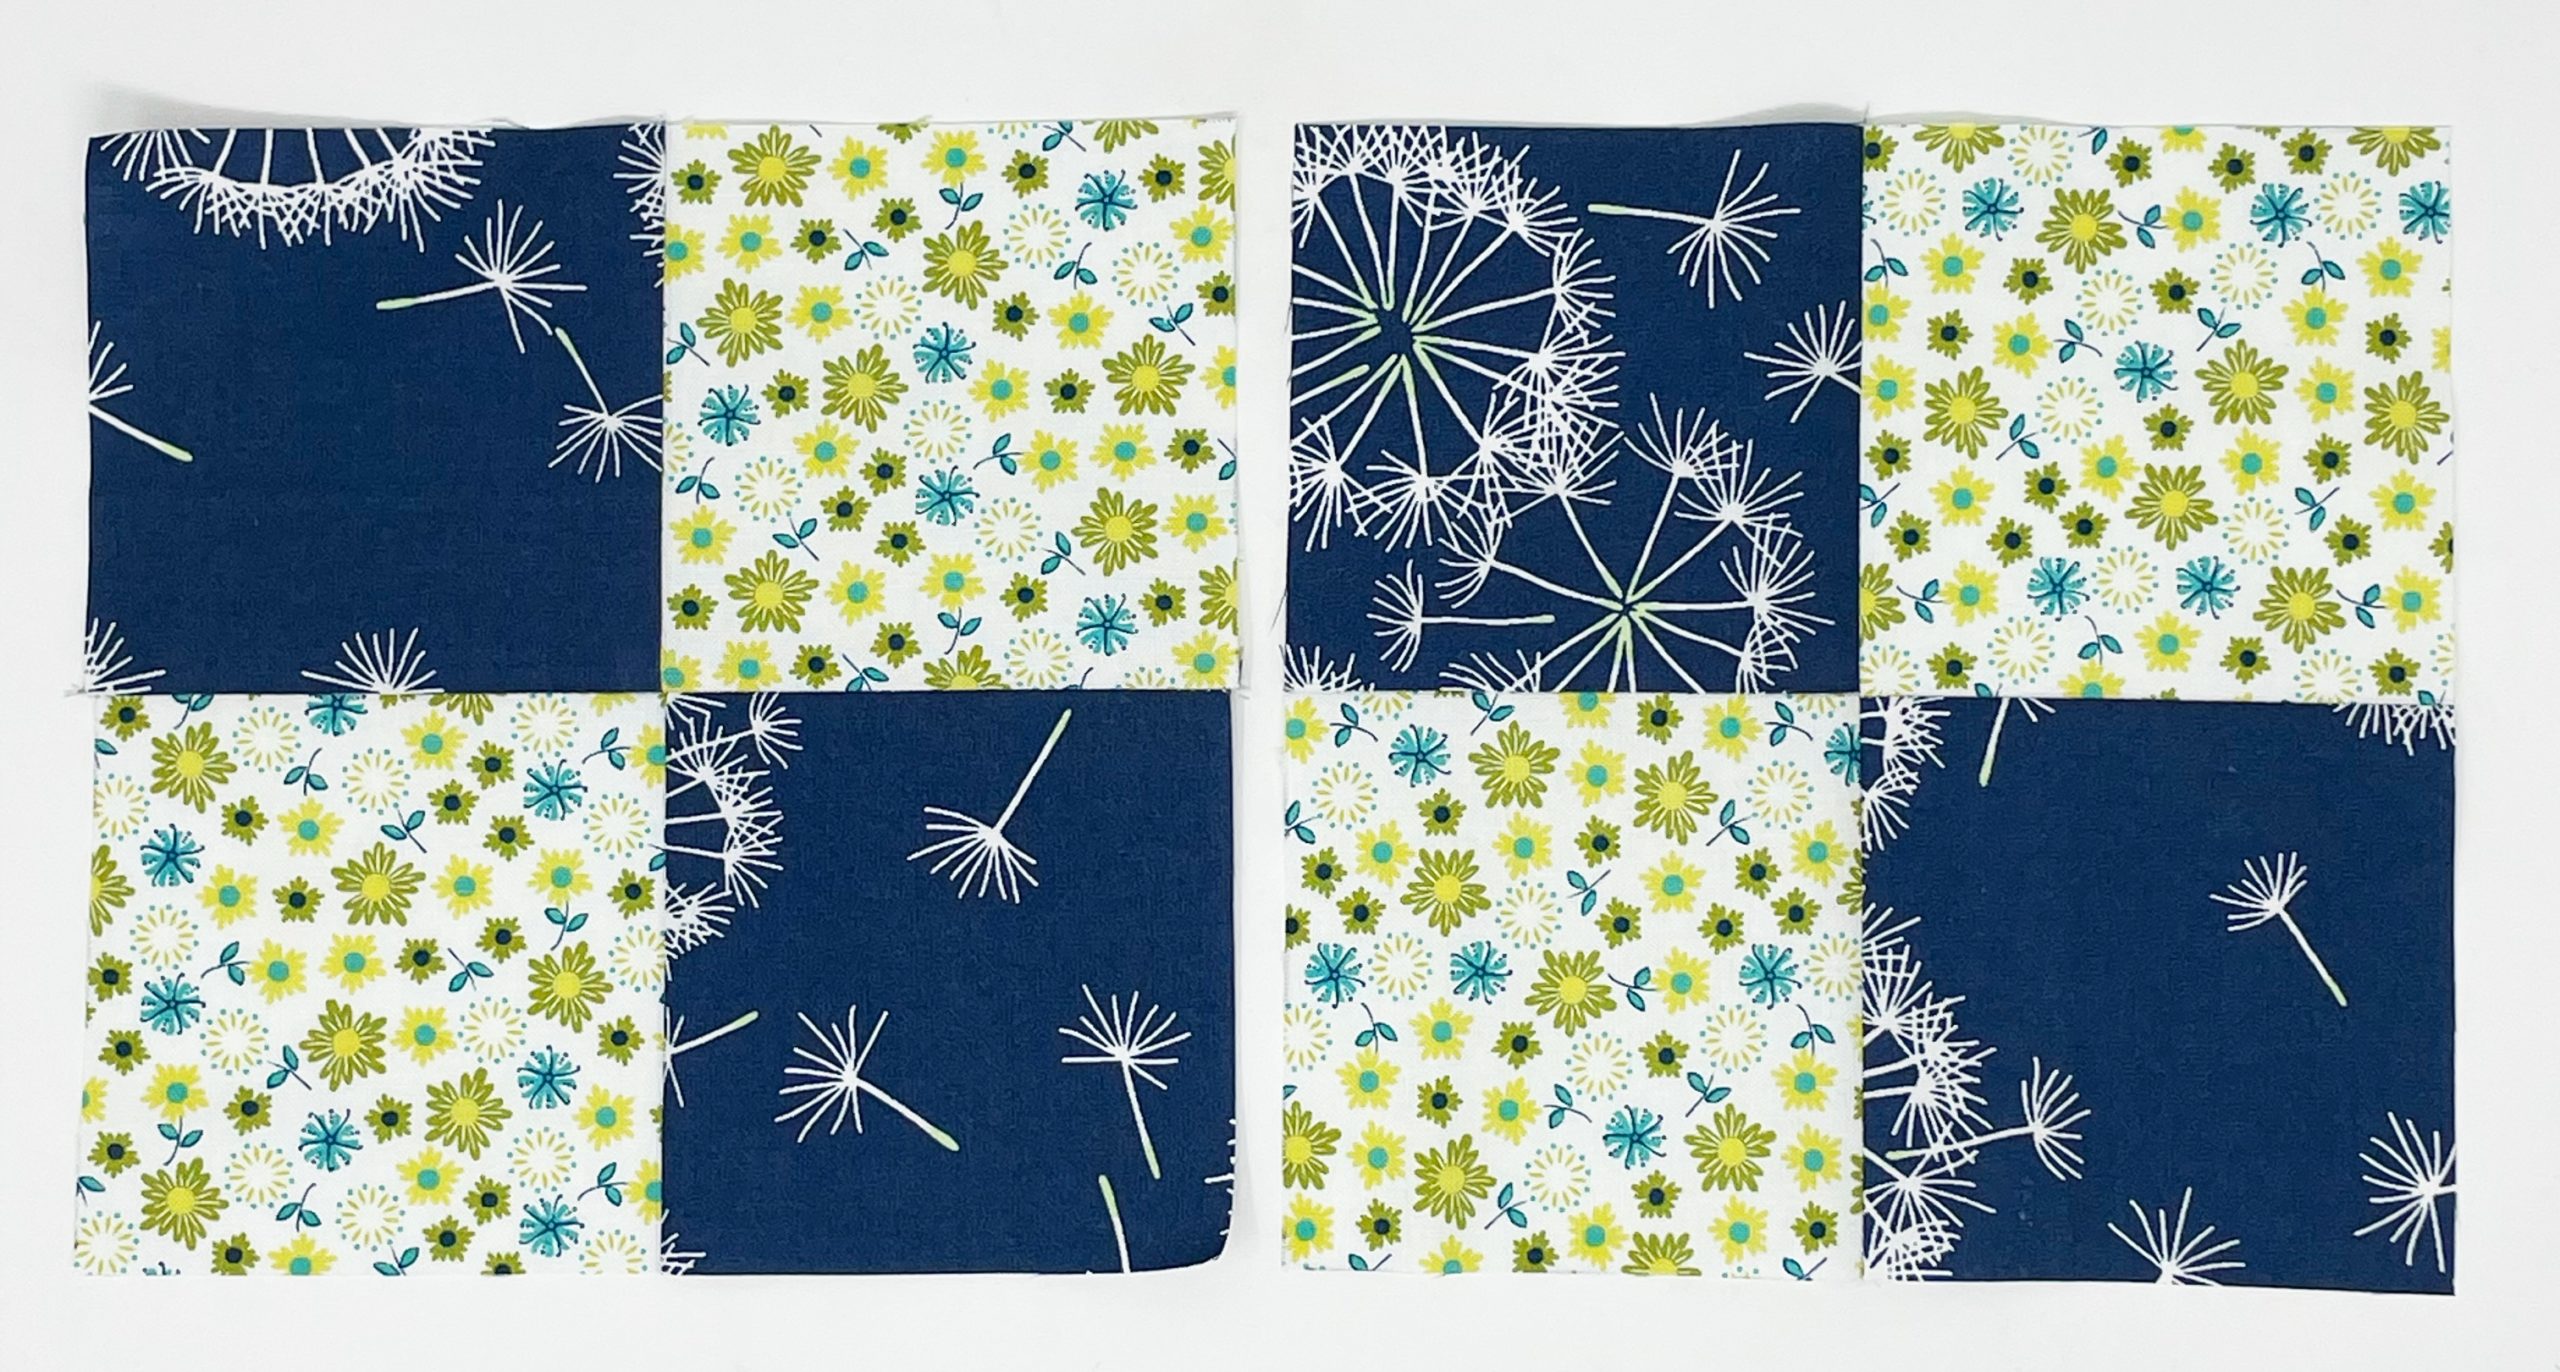
This will give you two 6.5″ four patch squares. BUT you only need one for this block so pick which one prefer to use and put the other one aside for a future project.
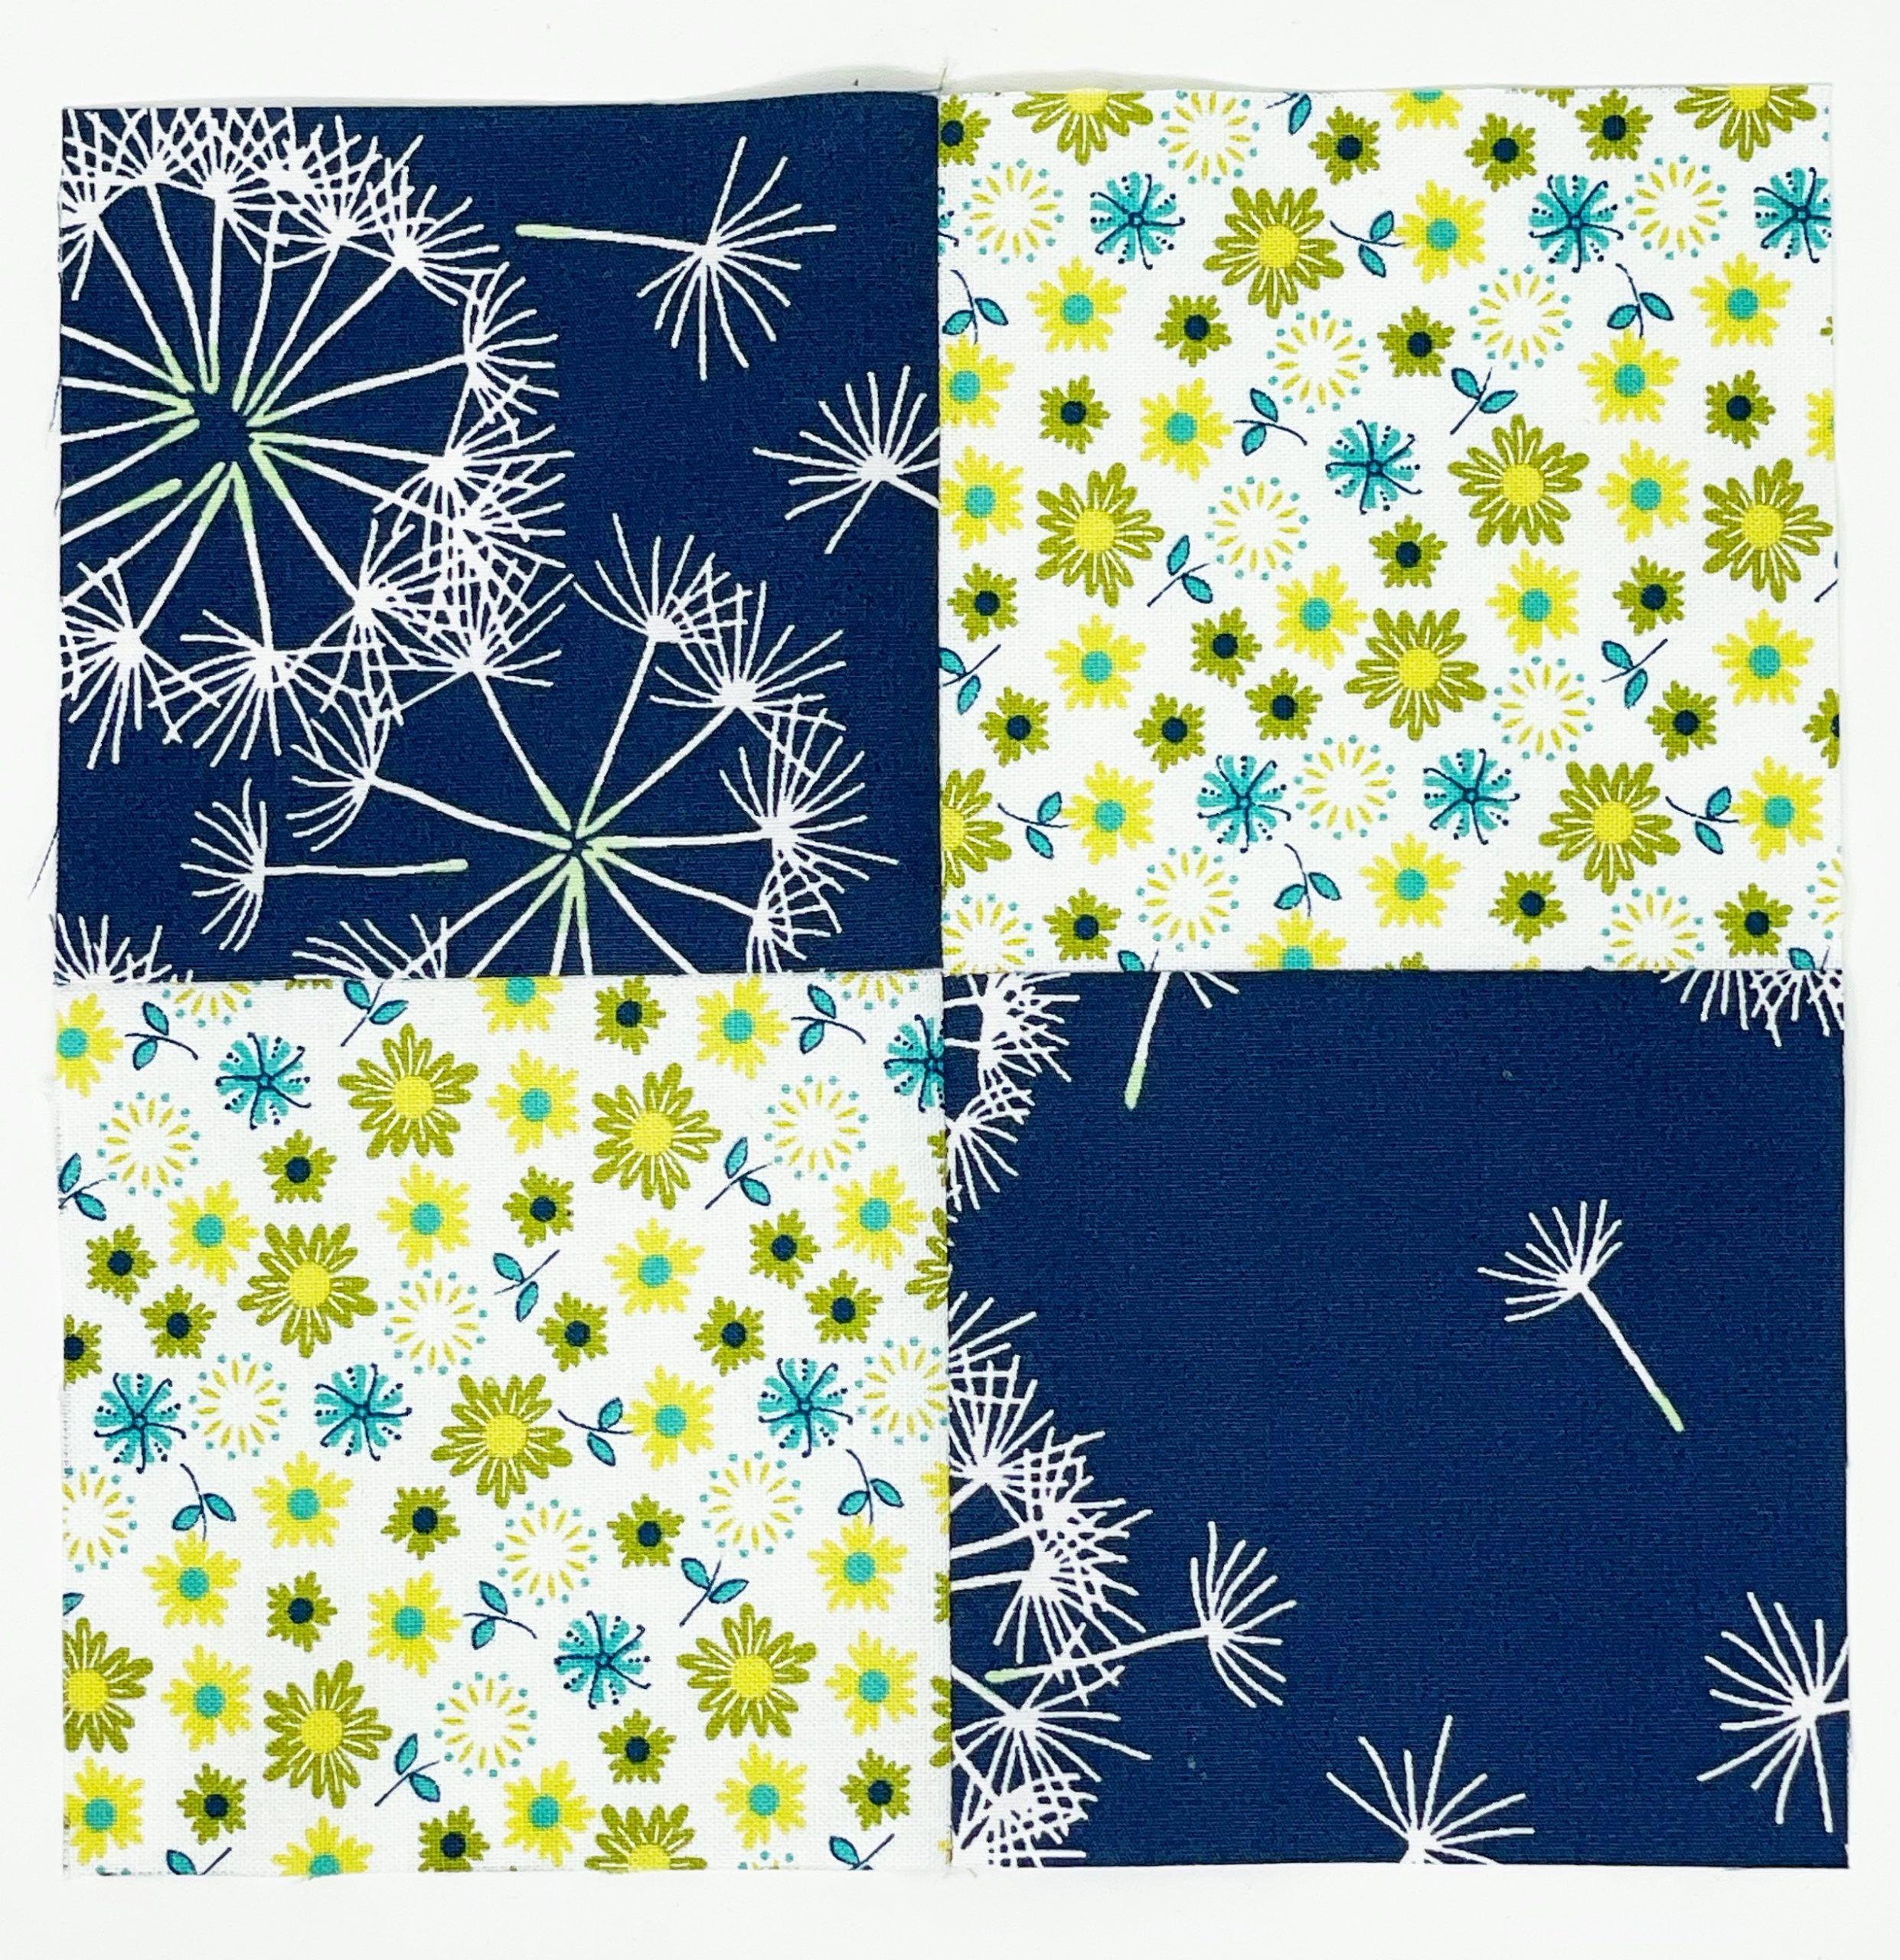
I personally feel like the busier the better for my quilts so I picked the four patch with the most crazy dandelion print.
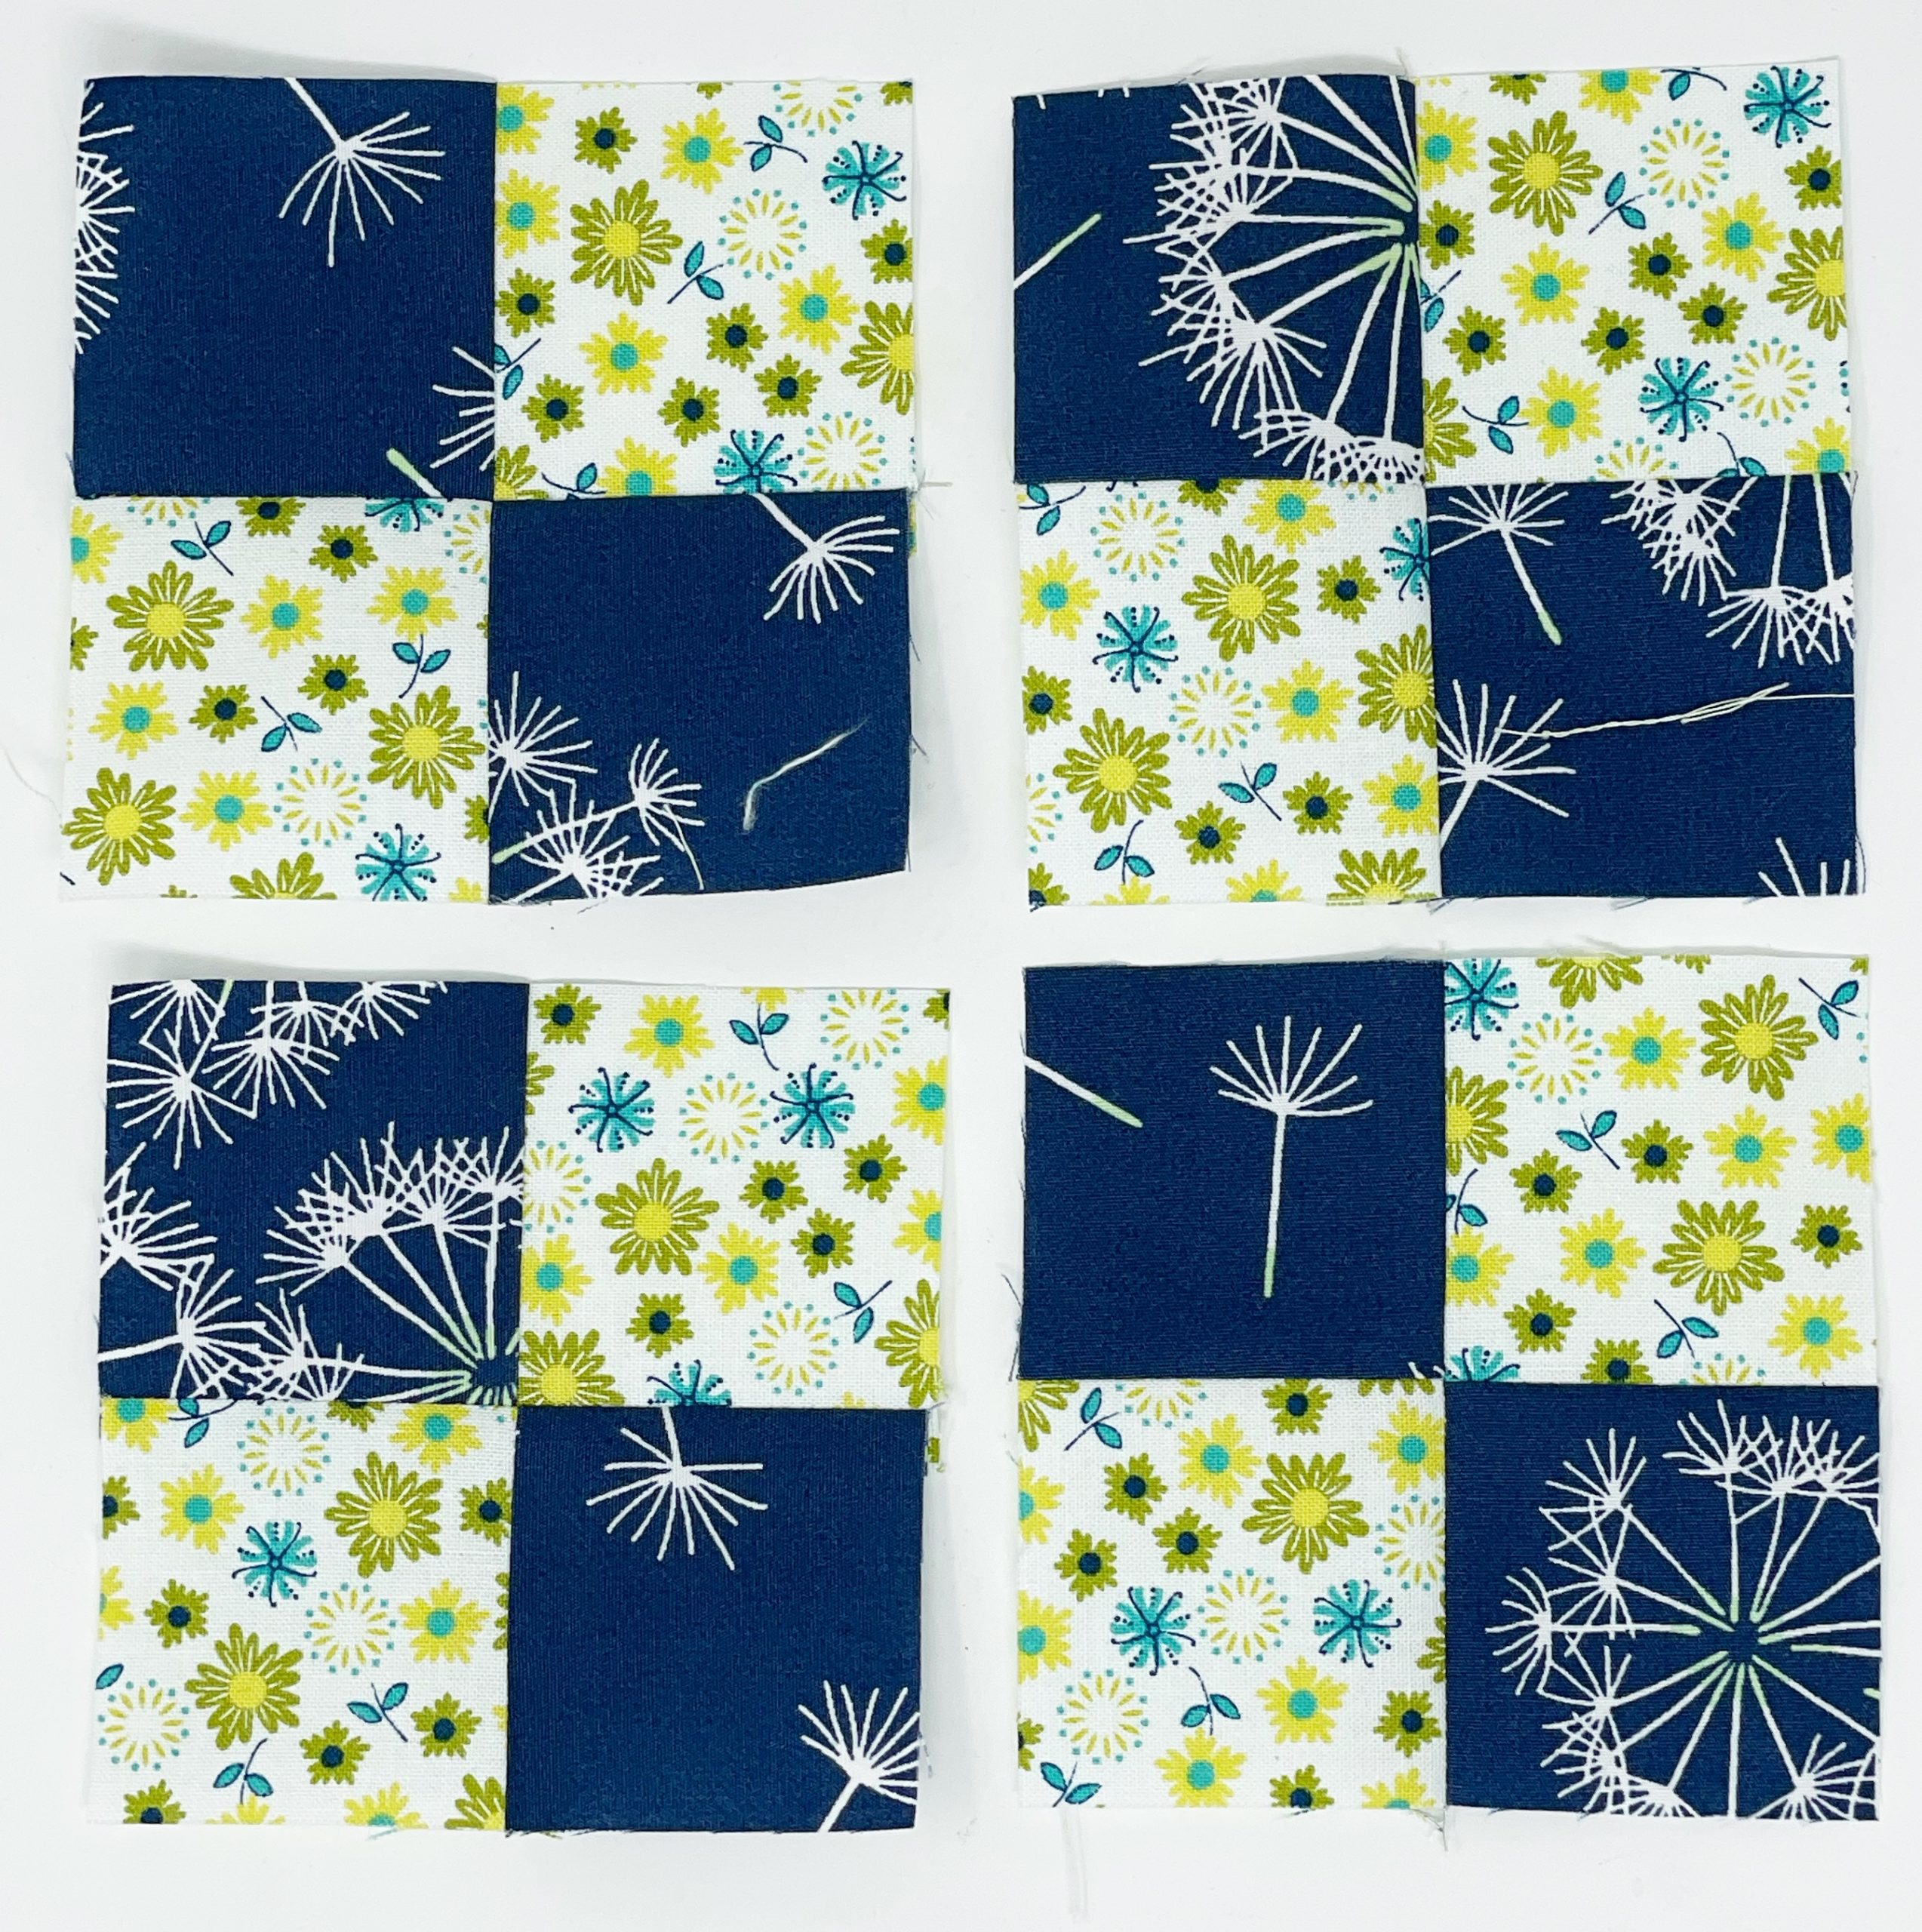
Next – repeat the process for making a four patch with the two 4.0″ fabric A blocks and the two 4.0″ fabric B blocks. This will make the four 3.5″ four patches needed.
Construct a Half Goose Unit
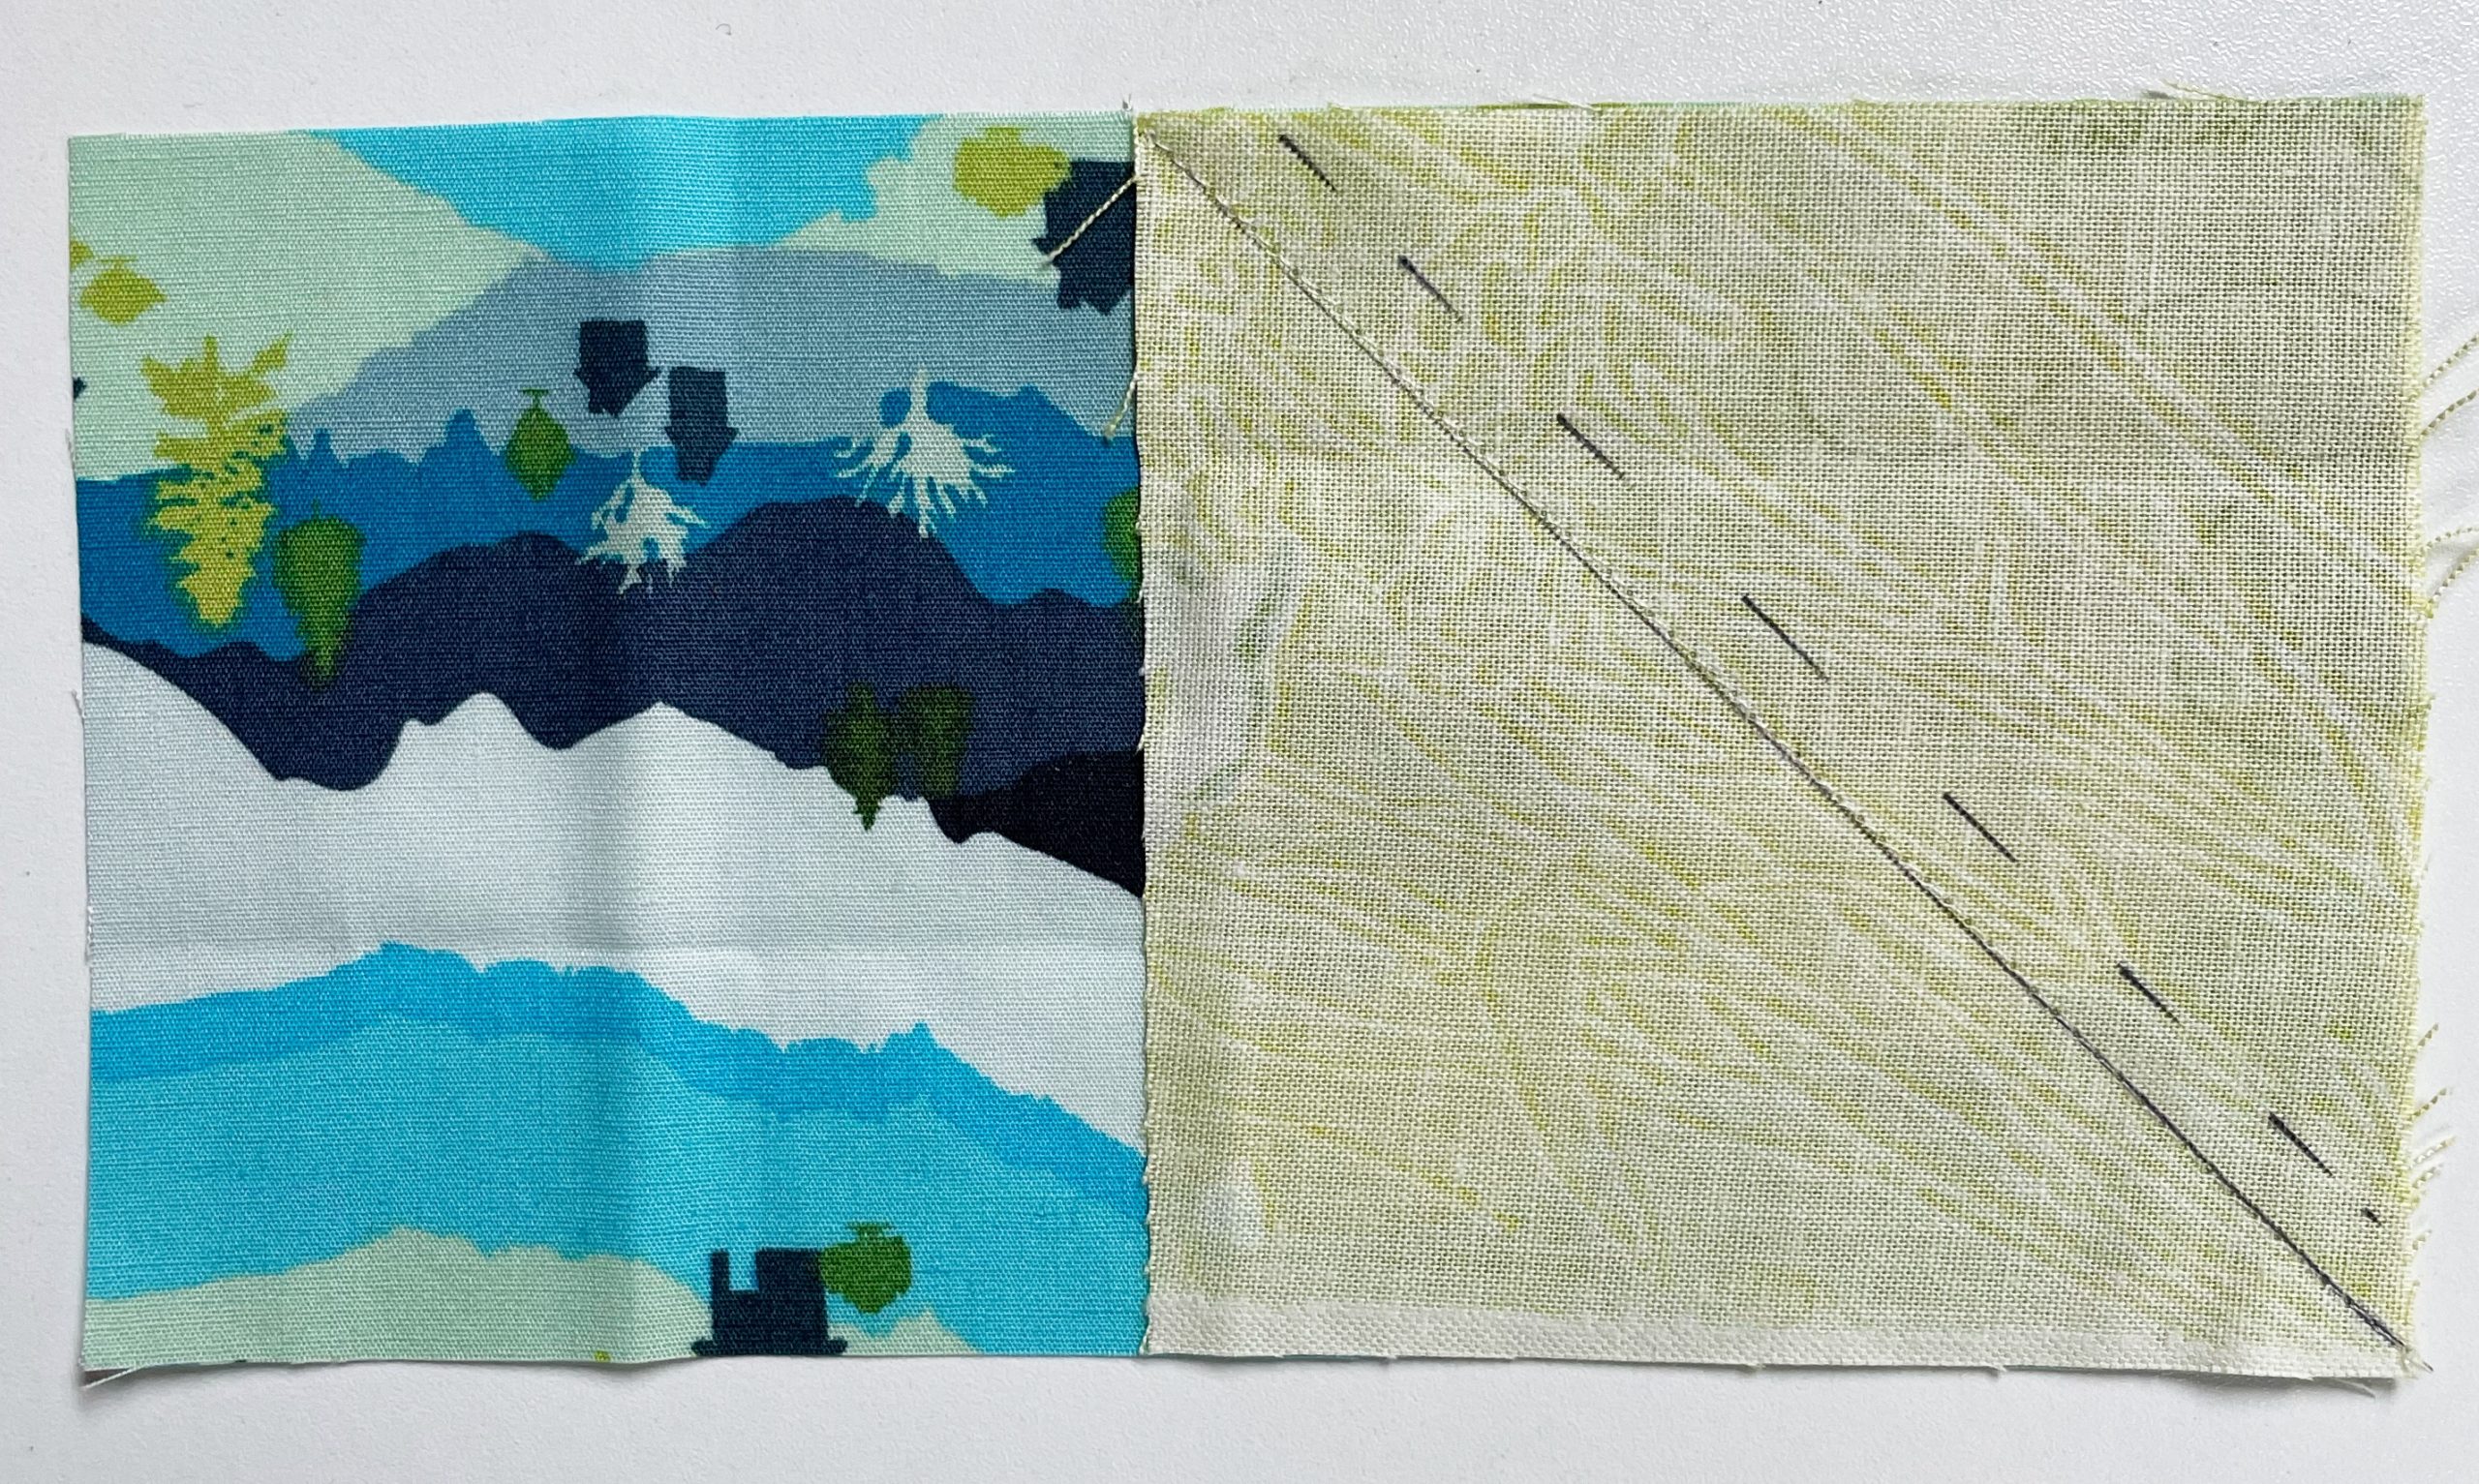
Place a 3.5″ square of Fabric D right sides together on the right side of a Fabric C rectangle. If your fabric has a directional print I’d recommend flipping it at this point so it’s upside down. On the wrong side of Fabric D draw a line from corner to corner. Sew directly on this line. Trim a quarter-inch outside the line you just stitched – right where I drew a dashed line.
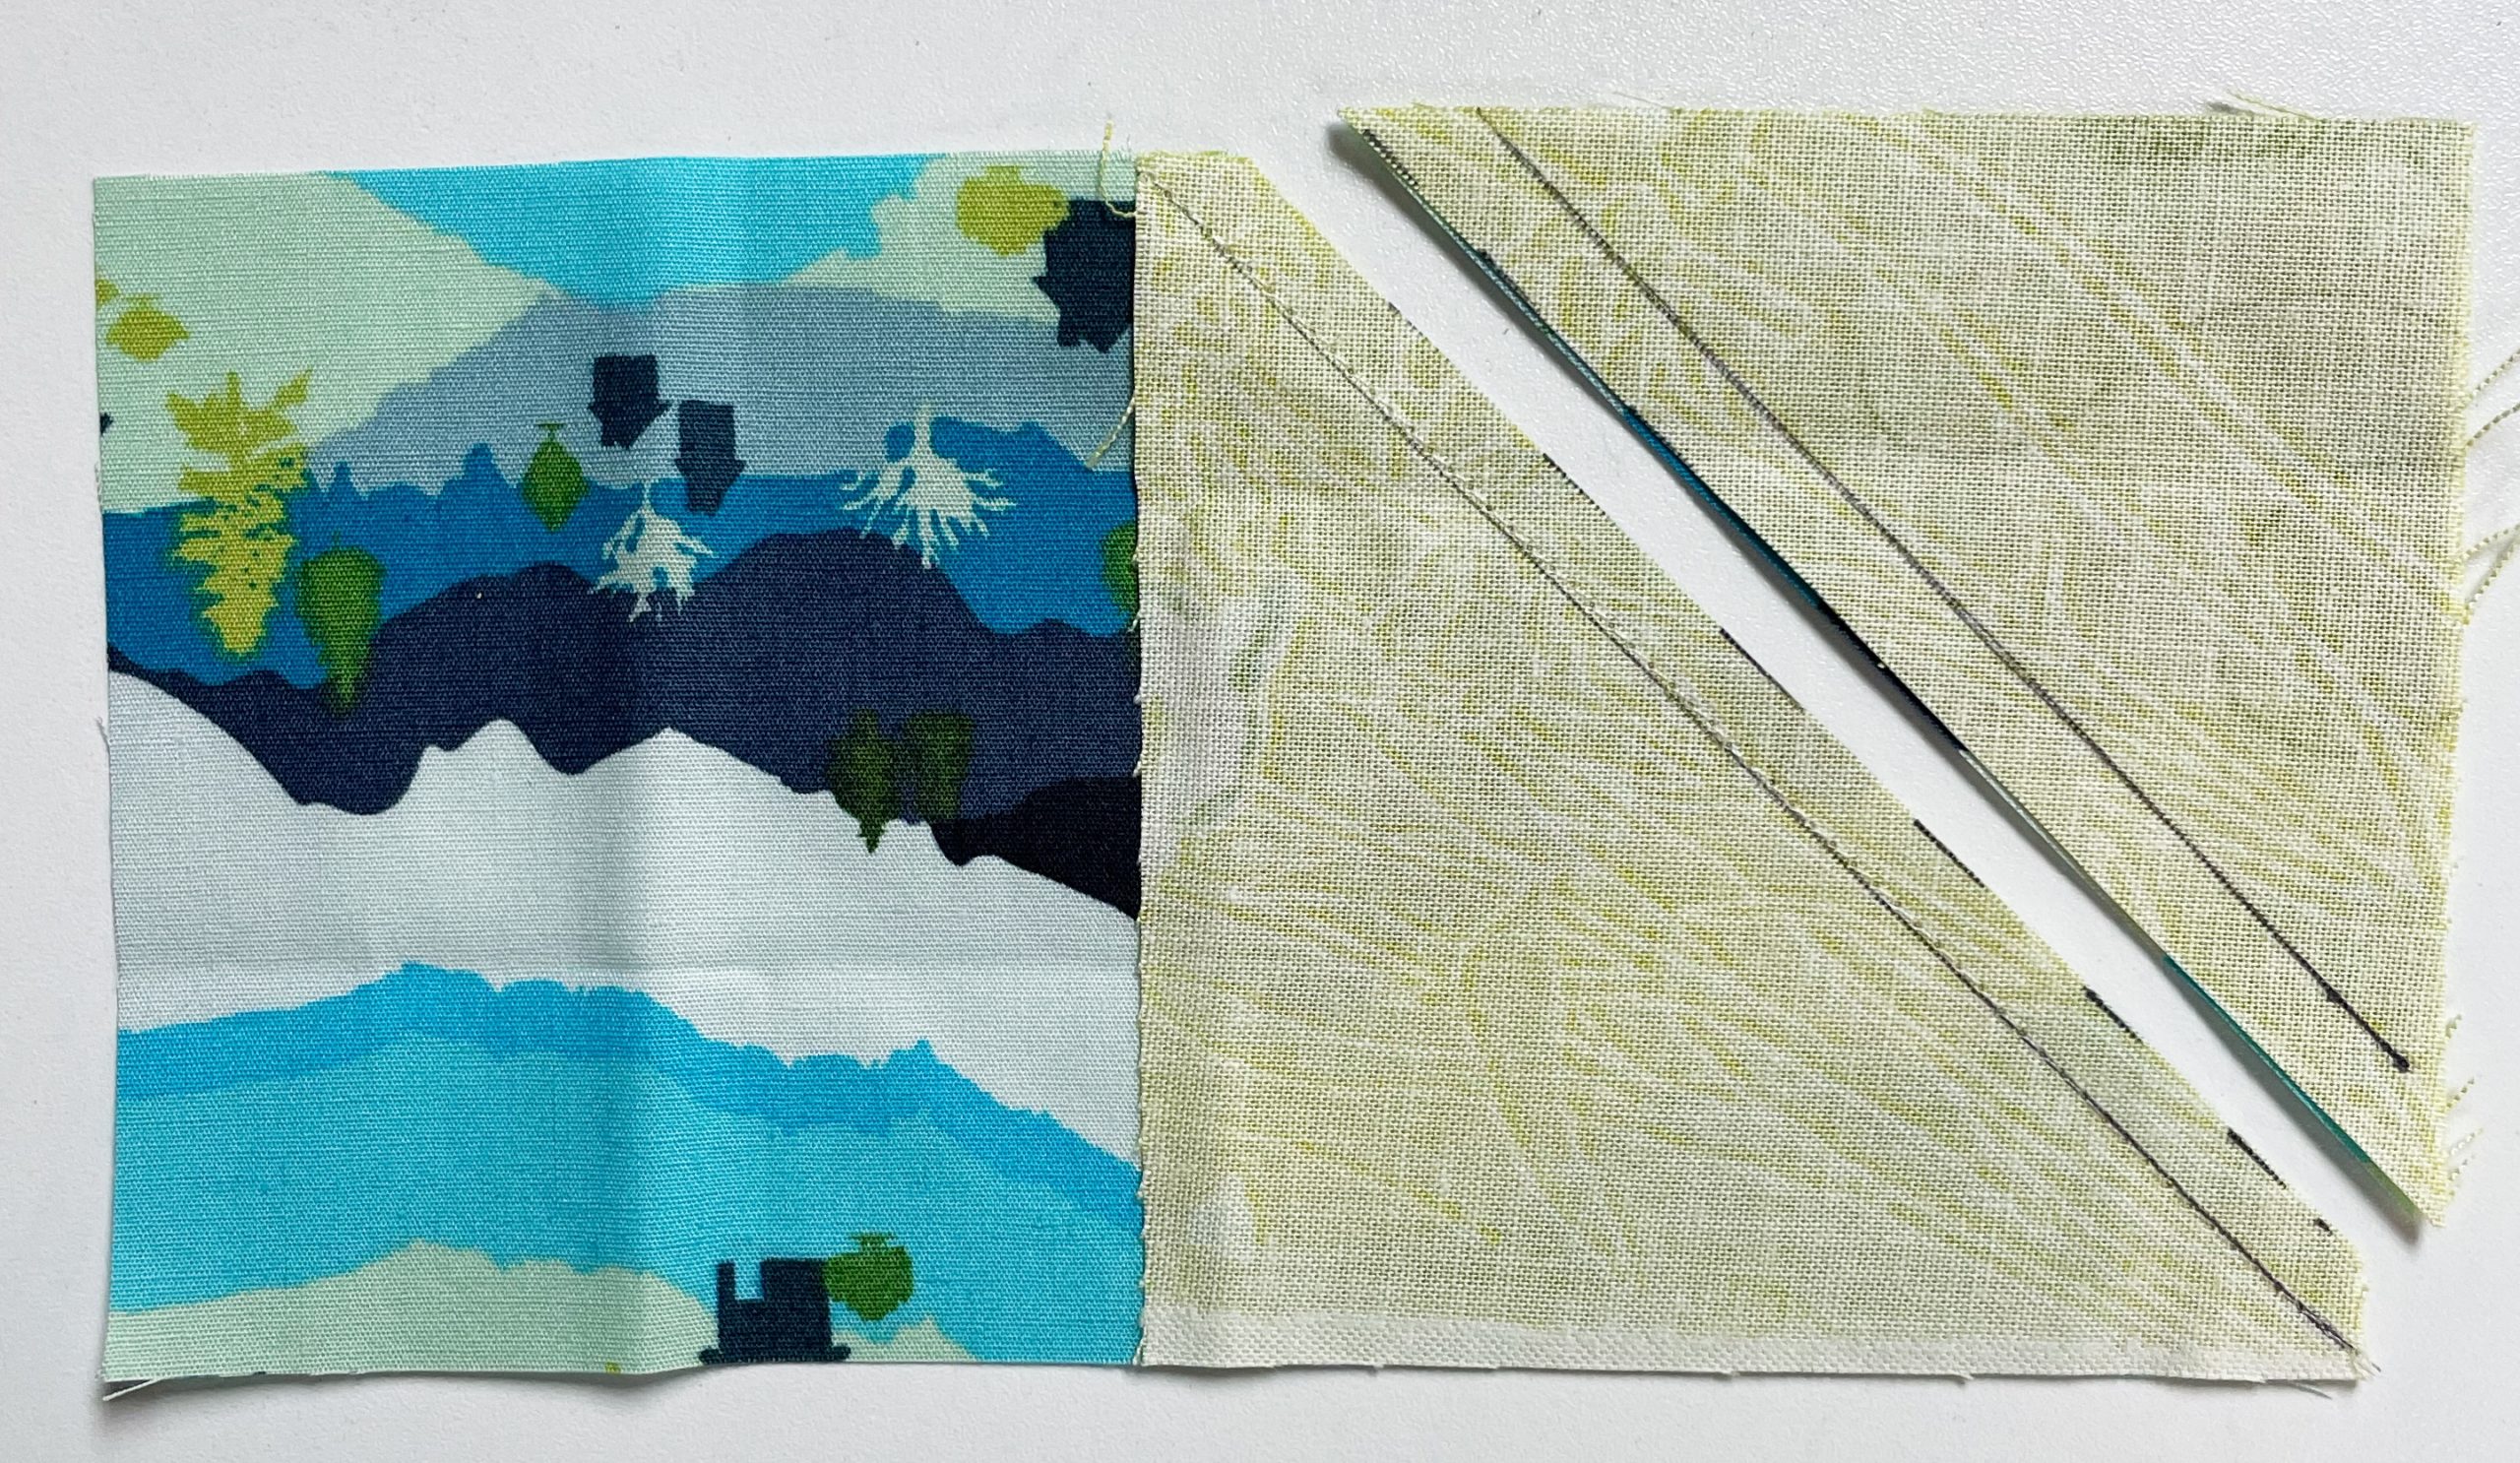
Now – this isn’t mandatory but I recommend sewing the triangles that were trimmed off right side together with a quarter inch seam as indicated on the solid line. This will gave you the start of a half-square triangle which will either be useful later in this quilt along OR you can use it to make other quilt blocks.
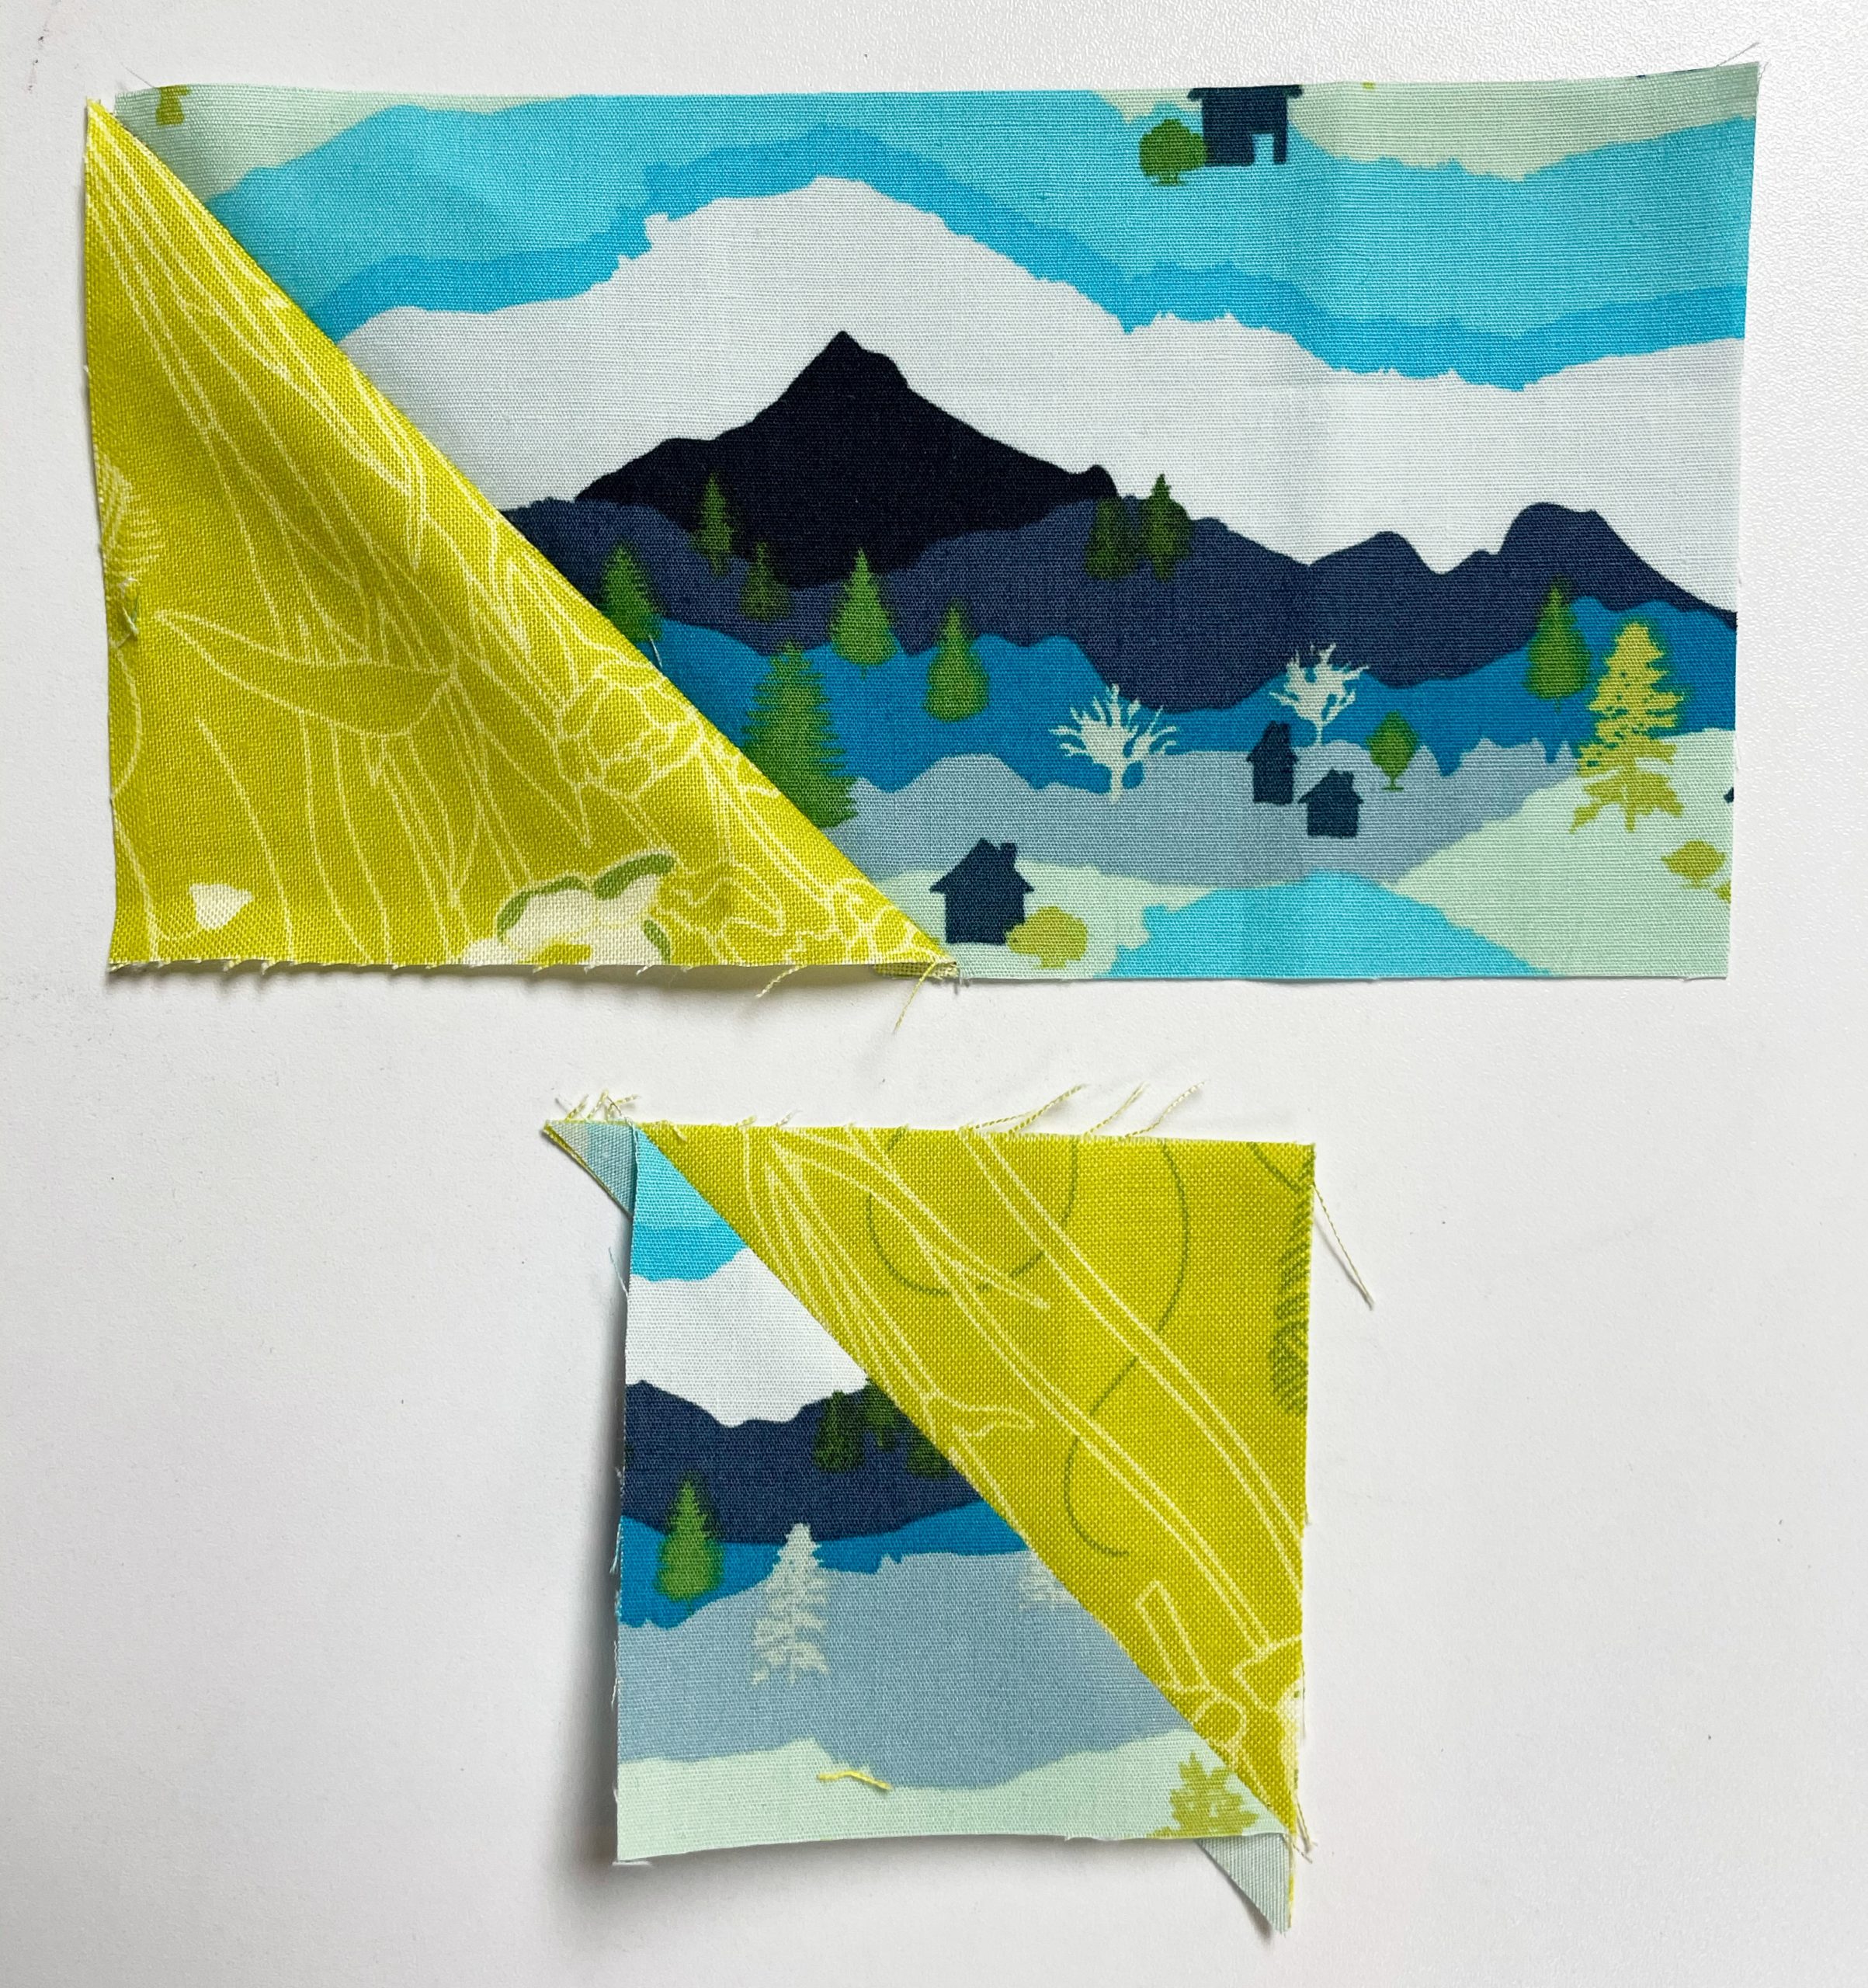
Press towards Fabric D on the half goose. Press the bonus half square triangle whichever way you please.
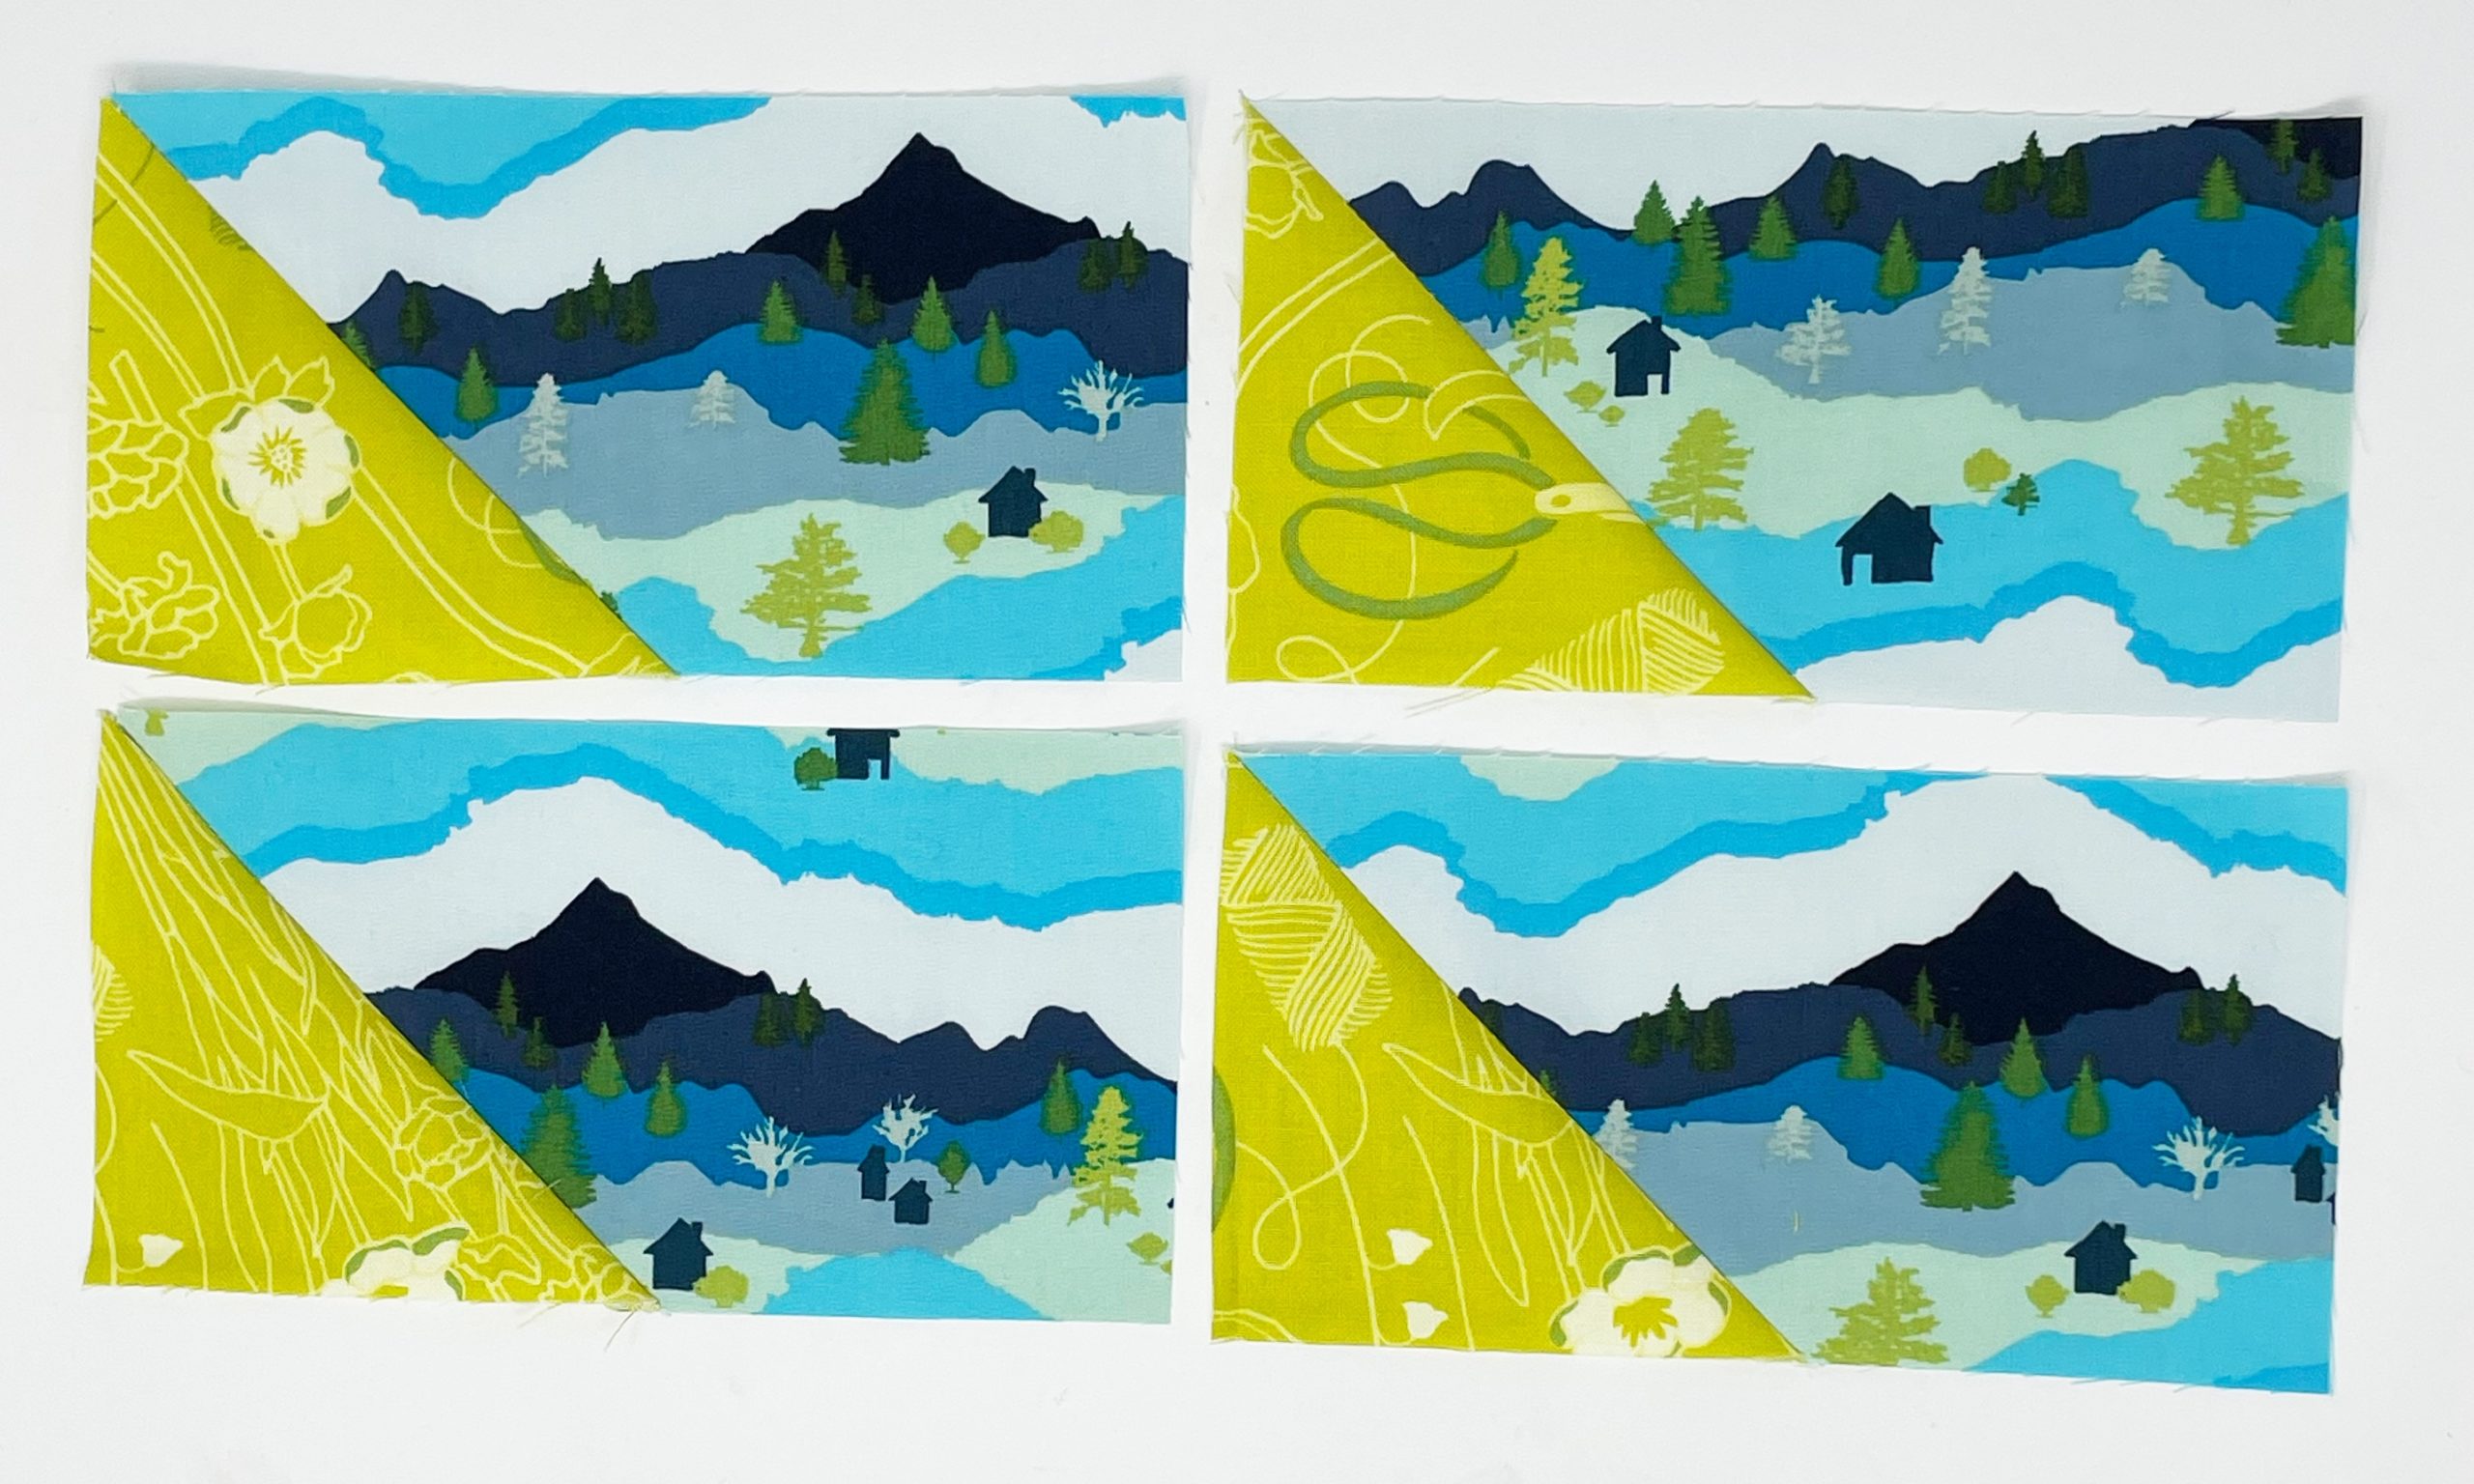
Repeat to make four half goose rectangles.
Piece the Patched Friendship Star
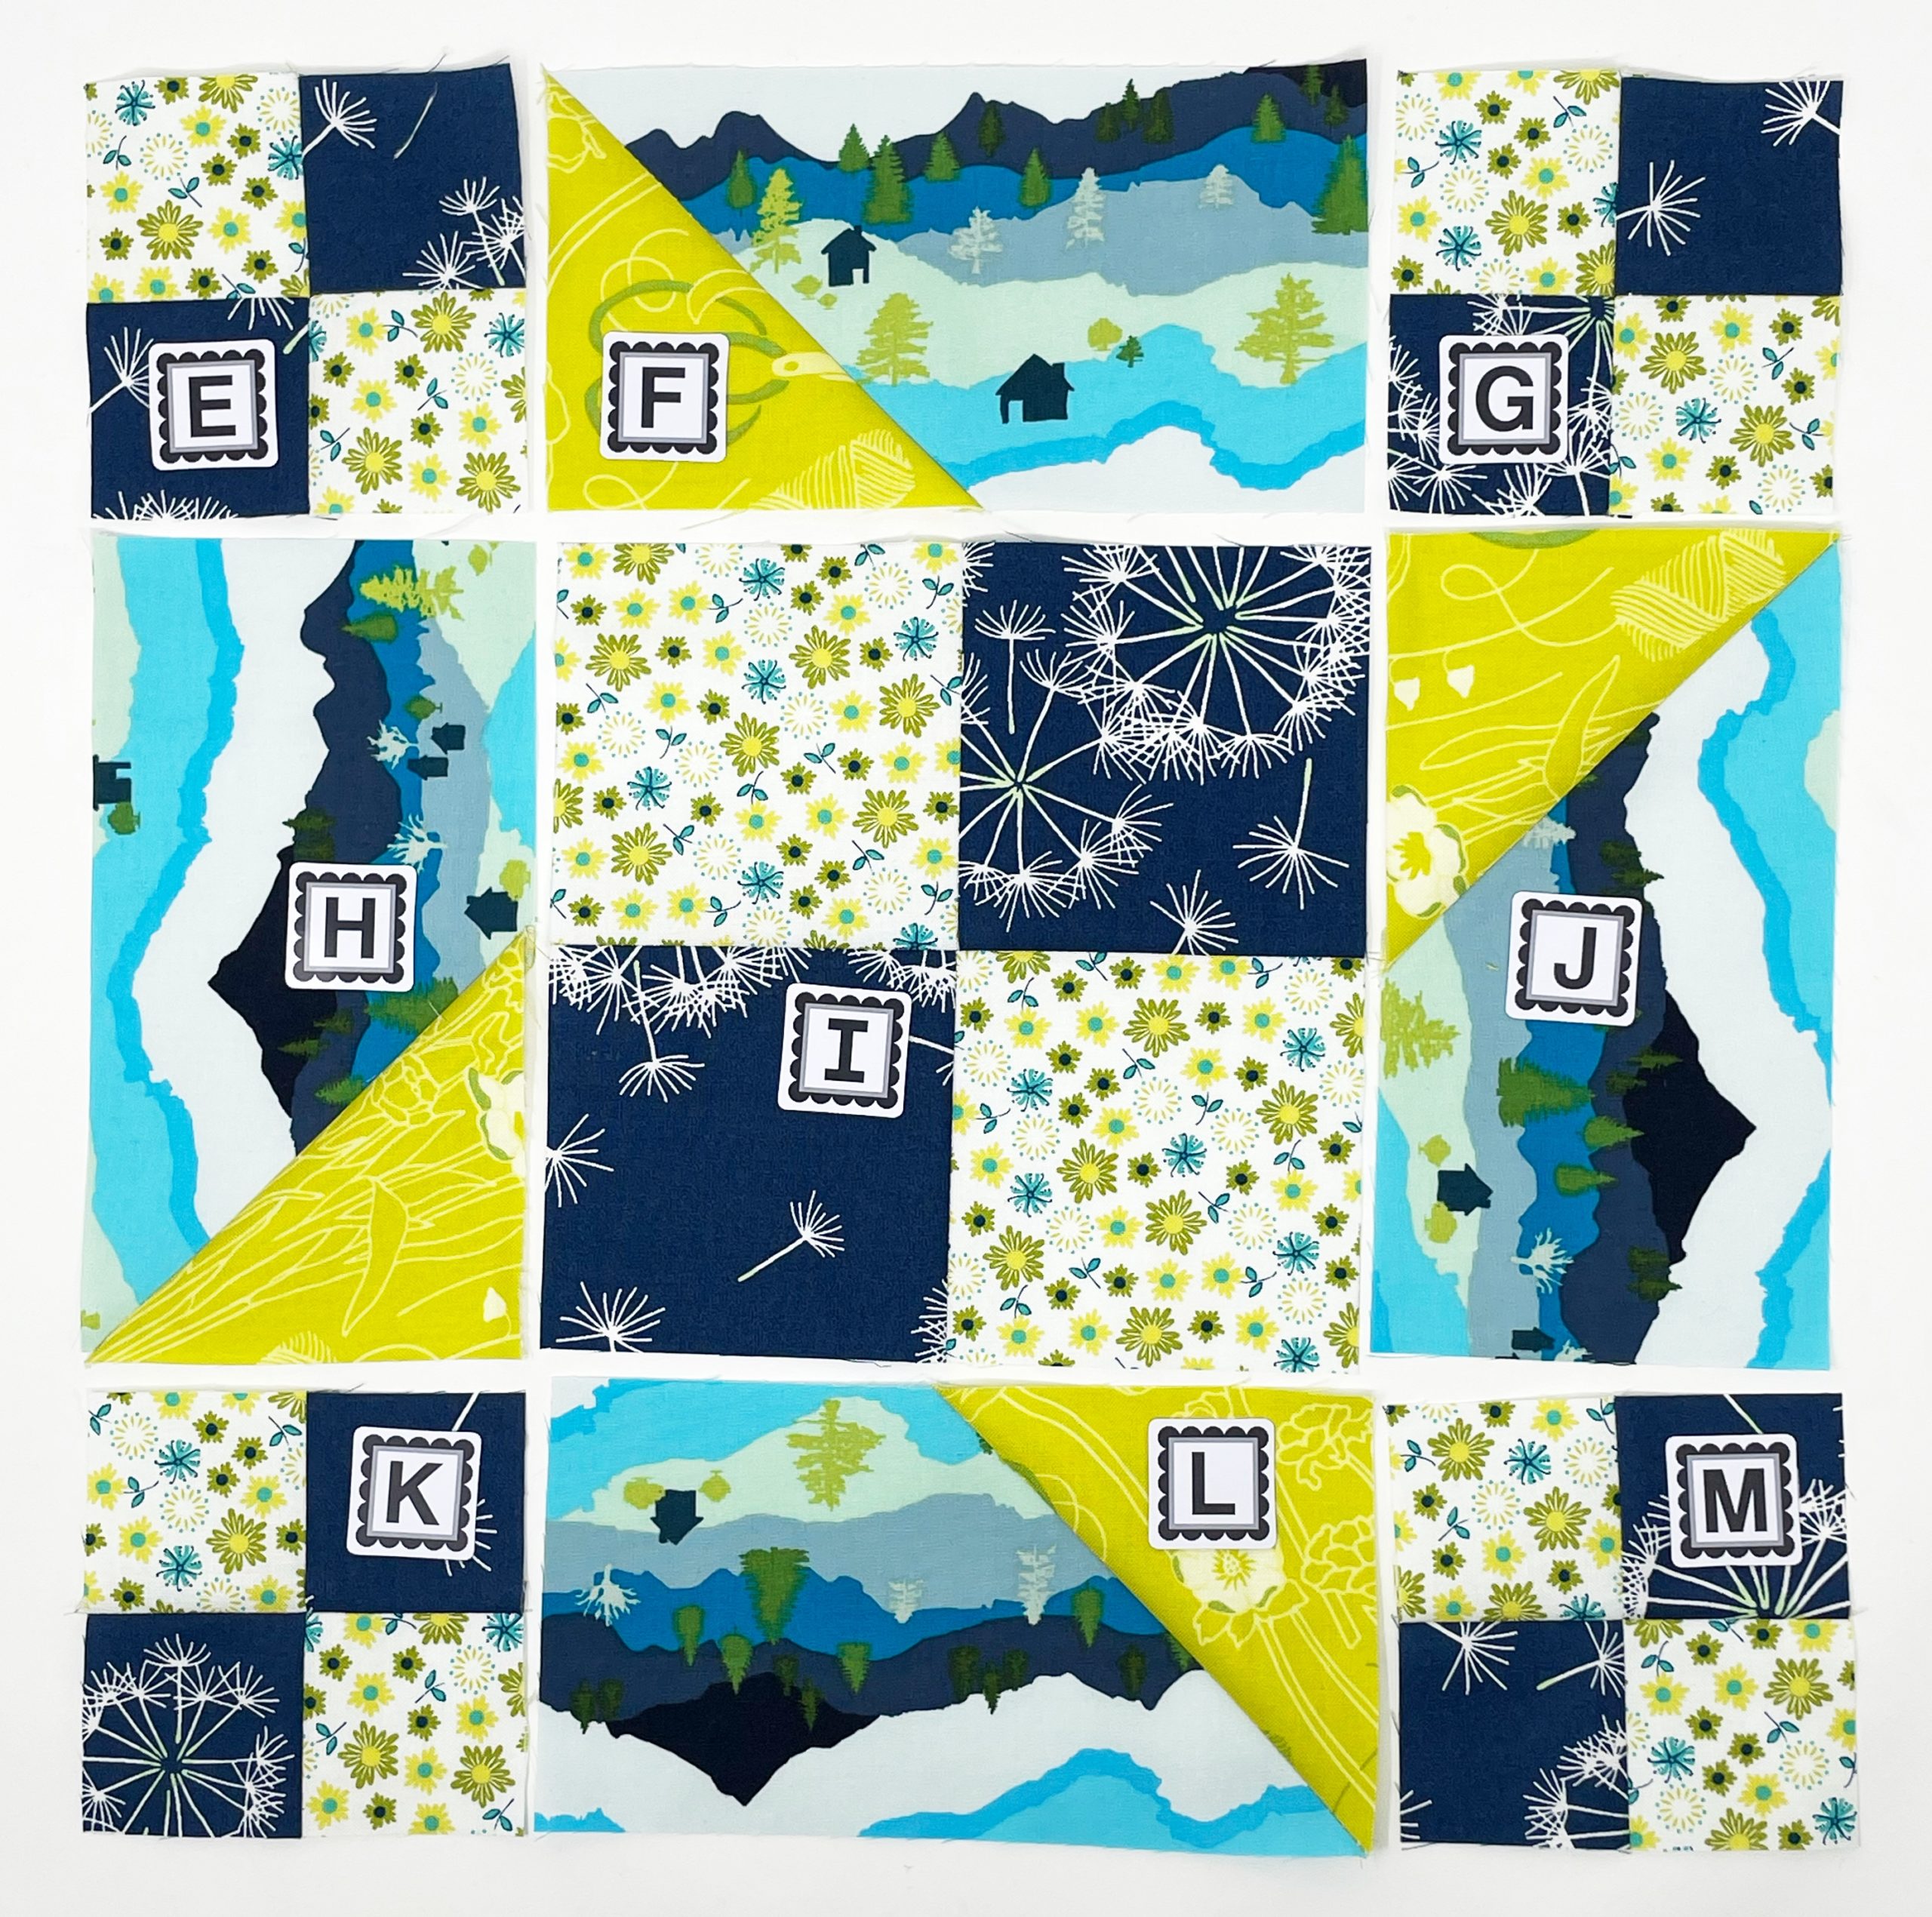
Layout all the pieces you’ve made as shown above.
Blocks
- E, G, K and M – 3.5″ four patch squares
- F, H, J and L – 3.5″ x 6.5″ half goose rectangles
- I – 6.5″ four patch square
Sew unit F to unit E, unit I to unit H and unit L to unit K.
Sew these units together with a quarter inch seam.
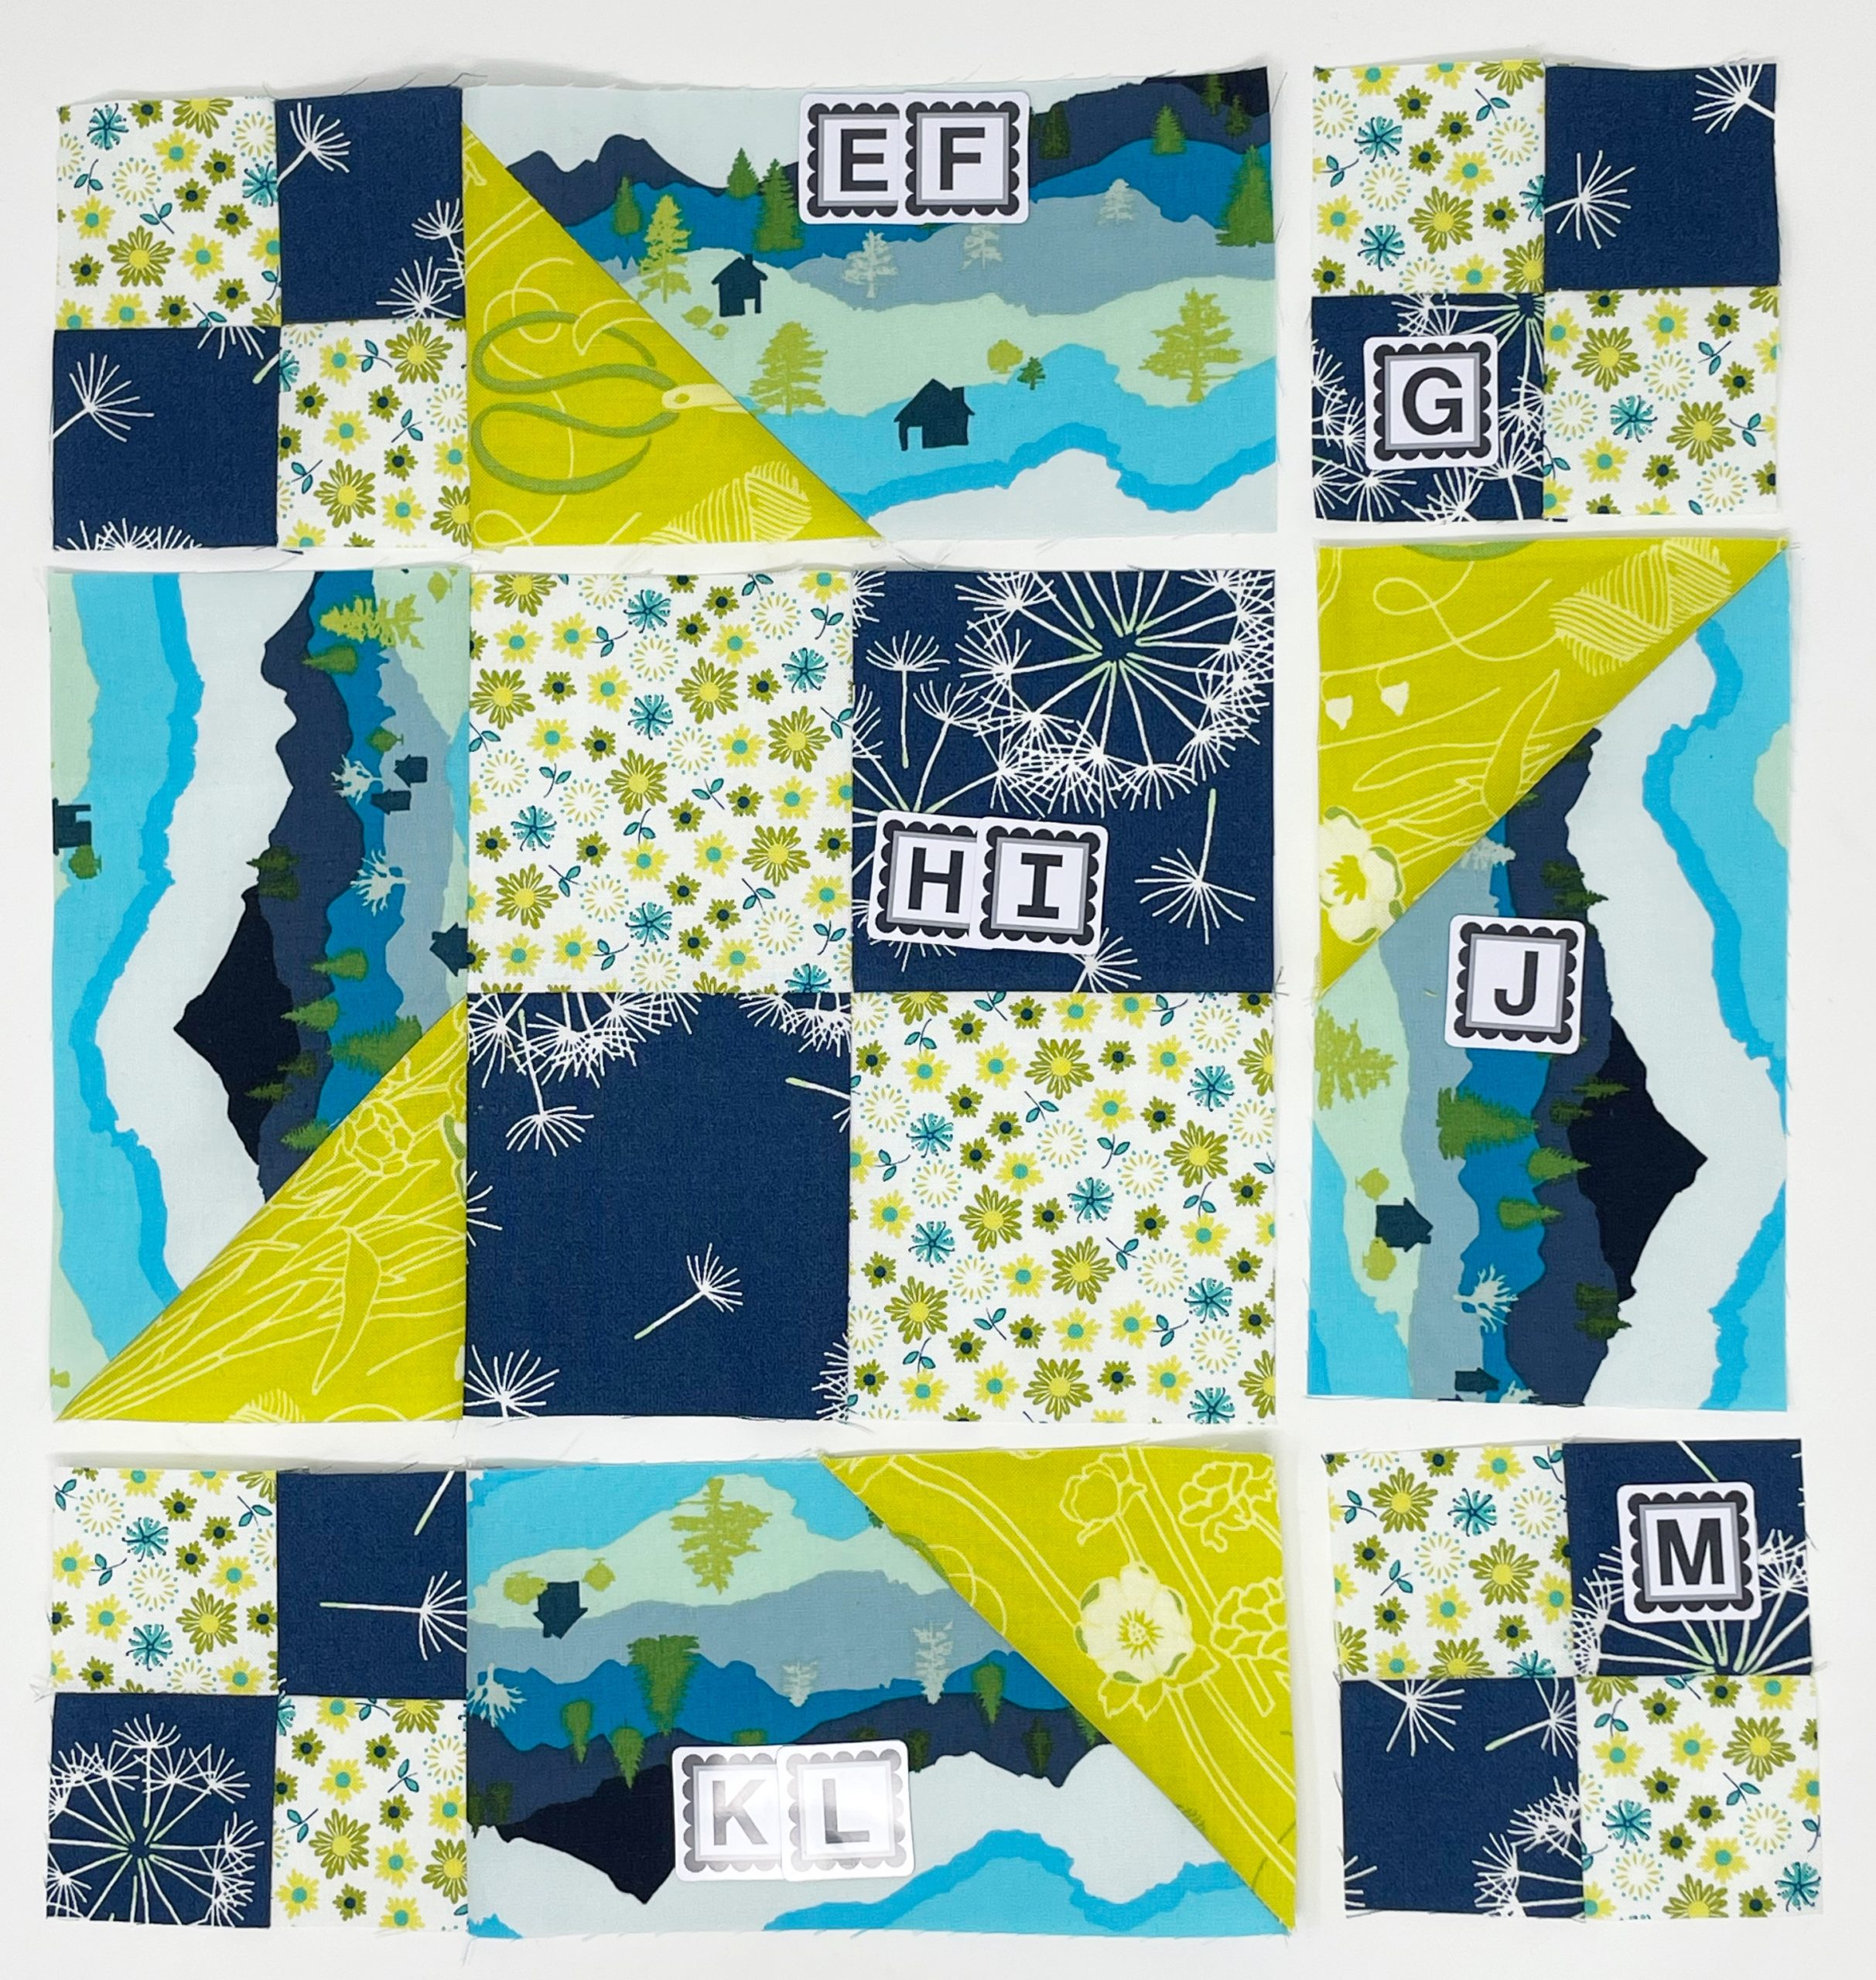
Press towards the half goose units.
Sew unit G to unit EF, unit J to unit HI and unit M to unit KL.
Sew these units together with a quarter inch seam.
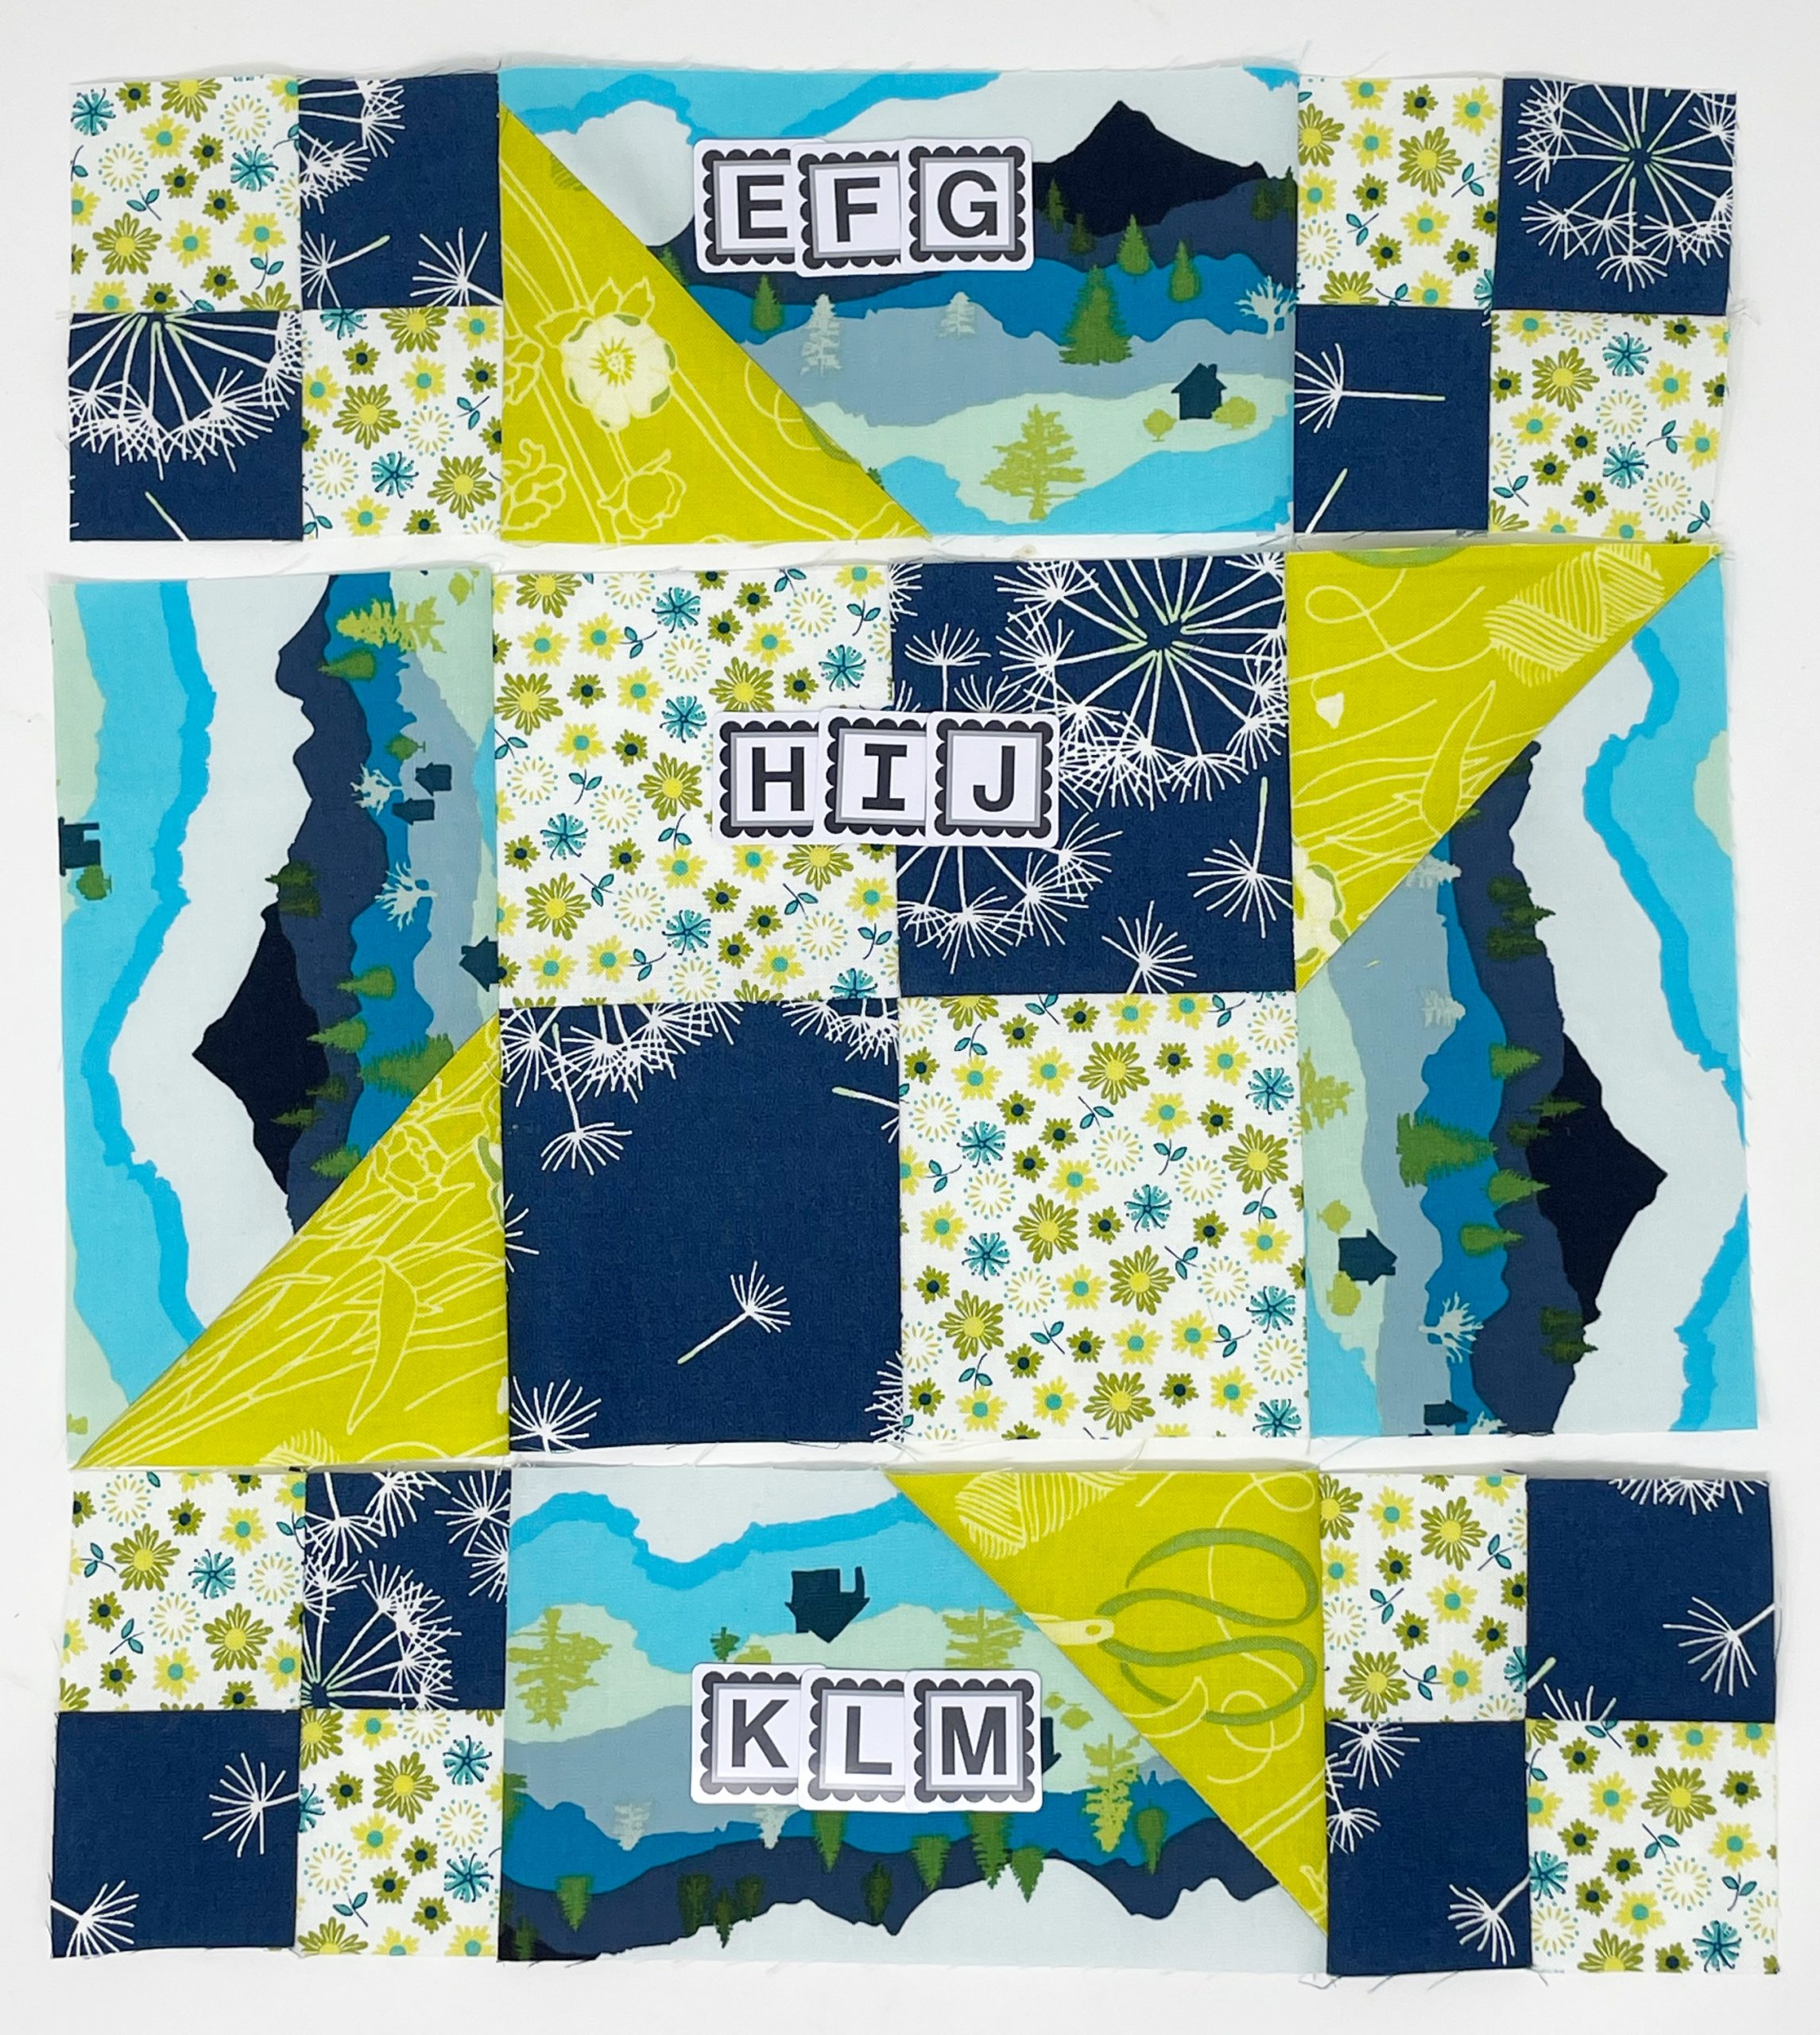
Press towards the half goose units.
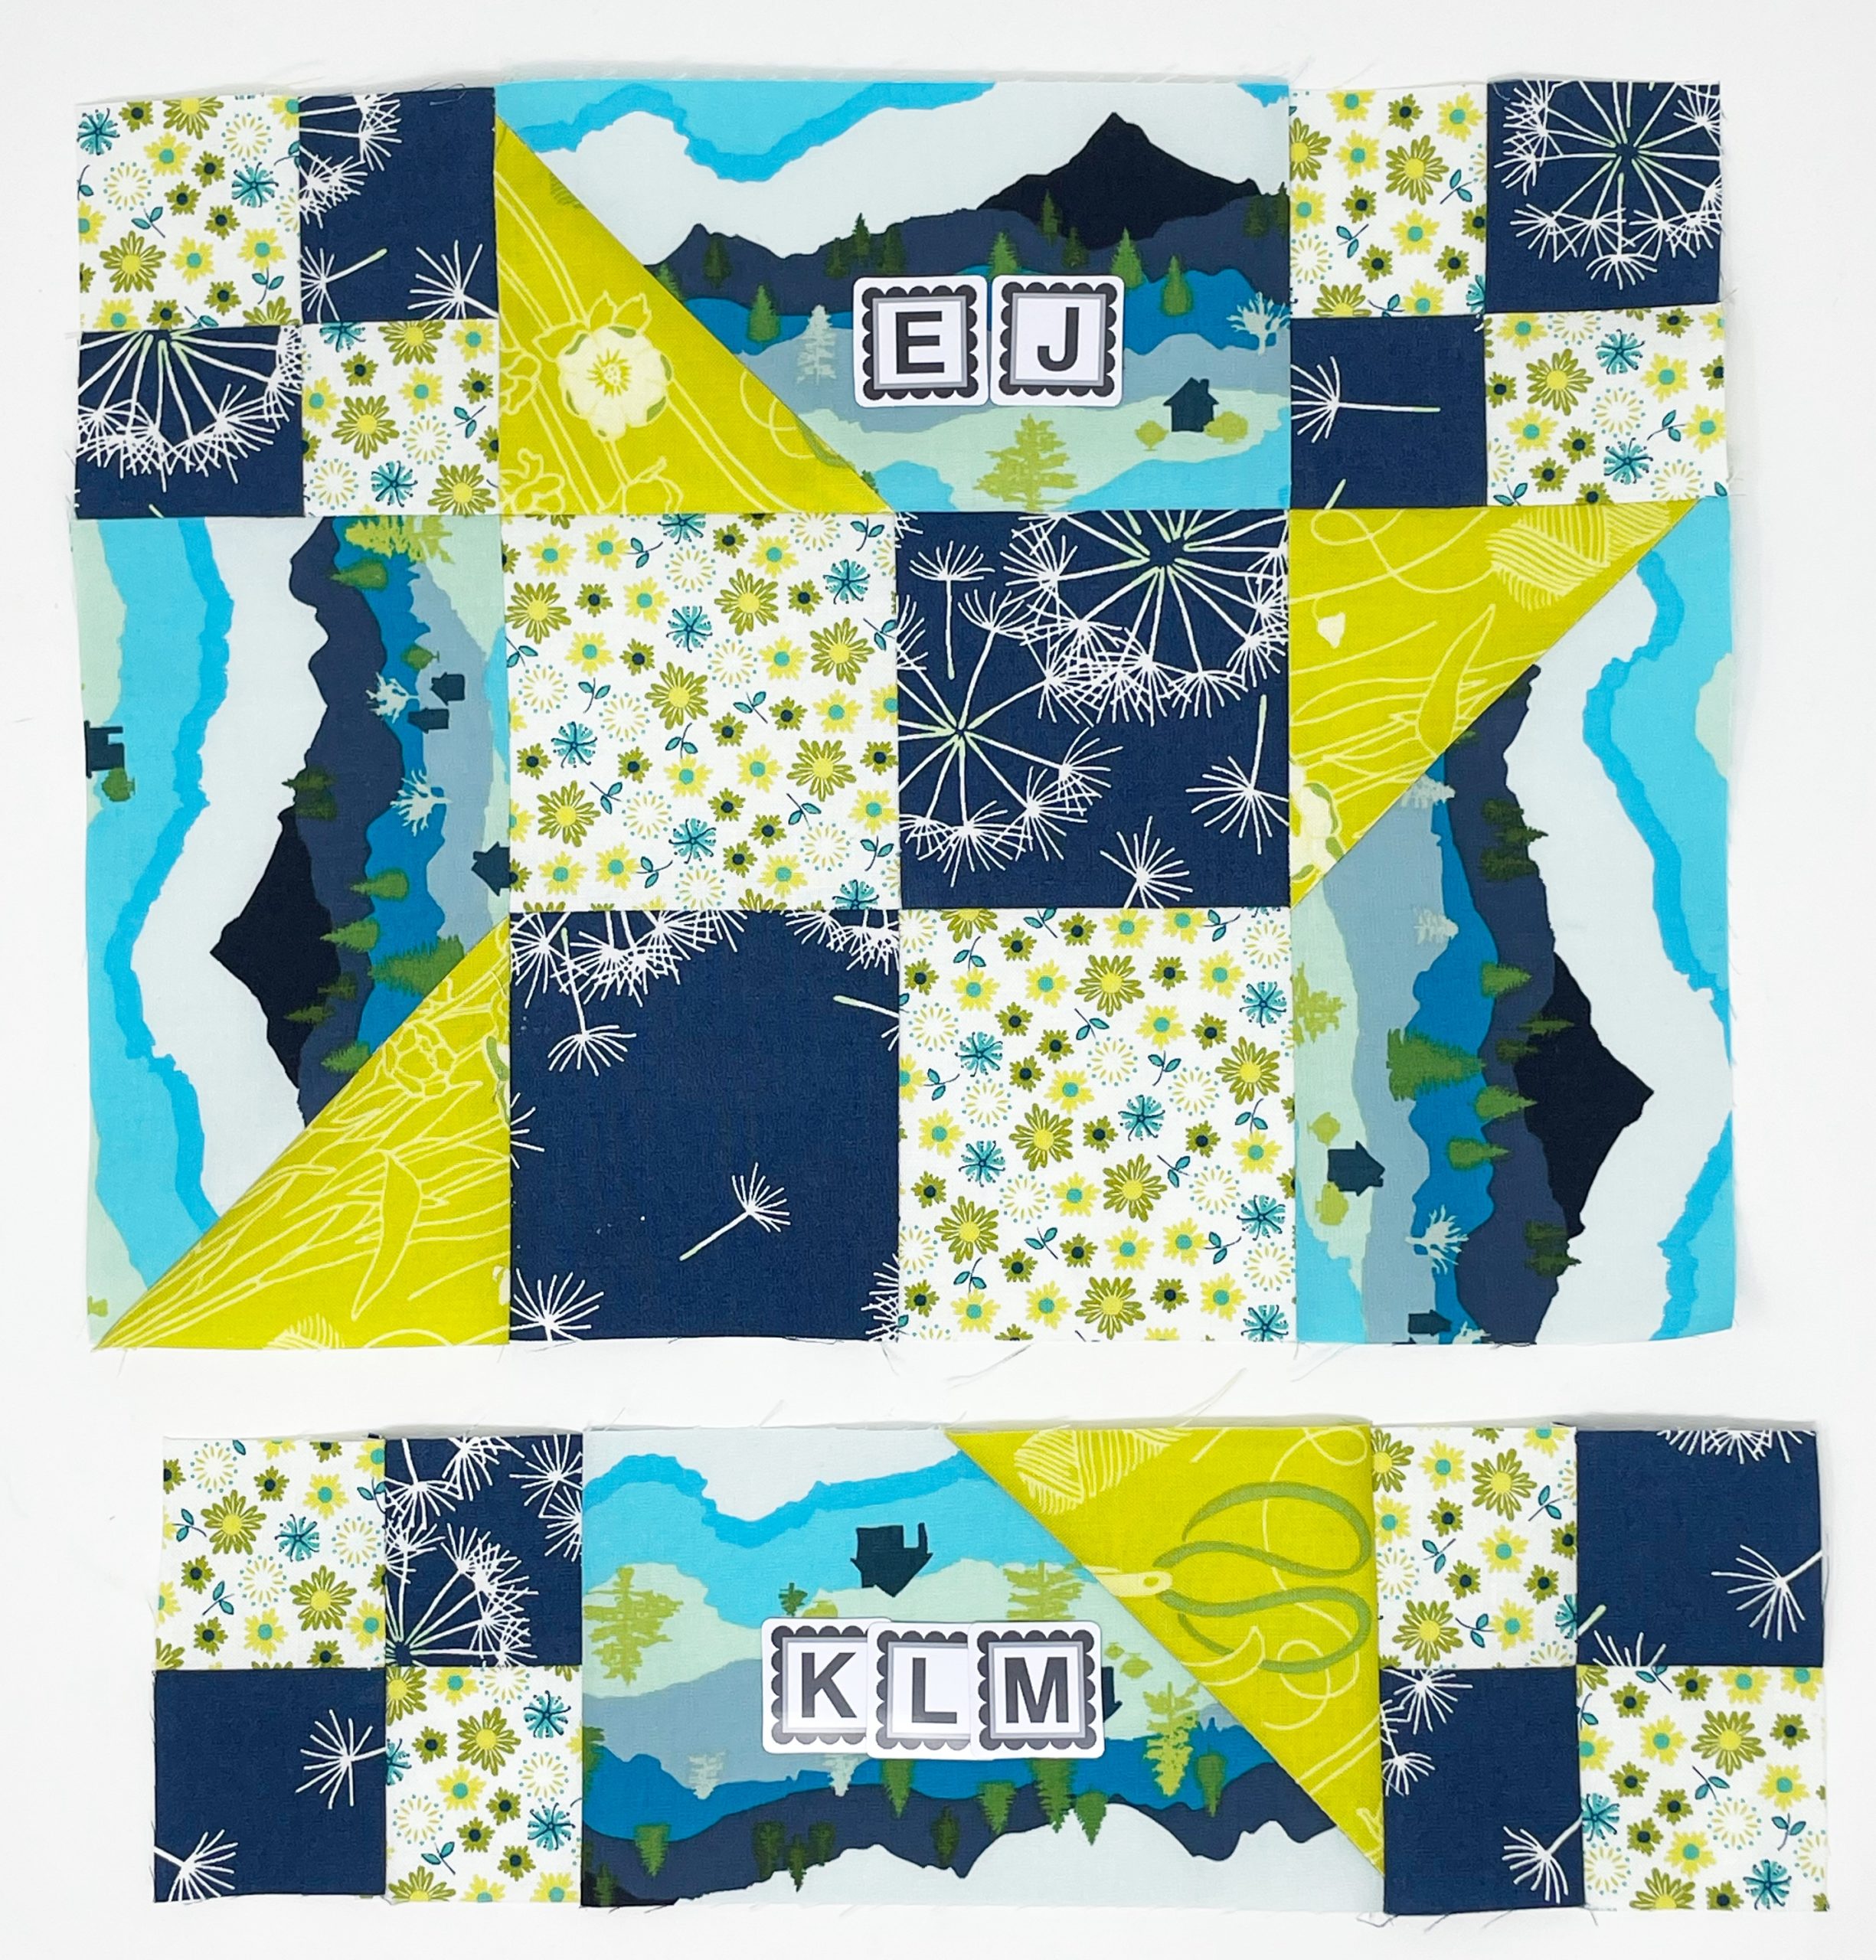
Sew the EFG strip to the top of strip HIJ.
Sew together with a quarter inch seam. Press towards strip EFG
Sew the KLM strip to the bottom of strip E-J. Sew together with a quarter-inch seam and press towards strip KLM.
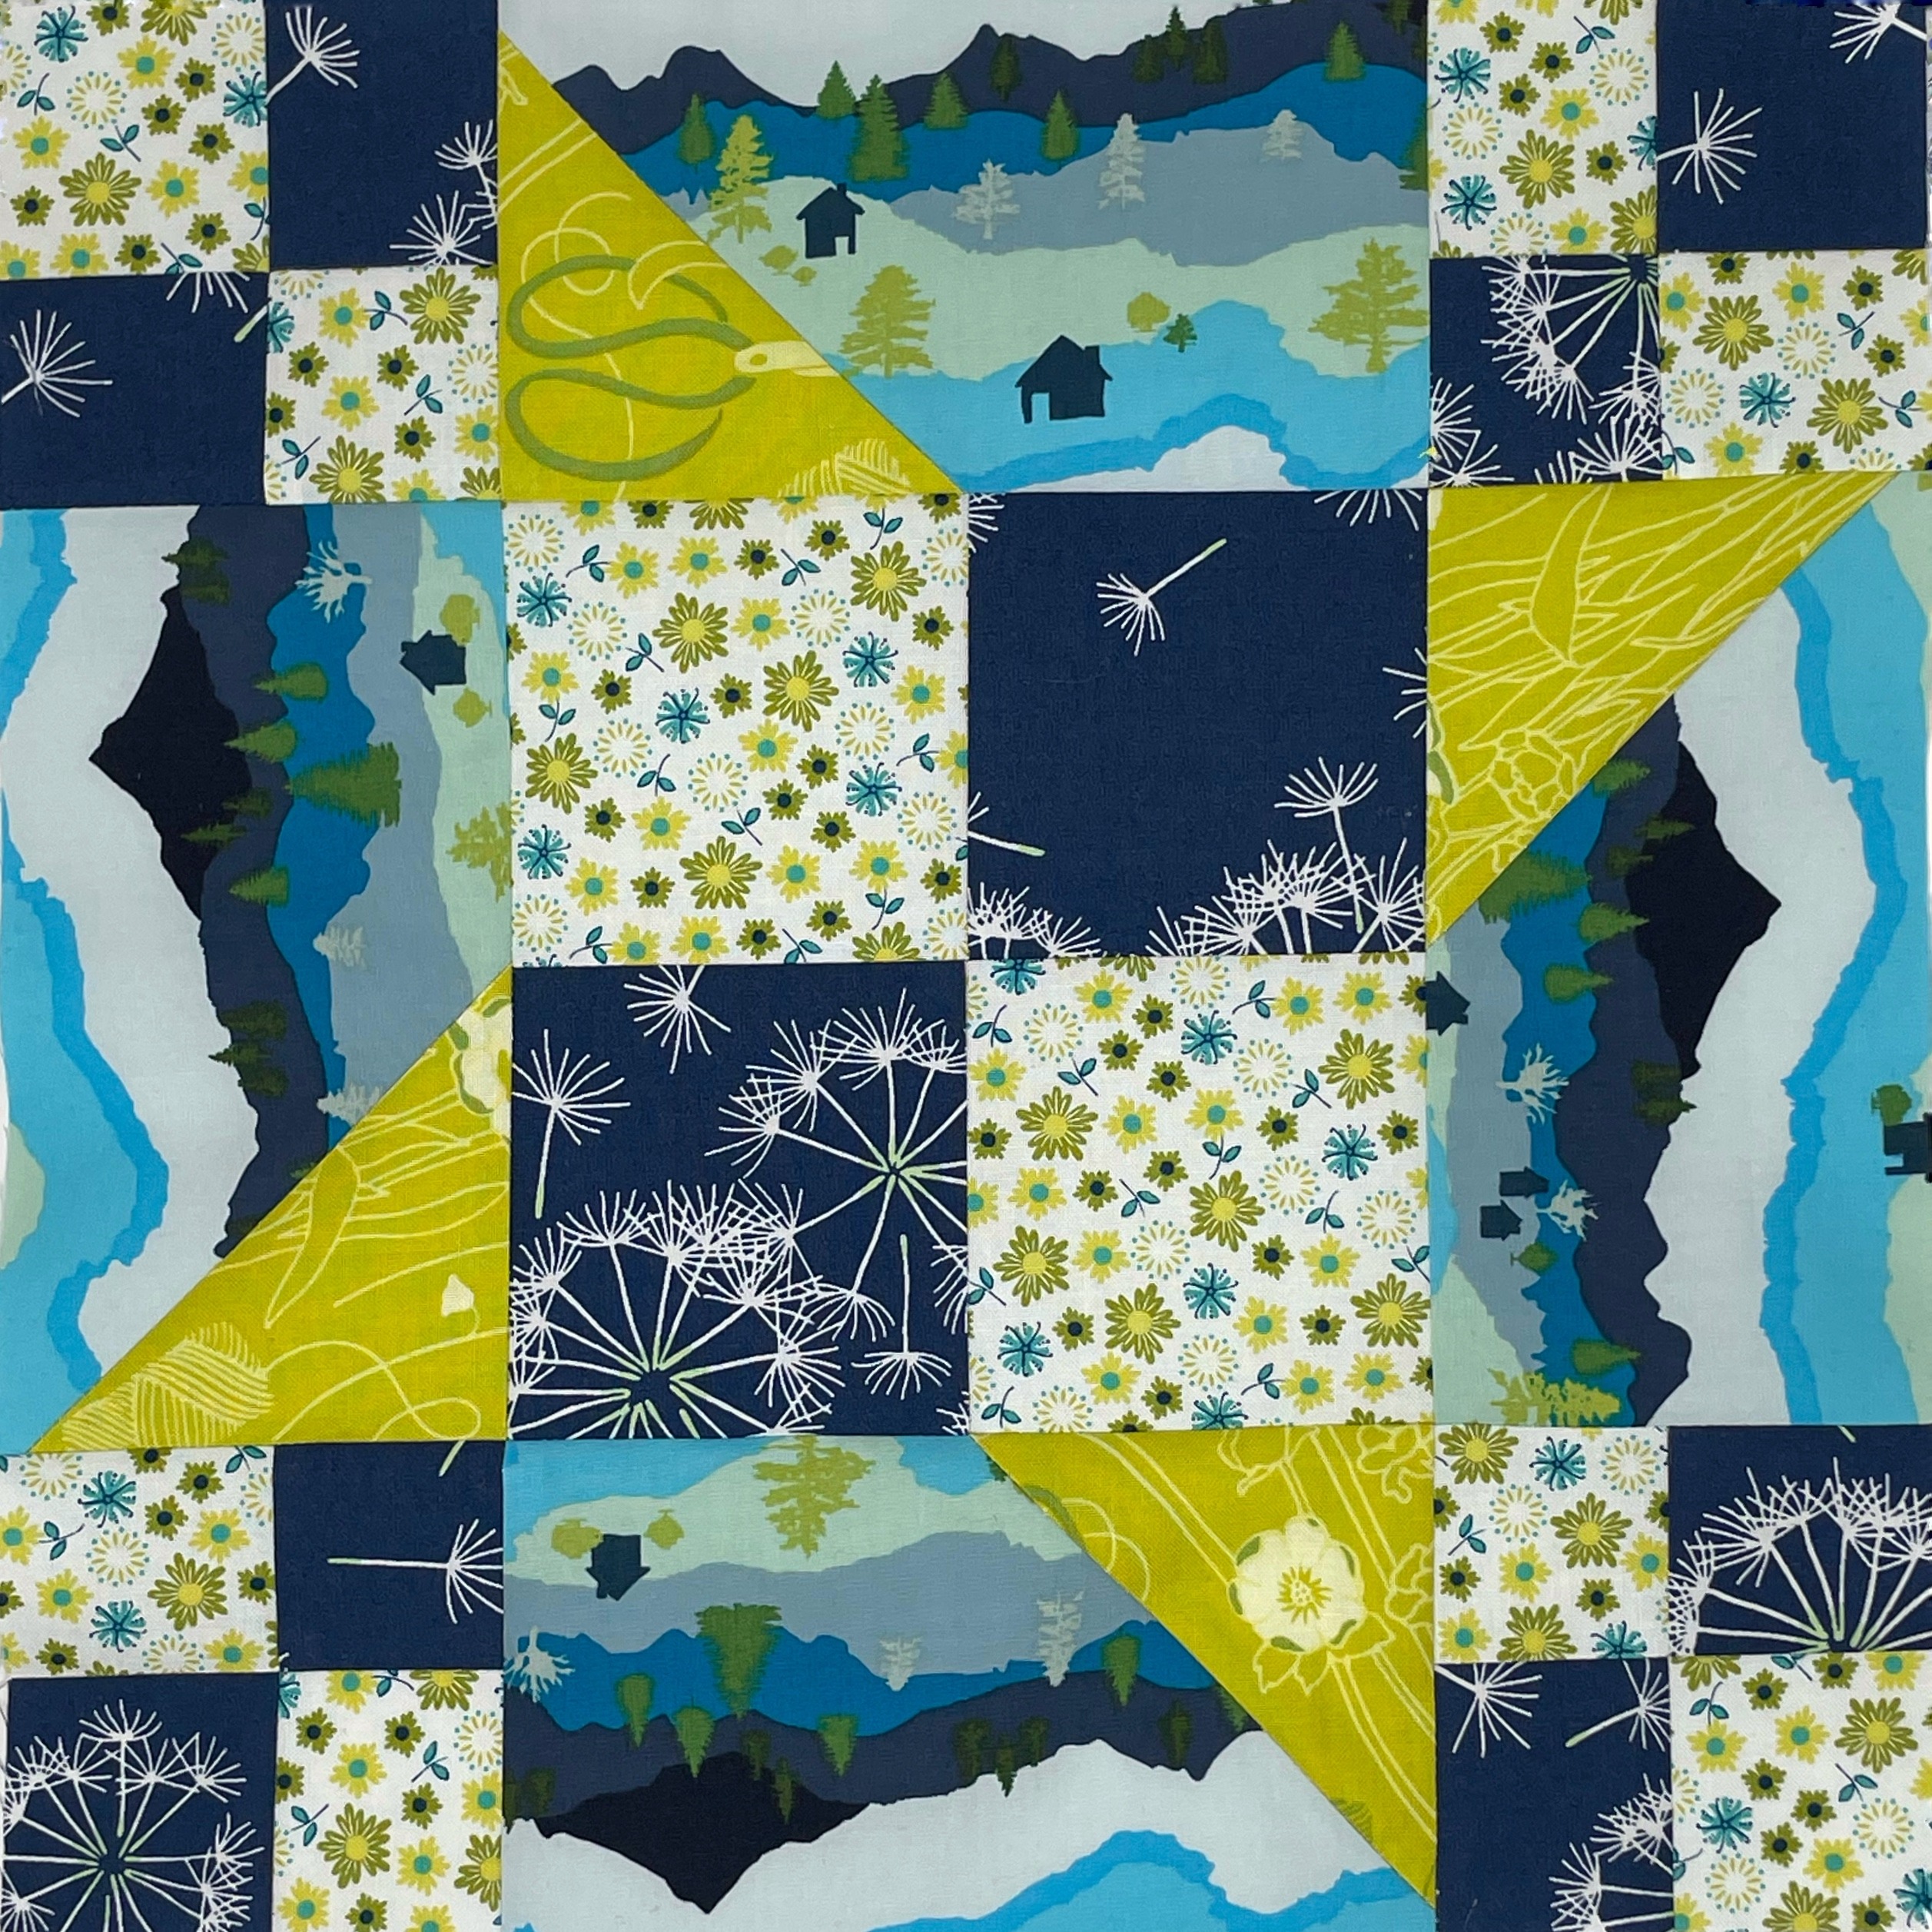
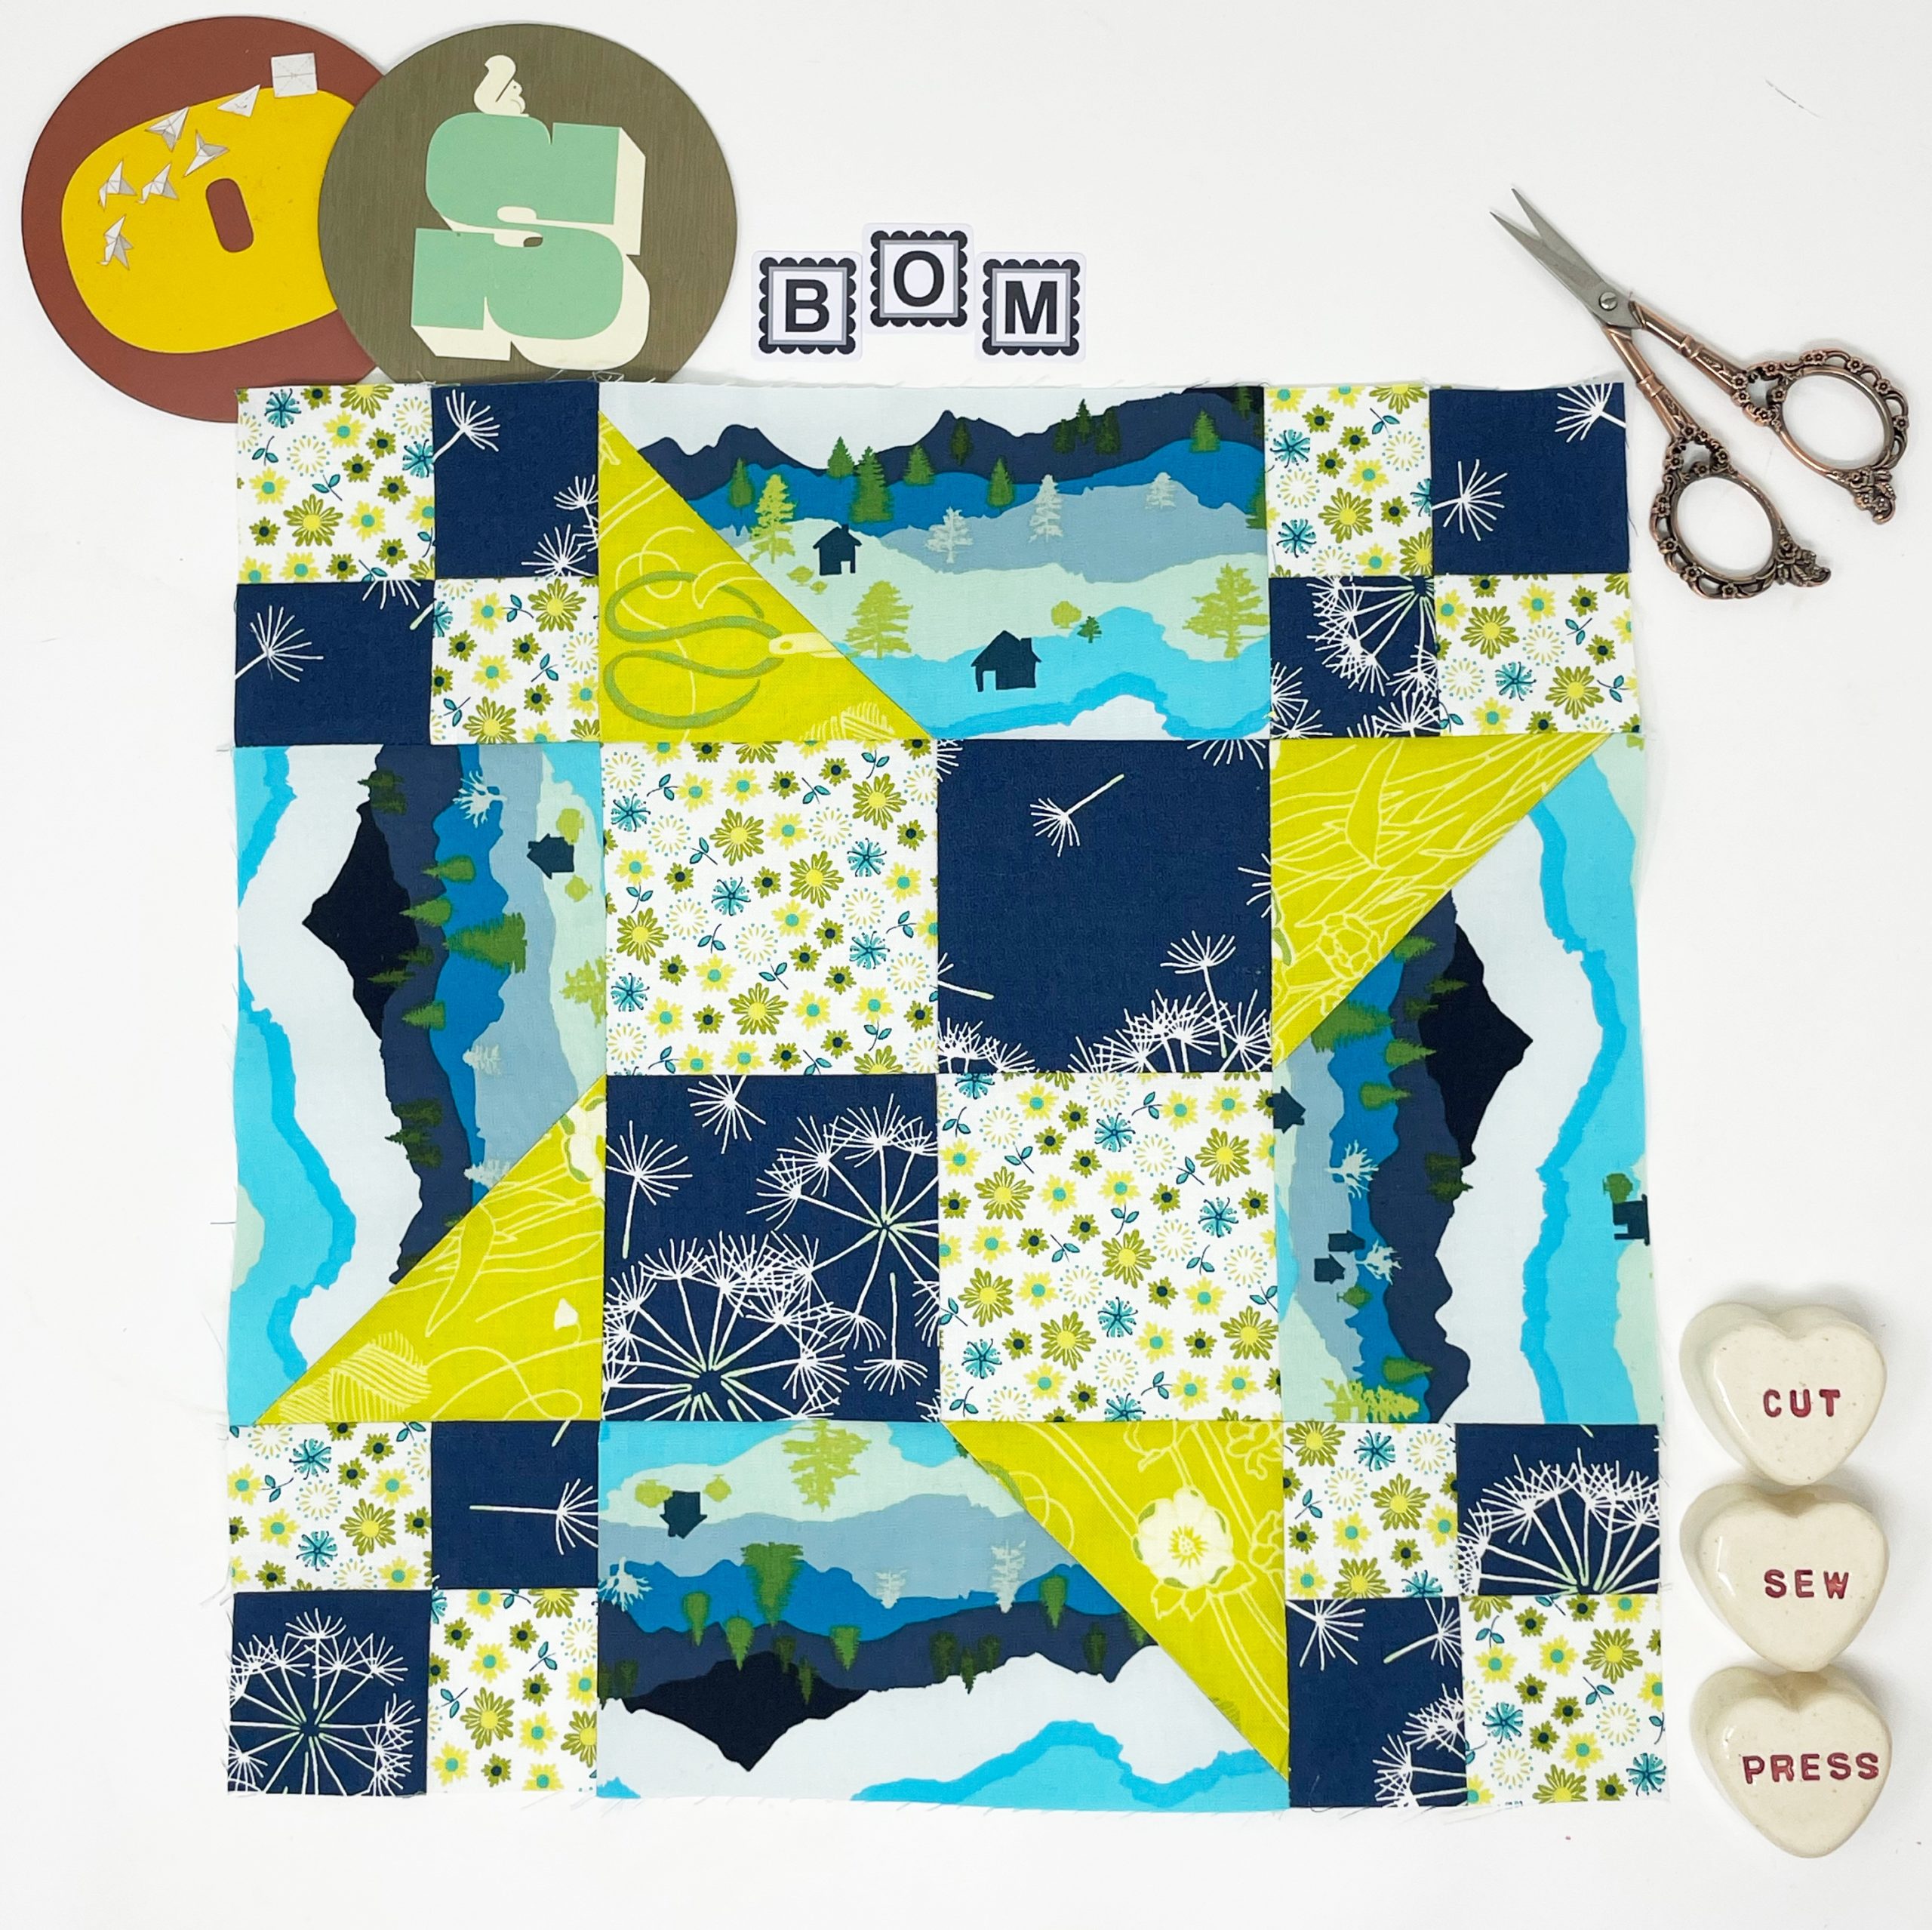
And that’s it! You now have a 12.5″ Patched Friendship Star! I hope you enjoyed making this fun little block and maybe learned a fun new way to sew four patches together!
Social Media
When you’re finished be sure to share your blocks to social media:
- Instagram: using hashtag #OSBOM21 and please tag me @PersimonDreams
- and/or the new Old School BOM Facebook Group!
And the blocks will continue to come! A new block will be featured on the 12th of each month on different bloggers websites! I have them all linked below but I’ll also post right here on my blog on the 12th of each month to get you in the right spot!
Schedule
Patched Friendship Star – Kim Lapacek (Persimon Dreams)
February 12, 2021 – Nancy Scott (Masterpiece Quilting)
March 12, 2021 – Quilt Jane
April 12, 2021 – Missie Carpenter (Traditional Primitives)
May 12, 2021 – Natalie Santini (Sew Hungry Hippie)
June 12, 2021 – Kerry Goulder (Kid Giddy)
July 12, 2021 – GoGo Kim
August 12, 2021 – Lee Chappell Monroe (May Chappell)
September 12, 2021 – Yvonne Fuchs (Quilting Jetgirl)
October 12, 2021 – Pat Sloan
November 12, 2021 – Katy Cameron (The Littlest Thistle)
December 12, 2021 – Sherri Falls (This and That Patterns)
~|~|~
affiliate ad


Do you have a PDF pattern link? I find it uses to made photocopy pages to print off your wonderful instructions, as I have to pay for each sheet.
here’s the link to the pdf – https://kimlapacek.com/wp-content/uploads/woocommerce_uploads/2021/01/Patched-Friendship-Star-Block-Tutorial-ocpkpu.pdf
Thank you for the PDF
. To print a PDF of this tutorial, check out the free app at https://www.printfriendly.com/.
No PDF file? (Maybe I just can’t spot it.) Would be so handy.
Correct – no pdf file for this free bom
. To print a PDF of this tutorial, check out the free app at https://www.printfriendly.com/.
When I saw this I guess I was looking for something related to old time school house or sites. I can see friendship star relating to school friends. Will other blocks relate to school! Primitive log schools, weatherboard school buildings, gyms, etc?
there might be – the “old school” part of the title is just that it’s a block of the month like the ones that happened in the early to mid 2000s. All the info on the bom can be found here: https://kimlapacek.com/2020/12/an-old-school-block-of-the-month-2021.html
is there a pdf file for this block to print
nope
. To print a PDF of this tutorial, check out the free app at https://www.printfriendly.com/.
be nice for a PDF file, as my sewing room doesn’t have a computer
Same here. Guess I’ll take notes and work from that.
. To print a PDF of this tutorial, check out the free app at https://www.printfriendly.com/.
Thank you so much for providing these free BOM tutorials. I am a quilting newbie and look forward to learning special tips and tricks for each of the blocks this year. It’s facinating to learn the little hints that you experienced quilters share for making what looks like a complicated, difficult pattern much easier in reality (I hope). I look forward to trying each of the BOMs, hoping to improve my limited quilting skills this year. 🙂
Thanks for the step-by-step instructions and for the FREE BOM! For those wanting a PDF, you could DIY…I cut and pasted the text into a Word doc for referencing at the sewing machine.
Such a cool way to do a four-patch! Thanks for sharing this, and for hosting this free BOM. Love your landscape print too – very effective in this block.
Too bad there’s no PDF🤨
Hopefully there will be one for future blocks.
. To print a PDF of this tutorial, check out the free app at https://www.printfriendly.com/.
Did I miss a post that talks about fabric amounts, contrast, how many fabrics to do the whole quilt?
Yup! Here’s the post about the BOM: https://kimlapacek.com/2020/12/an-old-school-block-of-the-month-2021.html and here’s a post about my fabric pull: https://kimlapacek.com/2021/01/fabric-pull-for-the-old-school-bom.html
Hey, Thank you for showing an alternate way to do four patch…I like the idea of sewing that little piece that would normally be cut off and tossed of the goose block. I bettcha I am going to enjoy this sew along, thank you again!
Hi Kim – what a great idea to host this Block of the Month. I love this sort of thing with the designs contributed by so many different people, each with their own styles.
As for everyone that keeps asking for a pdf – if I need to reference the tutorial, I just keep my laptop or tablet next to the sewing room. It is very simple to look up at the screen. That way I don’t waste paper. If needed, you can easily jot down the sizes of the pieces and then cut – after that, just take a glance at the screen to remind yourself of the assembly instructions. It is great that this designer has taken the time to provide the tutorial for all of us!! Thank you Kim.
Thanks Bernie! I really appreciate your support 🙂
This is a great idea. Thank you for all the work it took to bring all of us this beautiful block. Then for coordinating eleven others to come this year. Looking forward to my new quilt at the end of this year.
Thank you for your tutorial and the PDF file to download and/or print. It’s nice to have another BOM.
Great tut! A new trick as well. Love your fabrics and thank you so much for the great directions. This is going to be f u n !
Hi Kim,
Would you like us to post our blocks each month somewhere special ?
Thank you in advance. I am so excited to follow along with this BOM with all these great designers.
If you want to post on social media that would be great but nothing special is necessary. This sew along is really “just for fun and to learn!”
Thanks for your hard work. First block was fun!
Thank you for this BOM in pdf. form. I think it’s getting off to a wonderful start.