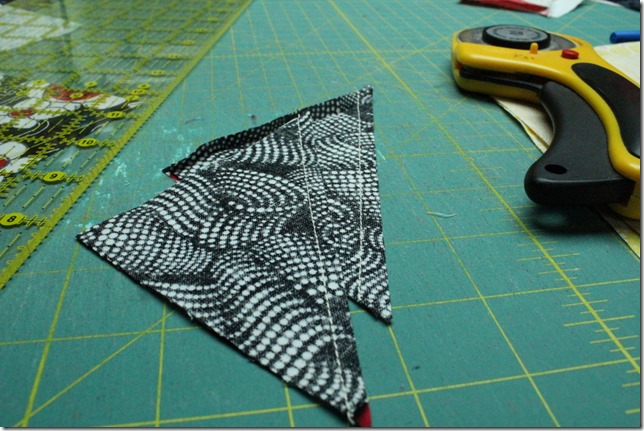
Hello everyone! Welcome to today’s stop on Sam Hunter’s Back to School Blog Hop! I consider Sam Hunter a quilting sensei … not only to me but to anyone who reads or blog or uses her patterns. I’m honored to be joining in on this fabulous hop! I was at a demonstration and I noticed that the demonstrator wasn’t setting her seams. So, I asked my quilting friend if she thought she was just doing that to save time or was it just not ‘a thing’ most quilters do? She said that a lot of people skip this! I was taught 98% of what I know from my Mother-in-Law and one of the things she taught me was to set my seams (and it’s pressing not ironing). After the demonstration and the talk with my friend I thought perhaps this rule wasn’t as necessary as my MIL had said … so I tried just pressing without setting my seam. It was not worth the time I saved! Setting my seam before pressing definitely helped ensure more accurate points and nicer looking seams. Now that I’ve spent two paragraphs rambling about setting seams do you want to know what I’m actually talking about? How to Set Your Seams  In this example I’m showing you how I set and press the seams of my half square triangle blocks.
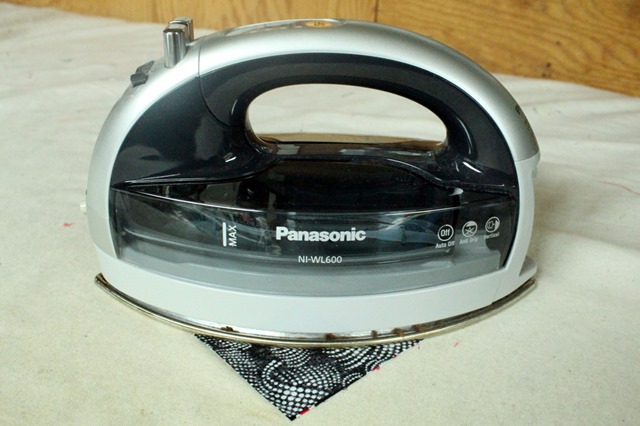
  Before I press the seam open, press them with a hot iron. You don’t have to do it for very long … just make sure it’s done. And that’s how you set a seam. Seriously – you just press the seam before you press the fabric open.
Why would you take the two seconds to do this?
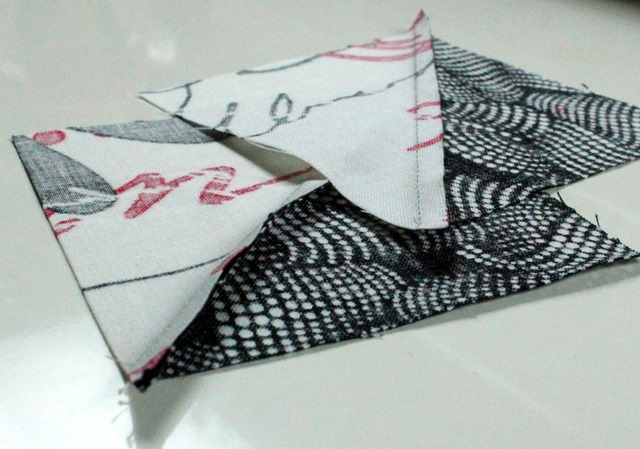
By setting the seam you are basically embedding the thread in the fabric. Then, when you press it open, it creates a nice sharp seam. It also helps make a more accurate measuring seam which leads to more accurate piecing.  I have to admit it was tough to get comparison pictures between a set seam and a non-set seam. Can you tell from the picture above which seam was set and which wasn’t? that’s right … the block on the bottom was not set … see how the seam is flopping out more than the seam of the HST on the top. In summary – if you don’t already set your seams … give it a try. It only takes 2 seconds!
  The Back to School Blog hop kicked off on September 1 and runs through the entire month, and little of October too as there’s just so much great info to share! Hop along with some of our industry’s pros to get tips and tricks for your quilting and sewing studio. Be sure to take a look back at the advice from earlier this month – there are some great tips!
- Sept 1: Peta Minerof-Bartos of PetaQuilts – So, Does that Diagonal Method for a Pieced Backing Really Work
- Sept 2: Cheryl Sleboda of Muppin.com – The Quilter’s Knot
- Sept 3: Teresa Coates of Crinkle Dreams – The Importance of Pressing
- Sept 4: Cath Hall of Wombat Quilts – Color Coding for Paper-piecing
- Sept 5: Sam Hunter of Hunter’s Design Studio – How to Calculate and Cut Bias Binding
- Sept 6: Melanie McNeil of Catbird Quilt Studio – Credit where Credit is Due
- Sept 7: Mandy Leins of Mandalei Quilts – How to Keep a Perfect 1/4” Seam Between Different Machines
- Sept 8: Rose Hughes of Rose Hughes – Fast Pieced Applique
- Sept 9: Megan Dougherty of The Bitchy Stitcher – The Care and Feeding of the Domestic Sewing Machine
- Sept 10: Lynn Krawczyk of Smudged Design Studio – Make a Mobile Art Kit
- Sept 11: Susan Beal of West Coast Crafty – Log Cabin 101
- Sept 12: Sarah Lawson of Sew Sweetness – Zipper Tips
- Sept 13: Jane Victoria of Jolly and Delilah – Matching Seams
- Sept 14: Jemelia Hilfiger of JemJam – Garment Making Tips and Tricks
- Sept 15: Ebony Love of LoveBug Studios – Curved Piecing Without Pins
- Sept 16: Misty Cole of Daily Design Wall – Types of Basting
- Sept 17: Kim Lapacek of Persimon Dreams – Setting your Seams
- Sept 18: Christina Cameli of A Few Scraps – Joining Quilted Pieces by Machine
- Sept 19: Bill Volckening of WonkyWorld – The Importance of Labels
- Sept 20: Jessica Darling of Jessica Darling – How to Make a Quilt Back
- Sept 21: Debbie Kleve Birkebile of Mountain Trail Quilt Treasures – Perfectly Sized No-Wave Quilt Borders
- Sept 22: Heather Kinion of Heather K is a Quilter – Baby Quilts for Baby Steps
- Sept 23: Michelle Freedman of Design Camp PDX – TNT: Thread, Needle, Tension
- Sept 24: Kathy Mathews of Chicago Now Quilting Sewing Creation – Button Holes
- Sept 25: Jane Shallala Davidson of Quilt Jane – Corner Triangle Methods
- Sept 27: Cristy Fincher of Purple Daisies Quilting – The Power of Glue Basting
- Sept 28: Catherine Redford of Catherine Redford – Change the Needle!
- Sept 29: Amalia Teresa Parra Morusiewicz of Fun From A to Z – French Knots, – ooh la la!
- Sept 30: Victoria Findlay Wolfe of Victoria Findlay Wolfe Quilts – How to Align Your Fabrics for Dog Ears
- October 1: Tracy Mooney of 3LittleBrds – Teaching Kiddos to Sew on a Sewing Machine
- October 2: Trish Frankland, guest posting on Persimon Dreams – The Straight Stitch Throat Plate
- October 3: Flaun Cline of I Plead Quilty – Lining Strips Up

YES. I learned to set my seams when I learned to garment sew, a long, long time ago, and carried it over to quilting. I don't think my muscles are capable of pressing a seam to the side without first setting it: my muscle memory won't allow it, LOL. If I've chain pieced, I set the seams before I cut the pieces apart. I even set the seams when I paper piece. Anything to help with that nice, sharp crease.
I set seams long before I knew why but it's such a dramatic help that I can't imagine not doing it.
You know I've only just started doing this in the past few months. I was watching something else and the person said "do this." Before that I'd never been told by anyone to do that. I do find it helps.
A simple reminder, but a good one. Michelle Freedman at Modern Domestic gave me lessons a few months back, and she had to remind me a lot to set my seams. Now I think I can remember. 🙂
What a great tip, so glad you posted this. Another great post on our blog hop!