It’s hard for me to believe that we’re at the twelfth and final month of the Dresden Neighborhood Sew Along. It has definitely been a challenge coming up with twelve different themes for the Neighborhoods – not because I couldn’t figure them out – but because there are just so many possibilities. I hope that you take this sew along and use it as inspiration for your next Dresden Neighborhood block – and be sure to share whatever you come up with me!
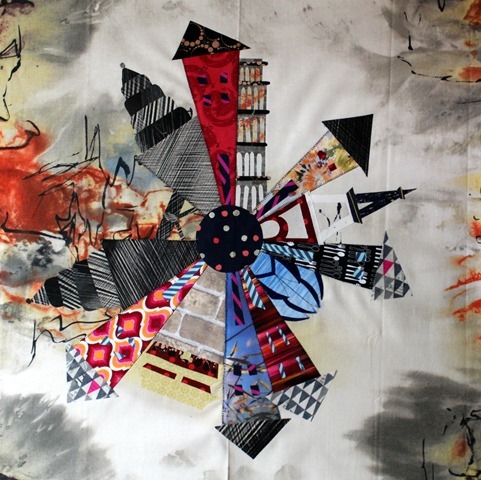
Today’s inspiration is “Around the World”.” I took iconic buildings from around the world and created special Dresden Wedge Templates for the buildings.
The buildings featured today are 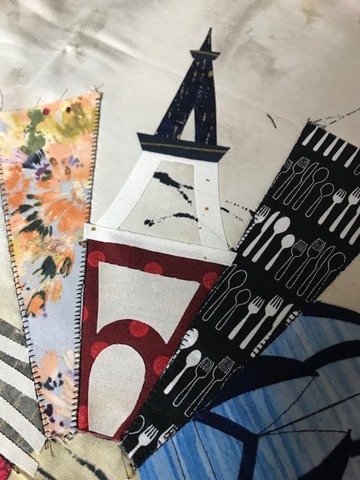 the Eiffel Tour,
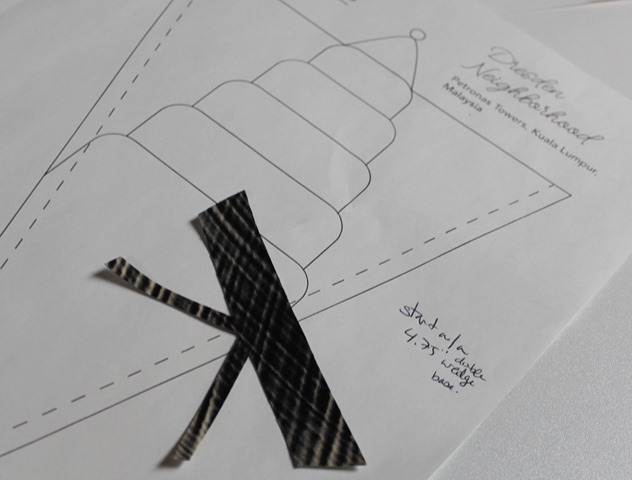
the Petronas Towers.
You can get your very own templates for these five special Around the World Dresden Wedge Templates on my craftsy page HERE.
Today I’ll show you some tips and tricks on how to fit these special wedges into your neighborhood. I’m not going to show you the whole process step by step though … that’s what the pattern you purchased is for. If you are confused with anything from your pattern though don’t hesitate to contact me with questions via email: lapaceksorchard {at} gmail {dot} com… I’m happy to help!
Each special building wedge is equivalent to TWO standard Dresden wedges. For example: if you decide to use one building wedge you would only need 18 regular Dresden wedges for the houses.
REMEMBER: 1 Double Wedge replaces 2 Regular Dresden Wedges
Supplies:
Dresden Neighborhood Pattern
Around the World Dresden Wedge Templates
optional:
Dresden Ruler
Double Wide Dresden Ruler
Heat N Bond Lite
Heat N Bond UltraHold
Super sharp scissors
Violet Craft Violet Seam Roller
Instructions for specialty wedges:
My special buildings were all created using the Double Wide Dresden ruler as a template.
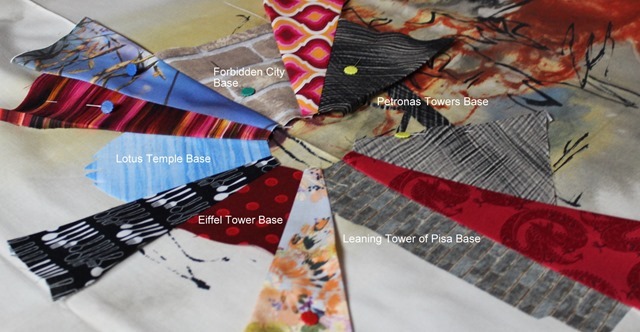
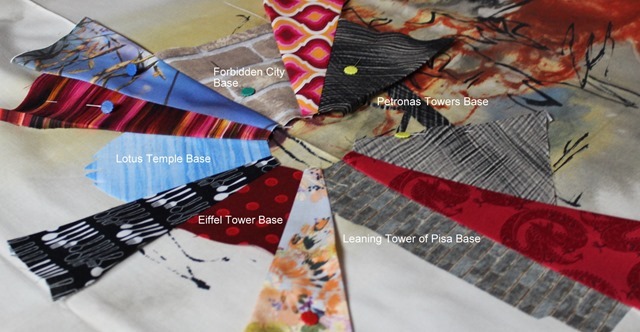
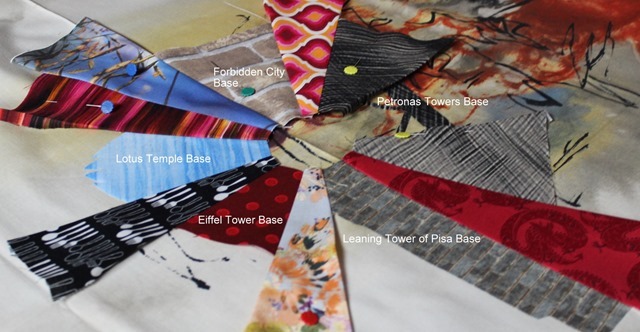
Before we can add all the details to each special building we have to build our Dresden Wedge. Each building is a double wide wedge so it accounts for two standard wedges. Time to do a little math to see how many regular houses are needed for this neighborhood.
Forbidden City – 2 regular wedges
Lotus Temple – 2 regular wedges
Eiffel Toer – 2 regular wedges
Leaning Tower of Pisa – 2 regular wedges
Petronas Towers; two buildings plus the bridge – 6 regular wedges
The special buildings consume 14 regular wedges meaning six standard houses will be needed to complete the Dresden Neighborhood circle. Follow the instructions in the Dresden Neighborhood pattern to create these six standard houses.
Lotus Temple
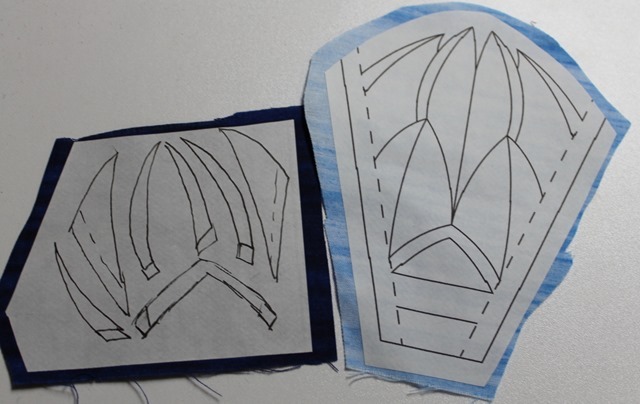
The shape of this Dresden Wedge building is unique and while you could trace it onto your fabric and cut it carefully out, I would recommend fusing this particular building to Heat N Bond Lite.
This is a situation where I’m really happy that ThermoWeb makes HeatNBond Ez-Print Lite sheets. Fusible paper that can go right into your inkjet printer and print the template exactly! This is much more accurate than tracing the details by hand.
Once the Dresden wedge is printed you can fuse it to the fabric you chose for the main portion of the building.
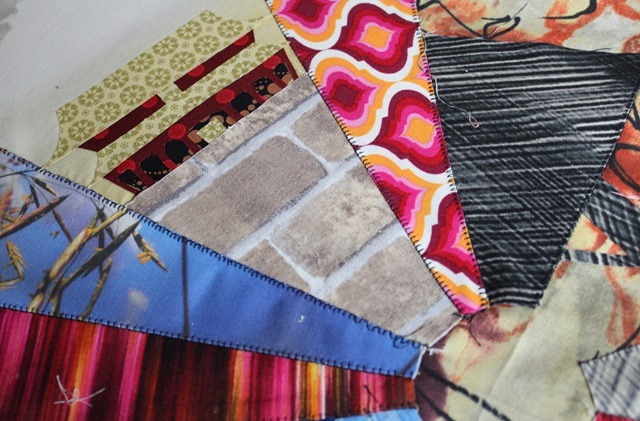
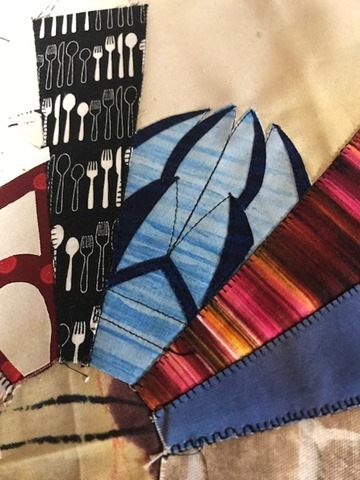
I decided to use a lighter blue for the base and then I traced the details of the building onto Heat N Bond Lite and fused it to a darker blue. To keep it extremely accurate, I used my Double Wide Dresden Ruler to cut out the bottom and sides of the church. I then carefully cut the rest of the details with a small, sharp scissors.
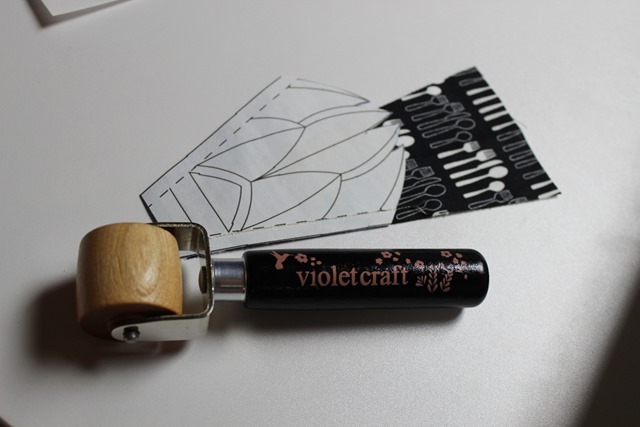 When you’re ready to sew the Lotus Temple wedge into the whole neighorhood plate feel free to leave the paper on. This helps guide the wedges through your sewing machine without needing a special foot or worrying about the fusible sticking. Once you have both sides of the plate sewn together simply peel the paper layer off just like you do when paper piecing. Because the Lotus Temple wedge has fusible on it, the seams cannot be pressed with an iron when adding it into the neighborhood. Instead I tried my new Violet Craft Violet Seam Roller. It allowed me to press the seam sharply without using the heat of an iron.
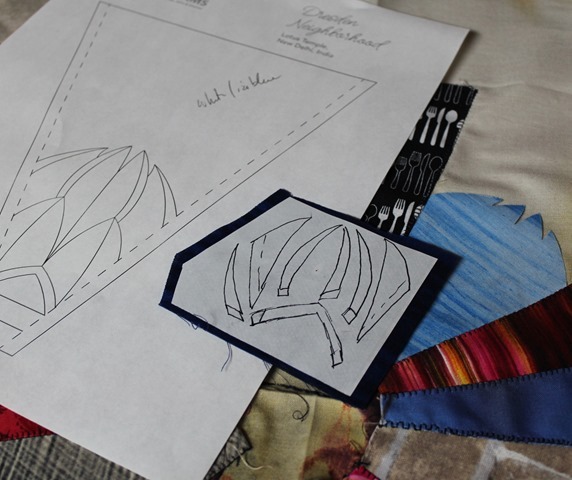 Don’t add the final details to any of the buildings until the entire Dresden circle is stitched onto the background fabric. Once the base of each building is secured (either stitched or fused) it will be time to add the details.
 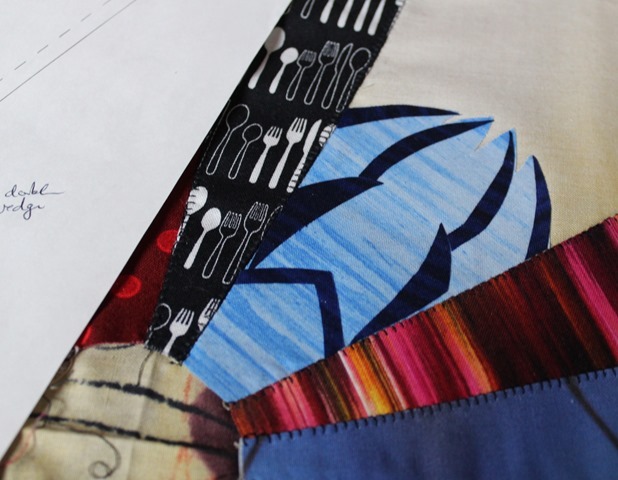 Carefully cut out the smaller pieces of the Lotus Temple and fuse them into place. Since this was done with Heat N Bond Lite they all need to be stitched down to secure them.
 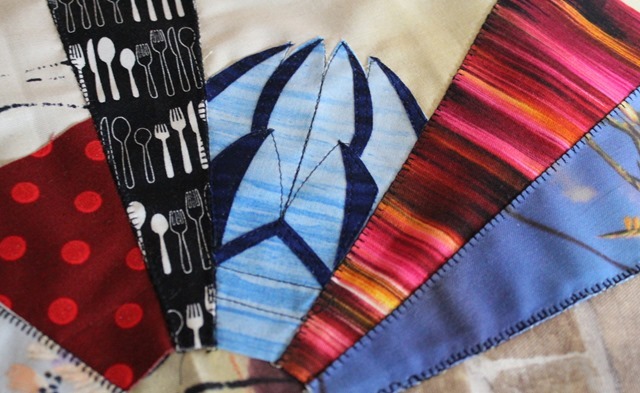 One could do this by hand but I decided to do a simple straight stitch around all the edges and to add the other details of the building.
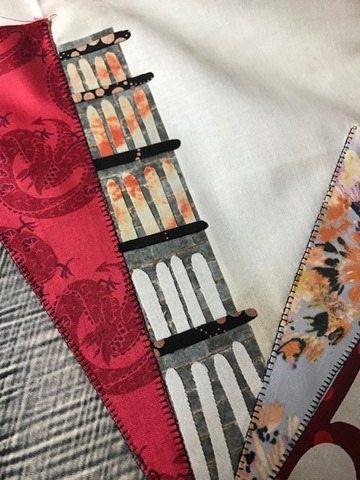
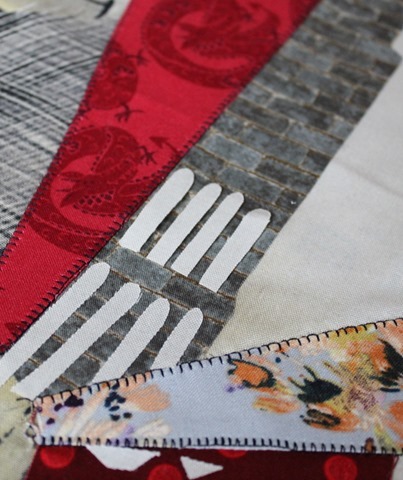
The Leaning Tower of Pisa
Once again – this is an odd shaped building that I recommend printing onto HeatNBond Ez-Print Lite sheets. 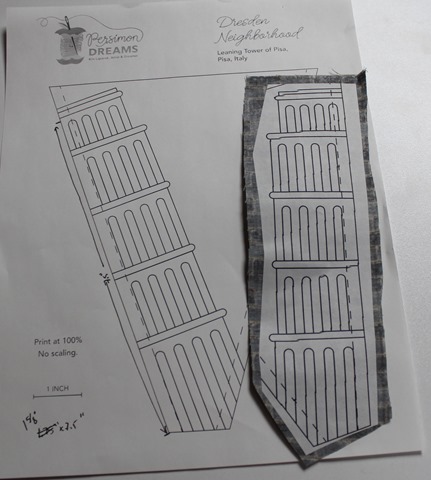 If you want your tower to lean to the left, print the sheet that shows it leaning right and vice versa (I included both options). Print a second copy of whichever side you chose to regular paper to use as tracing template.
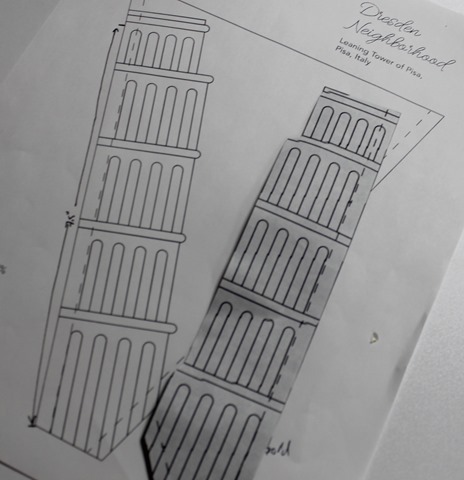 Cut the building out carefully on the two edges that will be sewn to other wedges. You don’t have to worry about cutting out the exact ledge details as we will fuse those bits on later in the process.
 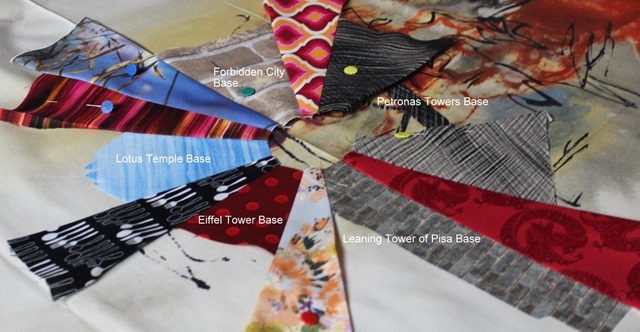 Follow the same process as you did with the Lotus Temple to stitch the Leaning Tower of Pisa to the rest of the blocks. Looking back, I wish I would have made the house adjacent to the tower shorter than the tower instead of taller. I just think it would have made the whole “leaning” thing pop a bit more.
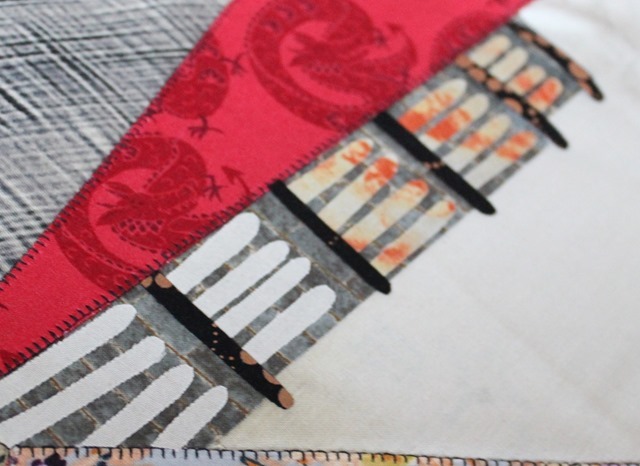
Trace each of the “door” elements onto fusible. I did this two rows at a time. I didn’t want to do it all at once since they are pretty small pieces. 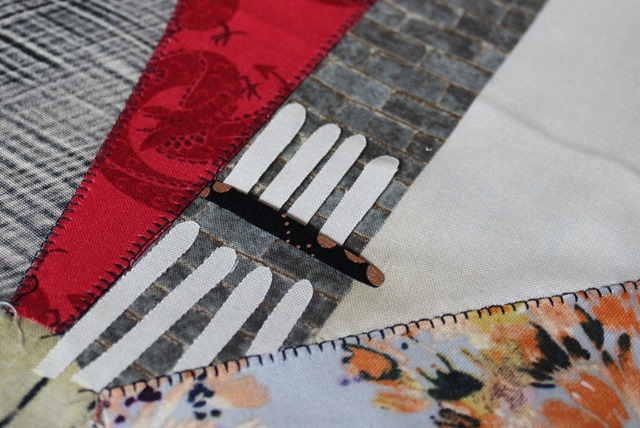 I found that two rows worked well since then I could adjust the height as needed for the ledge bits.
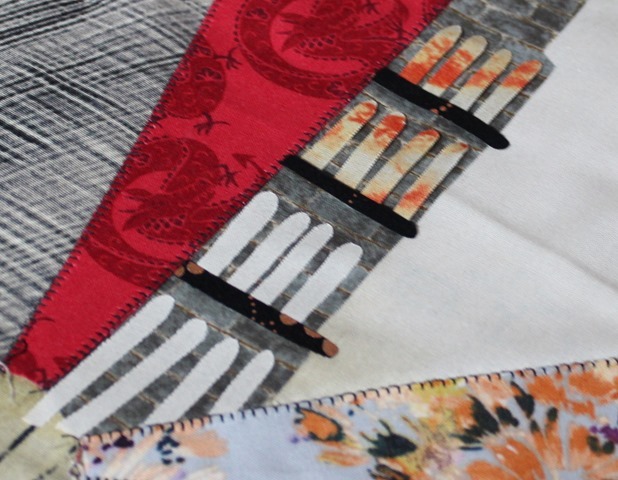
Before I knew it the entire Leaning Tower of Pisa had all of it’s fun details.
Because these are smaller pieces I did chose to fuse them onto Heat N Bond Ultra Hold Fusible. This allows me to only have to iron them in place and I don’t have to go back and stitch anything down. It definitely saves me a lot of time doing this with the smaller pieces.
The Eiffel Tower
This template is going to be a combination of piecing and raw edge applique. The base of the structure can actually just be a solid wedge. 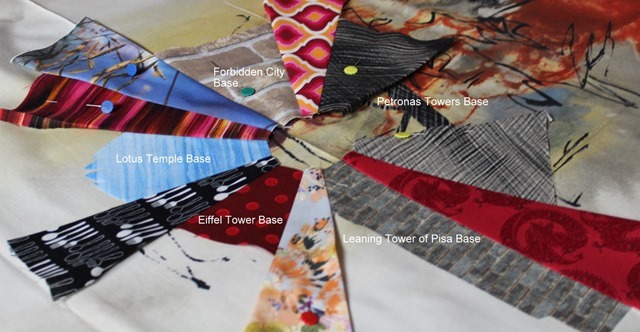
Start with a 3” wedge of fabric cut from the double wide dresden ruler. I chose to mimic the Eiffel Tower when it’s lit up in Red, White and Blue so my base is red. 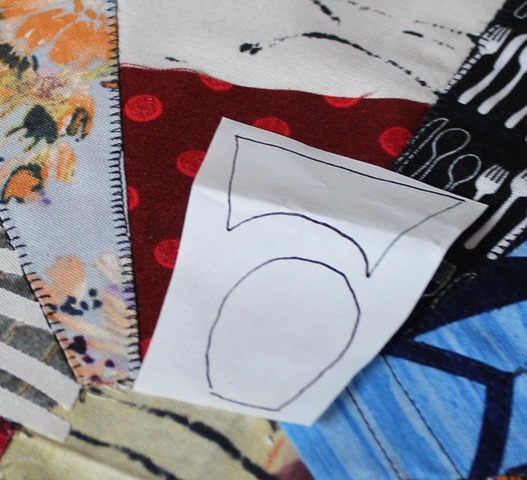 I traced the negative space of the tower base onto Heat N Bond lite and fused it to the same fabric I used as the background of this particular neighborhood.
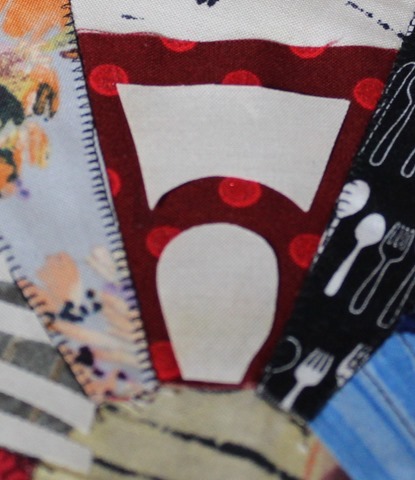
I felt this was easier than cutting out all those curvy details.
The remainder of the tower was traced onto fusible, fused to the fabrics I chose, and then fused onto the piece. 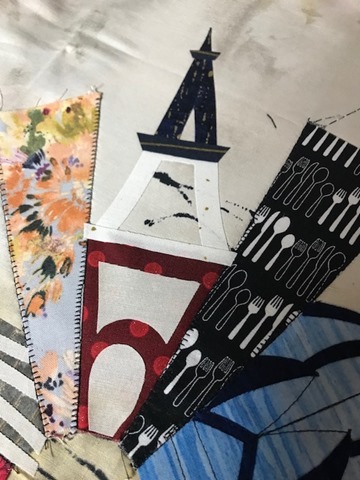
I will need to stich all this down with either my machine or by hand before putting the final quilt together since it was done with Heat N Bond Lite.
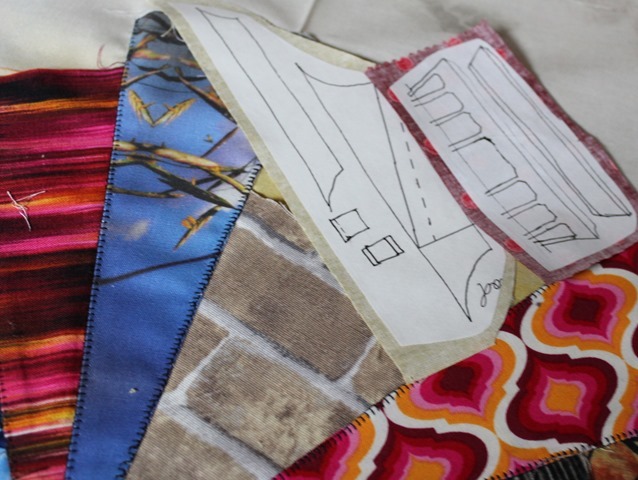
The Forbidden City
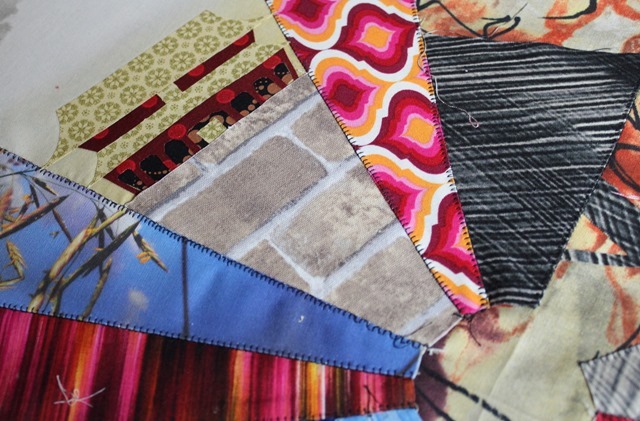
Hold the space for the Forbidden City with a 4.75” double wedge base.
I wanted the roofs of my Forbidden City to be gold and the columns to be red. 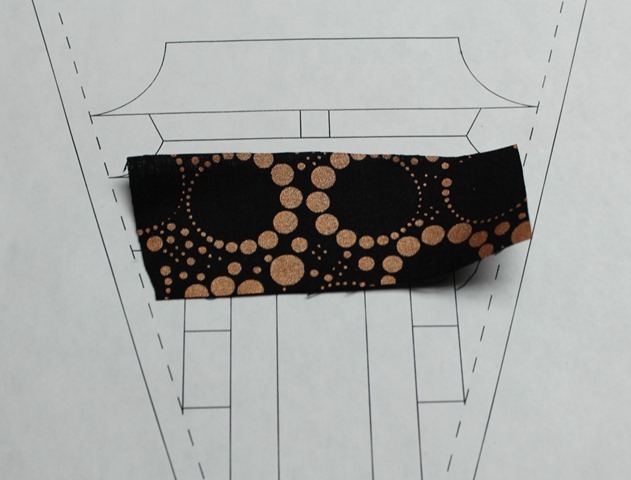 I realized that columns of the Forbidden city don’t go all the way through just to air so I also traced a shape to go behind the lower columns.
I’ll be adding details to the stairs and building with stitching … I’m still not sure if it will be by hand or with a machine. I’ll keep you posted!
The Petronas Towers
The base of the Petronas Towers should be made using two 4.75” double wide wedges.
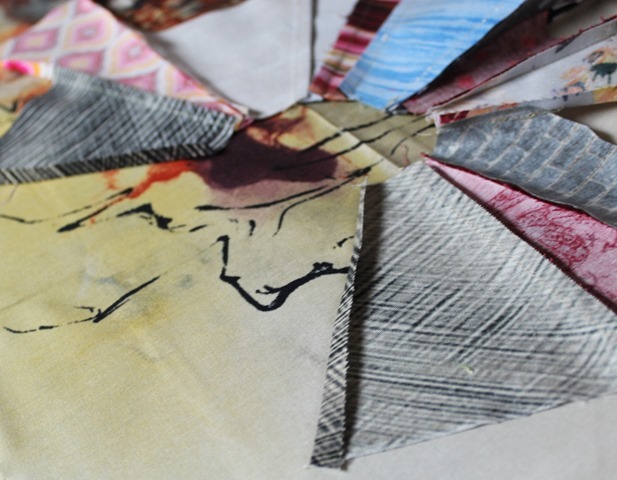 For the first time ever I won’t be sewing my Dresden Neighborhood into a complete circle. Because of this, press the long edge of the double wide Petronas Tower plates under 1/4-inch.
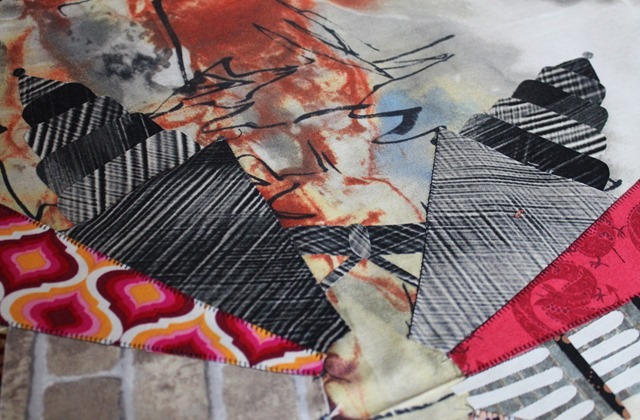
Trace the bridge of the Petronas Towers onto fusible and fuse them between the two buildings so they go under the edges just a bit.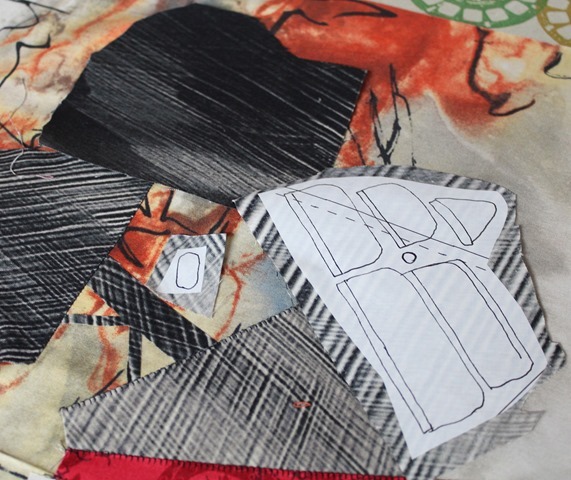
Trace the Petronas Towers levels onto fusible and fuse them to the corresponding fabric. I used an ombre black fabric and fused onto two different tones of the fabric. 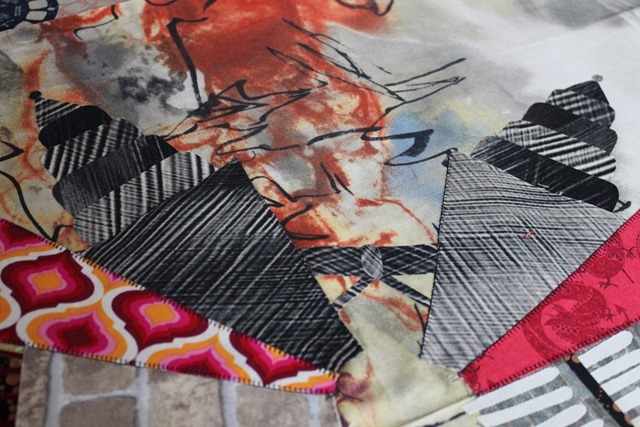 When I fused the towers into place I alternated the tones as I built the towers upwards. I will need to stich the edges of the towers since I did use a lite fusible for these details.
I know this seemed a bit intense. It was probably the most detailed neighborhood I constructed this year. The whole thing really did go together faster than I thought. If it seems too much for you – feel free to just use one or two or three of the buildings! It’s definitely not necessary to add them all to one neighborhood!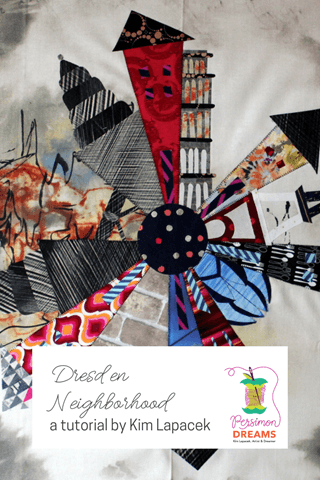
Now it’s your turn! Let’s see what you come up with for your Dresden Neighborhood for the #DresdenNeighborhoodSAL! Feel free to share photos in my facebook group “Quilt and Dream Along with Kim Lapacek”, post to instagram with the hashtag #DresdenNeighborhoodSAL. If you’re not feeling this months theme – feel free to use whatever theme/idea you have!
PREVIOUS NEIGHBORHOOD THEMES:
- Month 1: Hometown Proud
- Month 2: College Nights
- Month 3: Prism Dreams
- Month 4: Striped Sensation
- Month 5: Architectural Elements
- Month 6: Upcycled Fun
- Month 7: Liberty and Linen
- Month 8: Black and White – Kim Style
- Month 9: Solids
- Month 10: Halloween Night
- Month 11: 20 Days of Christmas
Leave a Reply