It’s no secret that I have a lot on my plate right now. But I just couldn’t not participate in Project QUILTING because of everything else going on right now. I mean … I’m the one preaching that you can always find some time to quilt … even if it’s a small piece. So … that’s what I did – a very small piece. I also figured out how to make my project fit TWO other tasks I needed to do! Let’s look at what I had to accomplish with this quilt.
- Project QUILTING Confetti themed challenge
- Homework for a design class called ‘Illusion of Space/Depth’
- Circle Challenge for my local quilt guild.
Here is my piece … ‘Orbital Eclipse’  Size: 17” x 17” In the very first season of Project QUILTING Ebony Love made the most amazing quilt ever using fabric shreds and tulle! I have wanted to try that technique ever since then. The ‘Confetti’ themed challenge was telling me it was finally time!
 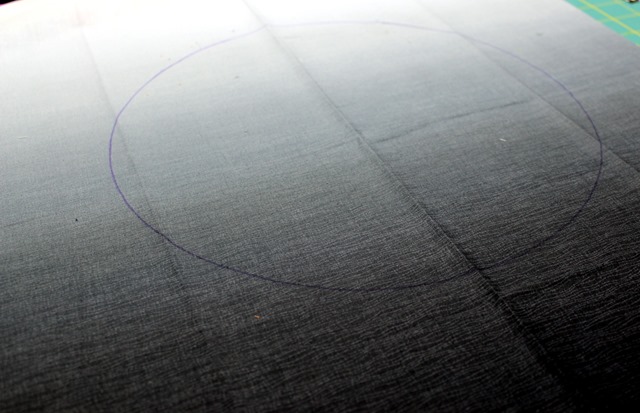 I cheated a bit on the whole ‘illusion of depth homework’. I chose an ombre print for my background … always helps create a little depth. I traced a hat box (circle – guild challenge accomplished!) approximately in the center of the fabric. I used a regular marker. I figured I’d cover it up with the next steps and worse case scenario I could do some fancy stitching. Have I mentioned yet I started this around 9:30pm on Friday after everyone in my house was sleeping?
  For the next step I pulled out my bin of hand-dyed fabric scraps. I chose hand-dyes because they are the same color on both sides. I wouldn’t have to even think about the right and wrong sides of my fabric. I also found this fun stretchy sequin-y fabric I had used in some tutu projects for the girls. I had it in silver/silver and black/gold. I threw bits of the silver in with my lighter colors and the black/gold in with the darker colors. Now when I pulled the hand-dyes for chopping into tiny bits of confetti I wasn’t really looking at color. I was squinting my eyes a lot and trying to think value. The value’s of the colors were what would create my illusion of depth.
  Before I started putting the fabric confetti into the circle on my fabric, I made a quilt sandwhich and put it on my sewing table. Once these little bits were on I didn’t want to have to move it too far to get started on the quilting. It helped a lot that this project was small!
  Once I had the values in the spots I wanted them it was time for the next step. I had never seen this done before … I had just read about it online or had a person tell me about it (well … both actually). I layered tulle over the top of my fabric confetti. I happened to have pink or purple tulle to choose from … I went with purple.
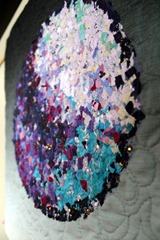 At this pointed a quilted the crap out of my circle of fabric confetti. I started in the middle and then moved to the outside. Then I went back through and did it all over again … and I did that at least one more time. I used invisible thread so you see the texture but not the stitches. Once I had the confetti secure I trimmed the excess tulle off. I proceeded to free motion quilt the rest of the piece. For the binding I decided to use the facing method. I didn’t feel like you really needed to see the binding in the front of this piece at all.
 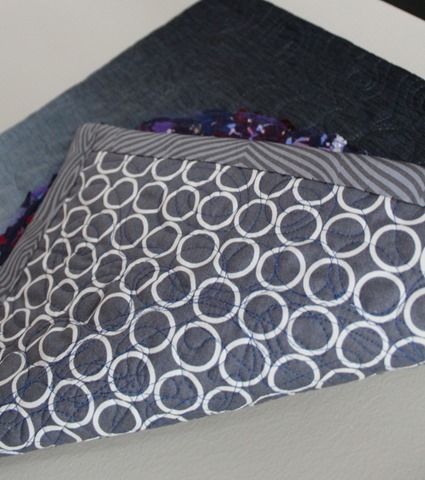 You can see here how the quilting in the circle got a bit crazy!
  I’m so unbelievably happy with how this turned out! And really … it took me only about 2-3 hours from start to finish (I bound while I chatted with a friend). And … let’s do a quick value check by making the quilt black and white …
 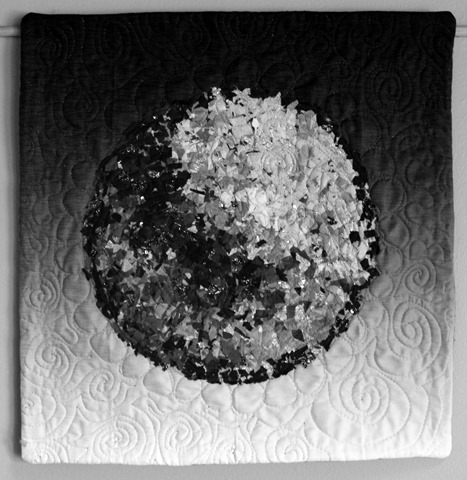 Yup! I’m pretty sure I can check all three challenges off my list! Be sure to check out all the other great quilts made for the ‘Confetti’ Project QUILTING Challenge by clicking HERE and scrolling to the bottom of the post.

I love it! And you know me I love fitting a challenge to other needs. This weeks I fit it to a birthday present I needed, fabric I wanted to use up, and a technique I am addicted to. And its completely done before Sunday!
That is gorgeous!! I wanted to try something like this, now I have to find some tulle!
LVOE it!!!
I love it! It's so cute!!
Even though I just finished my first challenge here using a similar method, you've taught me something new already! I didn't think to just position the bits and overlay the tulle. I wonder if it would help to spray the tulle with a bit of 505 also? I never thought of using invisible thread or the aspect of hand dyed fabrics, though both of those things are in my everyday vocabulary. You've offered me so many ideas, and even though I was thinking I probably wouldn't do another one soon–it was definitely a challenge, remember, I may have to. So many new ideas all of a sudden! Thanks for scratching my brain this morning.
Julie @ Pink Doxies
Absolutely gorgeous!! It just glows!!
I love it!
I love it!
I love it when one project kills 2 birds or in your case 3 quilty projects!
Well done.
This is lovely. A confetti quilt like you have made is definitely in my future.