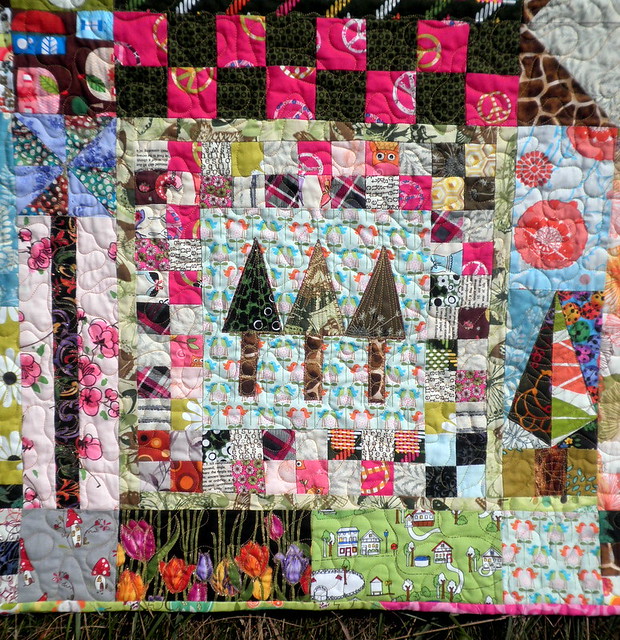
I’ll admit – I’m not sure how this sashing tutorial will go. I’ve actually been putting off showing this to you as long as I can. With that being said – if you have any problems at all – the templates don’t print right, my instructions are really confusing, you just don’t know what I’m trying to tell you to do please do not hesitate to leave me a comment! This is a great opportunity for me to improve my tutorial skills and I’m here to help you through it (like you’re here to help me through it too). 
We’re going to be paper piecing for the next three sashings. It’s a really simple paper pieced pattern but it may be a bit tricky for me to explain it to you.
The very first thing I need you to do is go to this link: Compass Tree PDF Pattern for Paper Piecing and print out the pdf I made for you. To check if you printed the sheet out to the proper scale the top two templates should measure 3.5” wide. The template on the left should measure to 5.5”.
 I’m going to show you the step by step process using the template in the upper left – measuring 3.5” by 5.5”. (If you’ve never paper pieced before I would check out THIS TUTORIAL and practice a little first on something super simple).
Cutting Instructions:
True North Tree
For triangle (1): Cut one ‘light’ 2.5” x 6”, cut one ‘dark’ 2.5” x 6”
For Triangle (2): Cut one ‘light’ 3” x 1.5”, cut one ‘dark’ 3” x 21.5”
For Triangle (3): Cut two blue fabrics – 5” x 2”
Trunk
1 – 2.5” x 1.5” in Brown
2 – 2.5” x 1.5” in Green (contrasting with greens you chose for your tree)
Sky
1 – 3.5” x 5.5” in Blue
 I chose two different ‘green’ fabrics – one darker and one lighter one. I placed them right sides together along the line between the two triangles labeled (1).
  Making sure that one of the sides had a 1/4” overlap to the other I sewed along the line. You can see my stitches in the picture above.
  Next, I folded over the paper along the line between the (1) triangle and the (2) tringle. Using my ‘Add-A-Quarter’ Ruler (a must for paper piecing)
  I trimmed the corners of both of my green fabrics.
  You can see what I’m left with here.
  Following the same method as before, I chose a ‘light’ fabric to sew to the ‘dark green’ fabric I used in the first step. Once I had the piece sewn on I pressed it open and trimmed it per the template.
  For the other side I sewed a ‘dark’ piece to the light green I had chosen in the first step. A gain – I sewed, pressed and trimmed.
  Next, I folded back the paper on the line between triangles 1 and 3. Using my ‘Add-A-Quarter’ Ruler I cut the lines for the final triangles to be added.
  Once I had my triangles 1 trimmed down appropriately is was easy to add on the blue triangles and paper piece them on. Trim the rectangle up and we now have our main ‘True North Tree’ Piece. The rest of this sashing goes together easily.
Take your brown trunk fabric and sew one strip of green fabric to either side. Press toward the brown. Sew this strip to the bottom of your true north tree. Press towards the trunk strip.
Finally take your ‘sky’ strip and sew to the top of the True North Tree. Press towards the sky.
True North Tree Sashing shown to the right of the accuquilt home bonus block.
I’ll be posting the next two tree sashings asap!
Again – don’t hesitate to ask for clearer instructions!


Leave a Reply