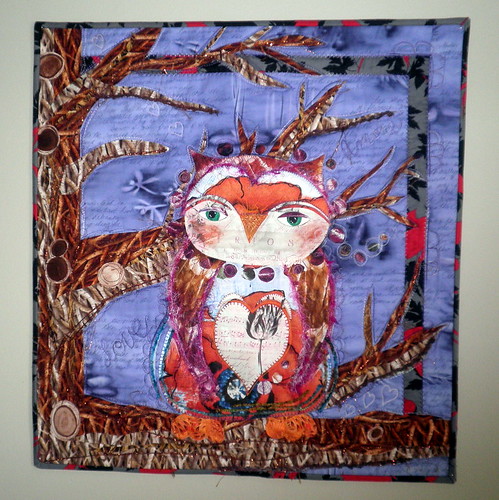
 I actually have made lots of quilts in the last year so it was difficult for me to figure out exactly which one to share. I finally decided on my quilt, ‘Owl Be Yours’ that I created for the ‘Be My Valentine’ Project QUILTING Challenge. As I’m looking back on these post’s Amy was actually the guest judge for this challenge too – I hadn’t realized that when I decided that this would be my quilt for the festival!
  The Story Behind the Quilt: The day before this challenge was posted I had taken a class called – ‘How to Paint an Owl’ with Juliette Crane which turned out to be the perfect inspiration! My piece is called ‘Owl Be Yours’. Here’s a quick and dirty breakdown on how it all came together. Step 1: Pieced the main background fabric AND the border strips. Step 2: Fusing, Fusing Fusing! I fused all the branches and each separate piece of the owl onto the fabric. Step 3: I then took a piece of fusible fleece and did the outline quilting of the owl. I cut it out for the ‘trapunto’ technique. ***FIRST time doing trapunto***
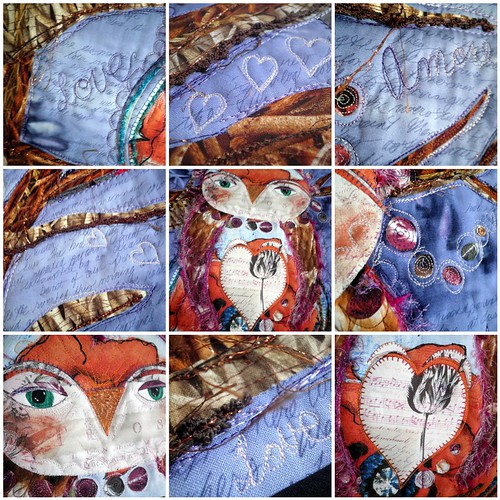
 Step 4: Free Motion Quilting. I did LOTS and LOTS of free motion quilting on this piece. To create more texture in the branches, throughout the owl, I did an awkward, not perfect outline of the branches with variegated purple thread to create a ‘windy’ look, fun whimsical half circles all around the owl, feathers on the owls head and wings, hearts, the word’s ‘Love’ and ‘Amore’ in the wind…the more you look…the more details you would see. Step 5: What’s a project without a little fiber? I appliquéd fun fiber onto the branches and the owl. The owl fiber was meant to give you the feeling of feathers and to create some distinction between the tree and the owl. Step 6: Oil Pastels, I used some of my oil pastels to create some shine on the beak and the feathers. I also used some bronzer to give the owl some flushed cheeks. Step 7: Three small white dots were painted in each pupil – to help make them look more realistic. Did I mention – of course my owl is pregnant! (We just welcomed our new baby girl, Persimoni Mae, into this world about 3 weeks ago so it was fitting to have a prego owl in February) Approximate Dimensions: 22.5" x 24" There are a lot of ‘step by step’ photo’s on my flickr site.
  Don’t miss out on all the rest of the fun and amazing quilt entries in the Spring 2011 Blogger’s Quilt Festival!

KimLapacek.com | Home of Persimon Dreams and Project QUILTING
Quilt designer, teacher, artist, dreamer
Hi, I love it. It is so unusual, the little owl almost looks alive. It looks like it was great fun making it. Thanks for sharing
This is terrific. I clicked on your quilt, because you are the one right after me–and I know those earlier quilts get all the comments. What a fun treat to see this owl and all the interesting techniques that really enhance the quilt. I'm always drawn to these types of quilts–one that move my creative impulse beyond the grid (although I DO love the grid), so thanks for posting this for us!
Elizabeth E. #508
http://occasionalpiece.wordpress.com
Love your owl quilt looks really fun to make. Happy Stitching. Chris
The tree is very lifelike and textured well with all those holes and such!! I like the owl's eyes as well.
I know it is a whole quilt, but the owl just grabs my attention.
Oh, wow! You are so creative. I really love seeing quilts that are unique and incorporate so many different techniques. I appreciate you saying how you did them, too. Congratulations on a beautiful quilt. And double congratulations on a new baby!