Looking back, I probably should have done this step by step post a few weeks ago and I apologize for those who were confused when trying to link up to the Project QUILTING Challenge. Please remember though if you ever have any problems you can always email me your projects picture and description and I’d be happy to link up for you … lapaceksorchard {at} gmail {dot} com. I’m going to walk you through a Link Up I have set up for on my ‘Time to Reorganize’ post. I use the app inlinkz for my link ups. At the bottom of the post you will find the link up. 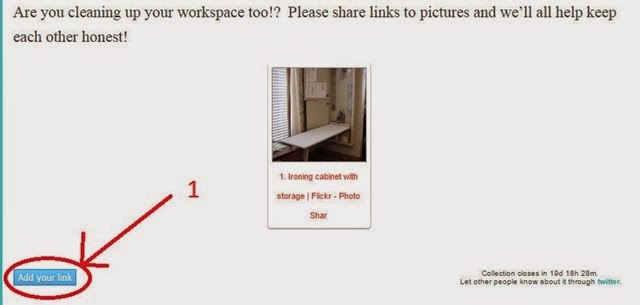 1. Click on the blue button ‘Add your link’ to start linking up your projects!
 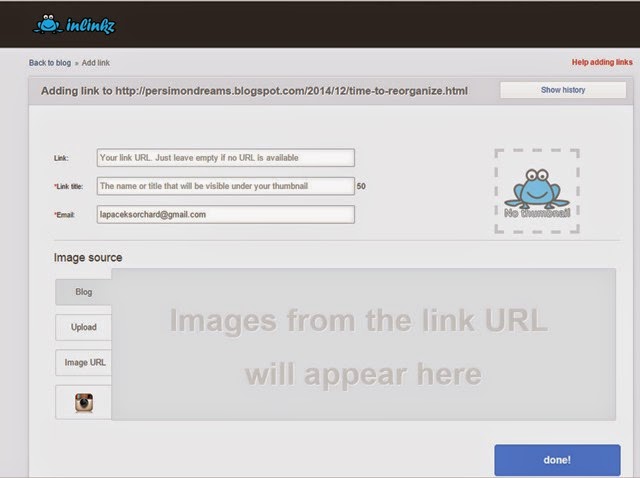 The page that comes up will look like this. Now you are going to add in the link the url your picture can be found at … this could be a blog, flickr image, or even a facebook image (make sure your picture is set to public so everyone can see it if you choose to go the facebook route).
  2. To add the link – go to the page you want to link to. Copy the url at the top of the page as circled in the image.
 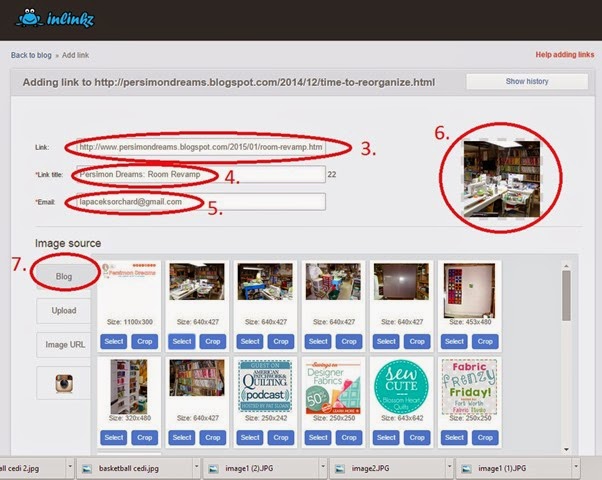 3. Paste that link into the ‘Link’ space. 4. ‘Link Title’ is where you can name your link – choose something you think will catch people’s attention and make them want to click on it. 5. This is where you put your email. This won’t be shared with anyone. 6. In the space you can see a preview of what the image for the link up will look like when you are finished. Image Source. There are a few different ways to get the image you want … 7. Blog – this is where you’ll pick which picture will show up on the link up from your blog or flickr site. You can also crop the image if you’d like by clicking on the blue ‘crop’ button under the image of your choice.
 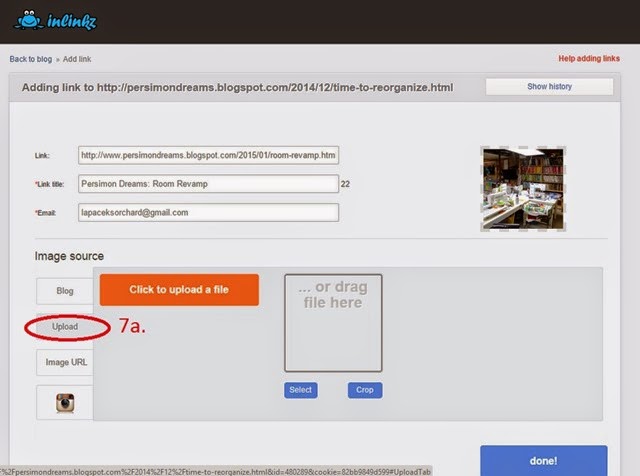 7a. Here you can upload a file directly to the link up. You still need a link so I don’t think this is the best option for Project QUILTING.
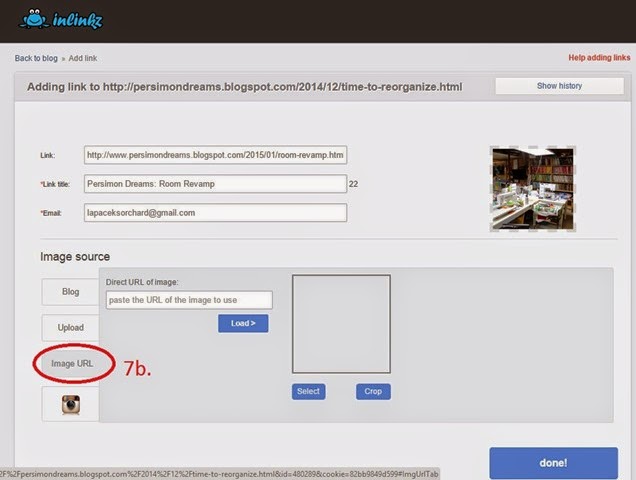 7b. If your image is hosted somewhere online you can grab the link that brings the person directly to the image. This also isn’t my favorite option as there is not description or story that can be shown at the same time but it does work if you need it to.
 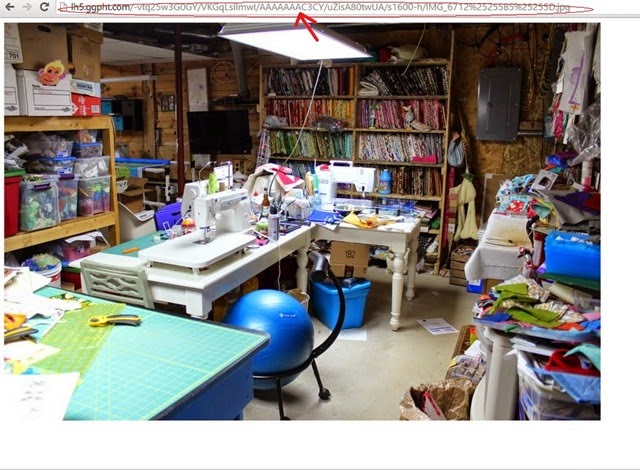 Here is my image online and I would just copy and paste that particular url circled for this image to show up on my link up.
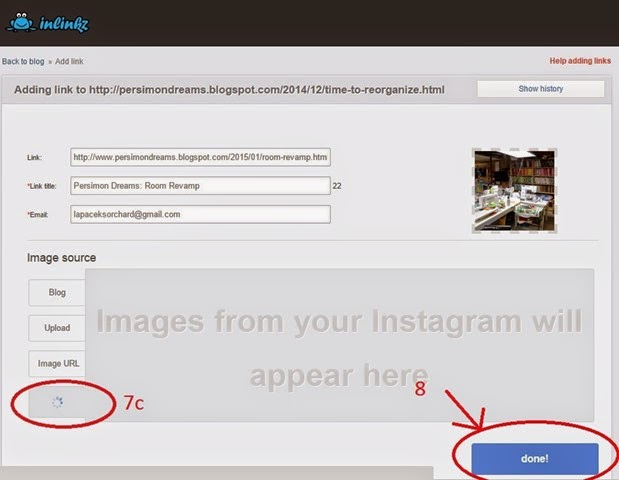 7c. Instagram. You can also link directly from an instagram picture. I think this WOULD work well for Project QUILTING as you can still have a discription of your project on your instagram picture. You will need to check your privacy settings though – you want everyone to be able to see your image when they are trying to vote. 8. When you link, link title, image and preview image all look good – click on the blue ‘done’ button.
 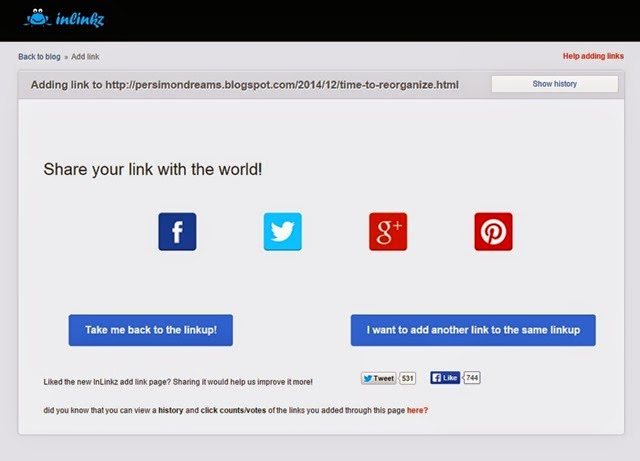 This is the page you’ll see once you’re all linked up! You can share you link via facebook, twitter, google+ or pinterest OR you can go back to the linkup OR you can add another link to the same linkup. Choose whichever option you’d like – I typically go back to the linkup and check that my link up is either already there or in the process of linking up (it sometimes takes a few minutes). I hope this little step by step tutorial helps you out a little bit … Oh one more thing!
 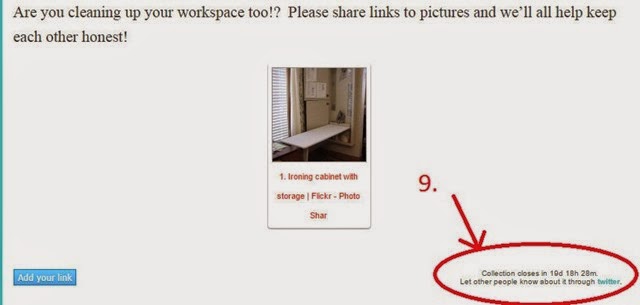 9. If the time zone issues are confusing you (trust me you wouldn’t be alone – I called it ‘Wisconsin-time’ on Sewing with Nancy!) you can always check the link up to see when the collection is about to close. It’s in the lower right corner of the link up. Okay – with that – let me know if you have any other questions I can help clarify before the next challenge – which will be posted on Sunday, January 18th. Don’t forget to vote for the current challenge HERE.

KimLapacek.com | Home of Persimon Dreams and Project QUILTING
Quilt designer, teacher, artist, dreamer
THANKS FOR SHARING!
msstitcher1214@gmail.com
Sherriwarner55@gmail.com
Would love to join your QAL
THANK YOU