Happy Wednesday! It’s time for another block tutorial for the 52 Twisted Traditional Block Quilt Along! I wrote this out on Tuesday night (yup – ahead of time for once) because today is a big day!
 Capri graduates from Kindergarten today! It’s so crazy how time truly does fly by. And everyone tells you that your kids are going to be grown before you know it. When you’re living in the moment it doesn’t feel that way but then you look back and you remember your little baby who six years ago was just starting to crawl and it hits you – time does fly by. It’s bittersweet. I’m sad she’s no longer a little girl. I’m proud of who she’s becoming. I’m scared that I’ll fail guiding her on the path to happiness and success. But most of all – I’m excited for her to discover all that life has left to offer her!
Okay – enough of that…I’ll be sure to post some pictures of her at graduation later…
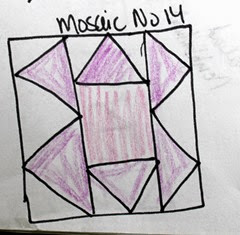
Today’s block was inspired by the traditional block ‘Mosaic No 14’. I was going to do a different block today…but on Saturday morning, right before we had a bunch of ladies over for a fabric dyeing class we discovered a snapping turtle in our front yard!
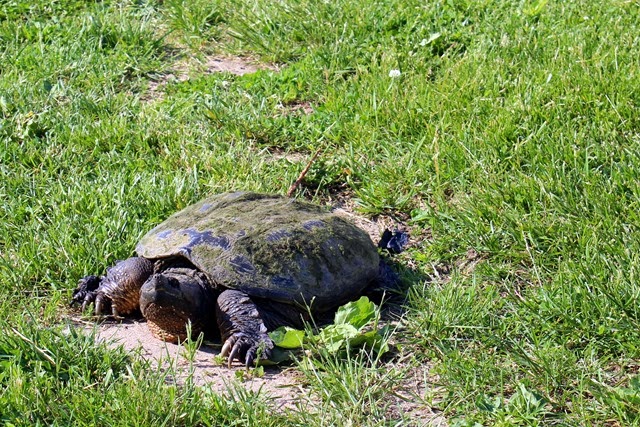
We had to get it in the back of my husband’s truck so he could bring it back to the swamp just a block away. He had me hold a piece of wood under it’s butt so he didn’t hurt it’s feet as he was using a shovel to get it into the truck. That turtle was mean and FAST! Wow – I’ve never seen one actually snap before and let me tell you – I squealed when I saw it! It was quite the scene and I’m pretty sure Diane and Jared couldn’t believe that I actually consider myself a farm girl after watching me with that turtle!
Mosaic Turtle Block Tutorial for
52 Twisted Traditional Block Quilt Along
Finished Block Size – 6” x 6”
I twisted the traditional block – Mosaic No 14 into a turtle for this block! Have fun!
Cutting Instructions

Shell (darker green)
1 -3.5” x 3.5” square
Extremities (lime green)
6 – 3.5” x 2.0” rectangle
Background (neutral print)
8 – 2” squares
4 – 3” squares
Eyes
Small scrap (1/2” x 1”) of darker fabric with Heat N Bond ultra fusible to match
Directions
Let’s start out by making four flying geese blocks.
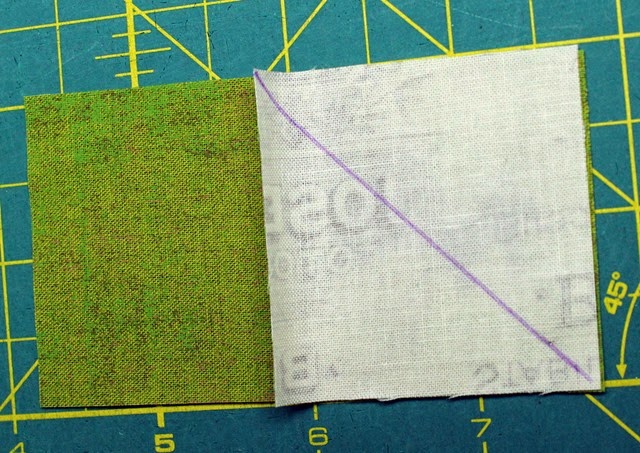
Draw a diagonal with a washable marker from one corner to the other on the wrong side of a 2.0” square of the background fabric. Lay it right sides together with a rectangle as shown above.
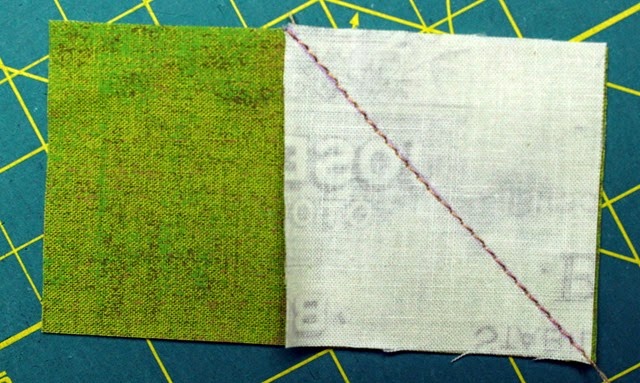
Stitch along the line you drew.
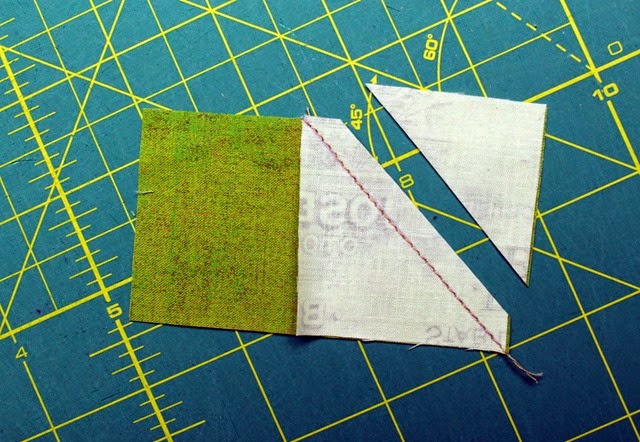
Trim off the excess triangle.
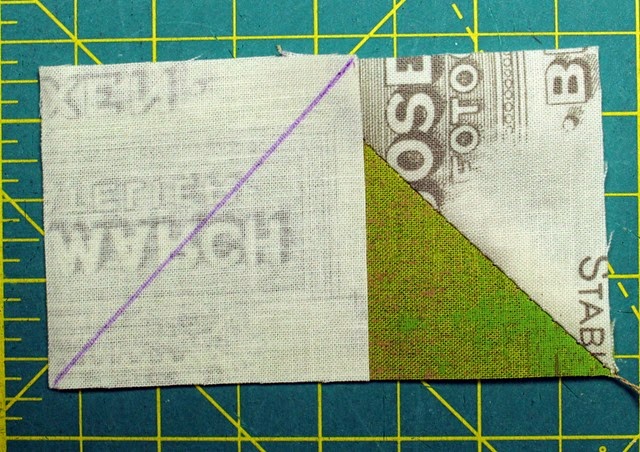
Iron towards the background fabric and repeat on the other side.
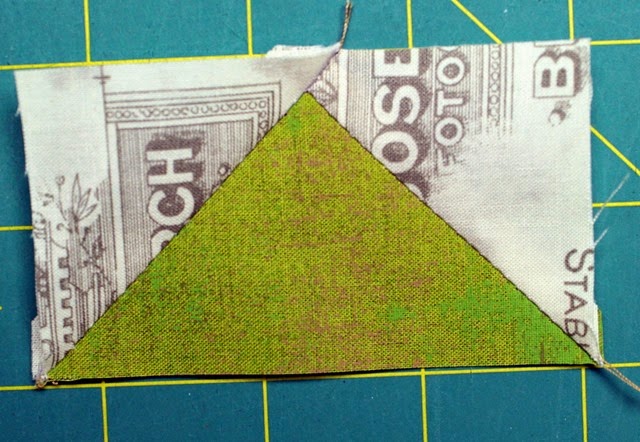
Make four flying geese blocks – 3.5” x 2.0”
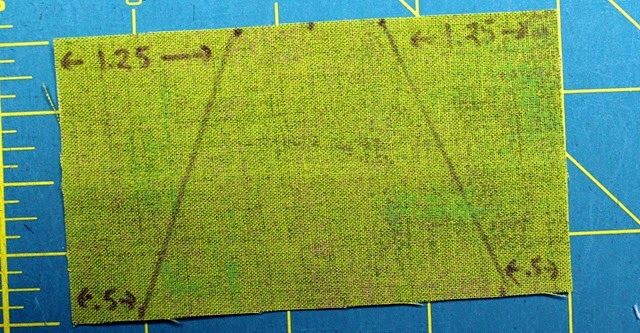
To make the tail for the turtle we’re going to draw on our rectangles and create a template for where we want to stitch. Use a washable fabric pen for this.
First. Measure 1.25” from both of the top sides of the rectangle inwards – put a dot there.
Next. Measure 0.5” from both of the bottom sides of the rectangles inwards – put a dot there.
Draw the line and match the dots.
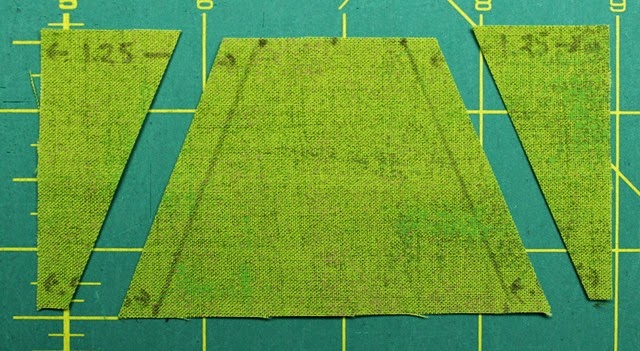
With your ruler cut a ¼” from the line you drew as shown in the picture.
.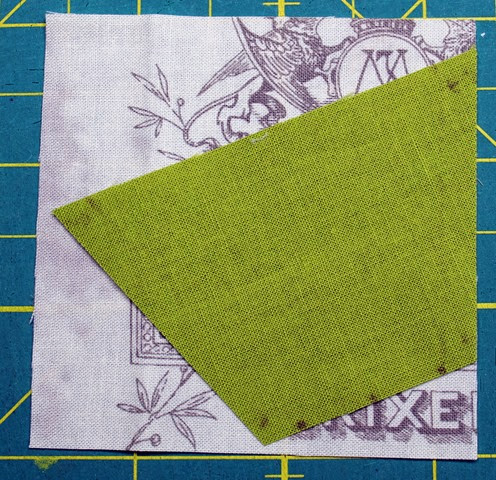
Center up a 3.0” background square on your new edge and stitch down.
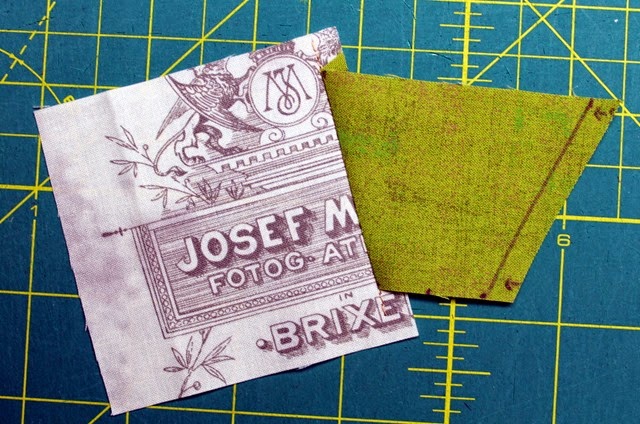
Iron towards the background square.
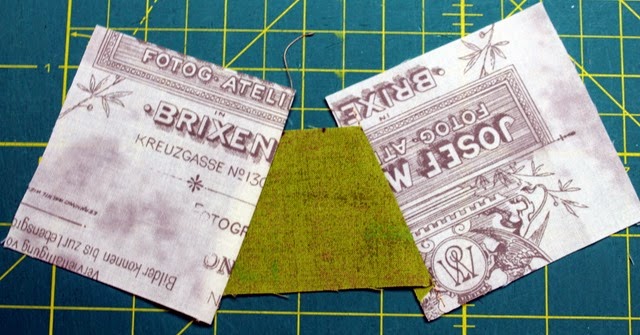
Repeat on the other side.
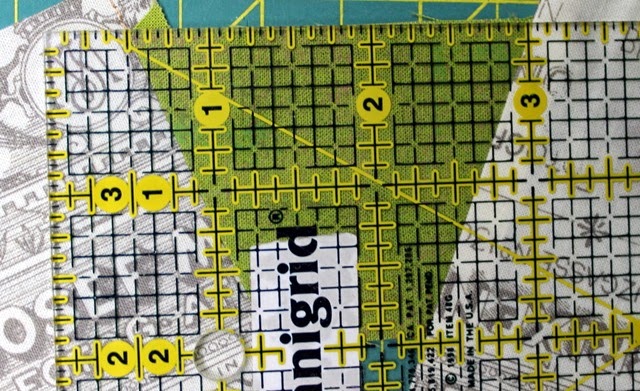
Line up your ruler so you can trim your rectangle to 3.5” by 2.0”.
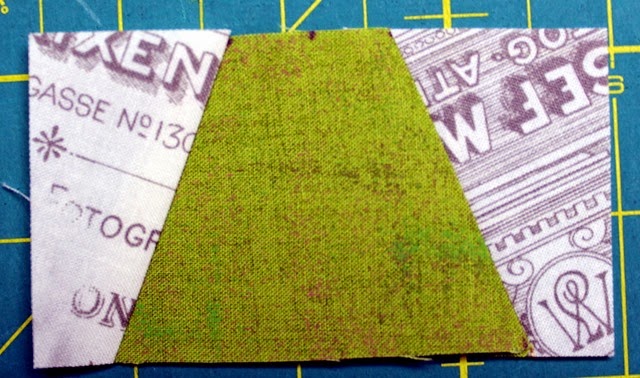
You now have a modified flying geese block.
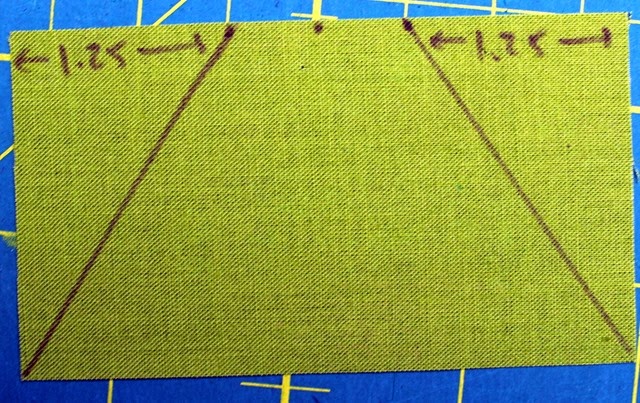
For the next modified geese block –measure 1.25” from the two top corners inwards and draw a dot. Now connect that with the corner of your rectangle.
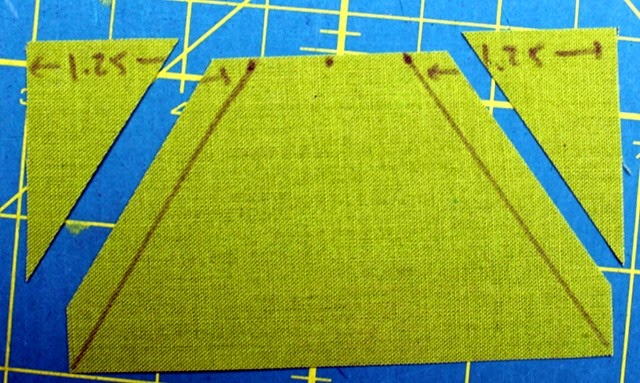
With your ruler cut a ¼” from the line you drew as shown in the picture.
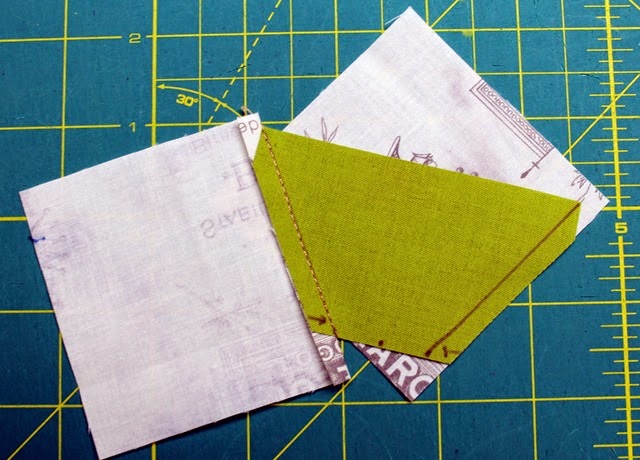
Line up your remaining 3” background squares and stitch them to your newly cut diagonals.
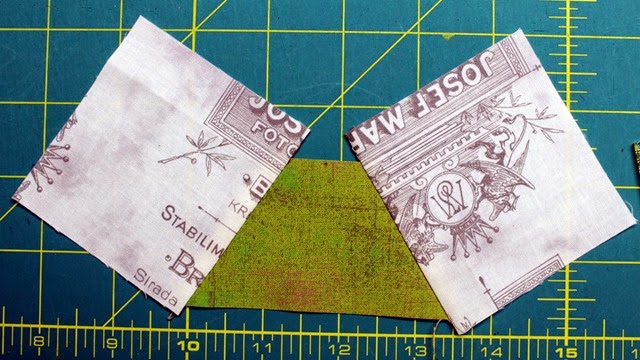
Iron toward the background fabrics.
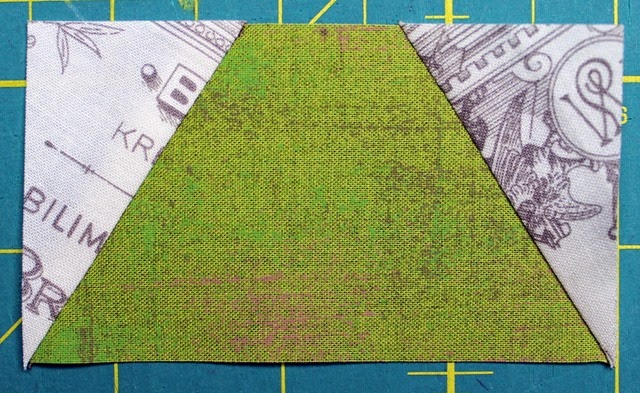
Trim the block down to 3.5” x 2.0”.
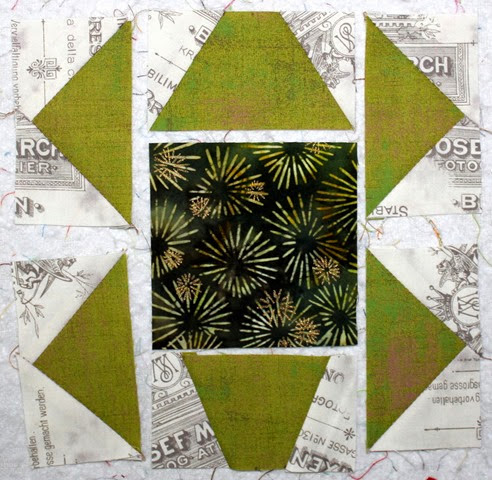
Layout the blocks you just made as shown in the diagram above.
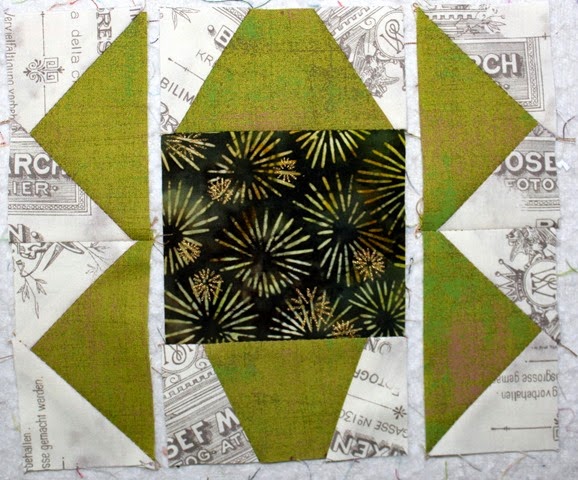
Sew them together in three longer strips first and then piece them together into your main block.
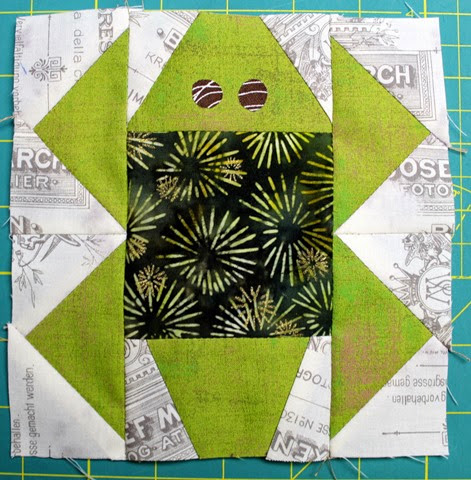
Draw two circles, approximately 3/8” in diameter, onto your scrap of heat n bond ultra. Fuse them to your scrap of dark fabric and cut them out. Iron them to the turtle’s head.
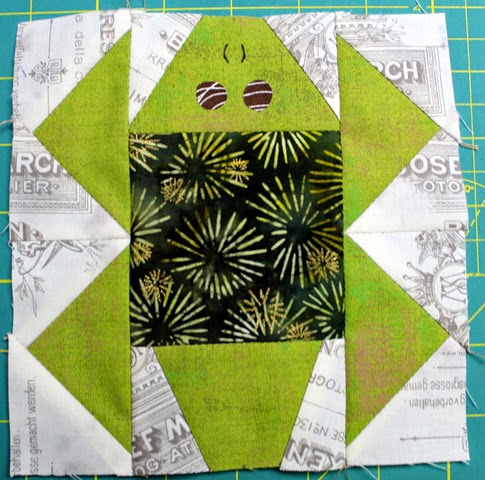
Using a micron pen I drew two small curved lines to mimic a turtle’s nose. This could also be embroidered to your block.
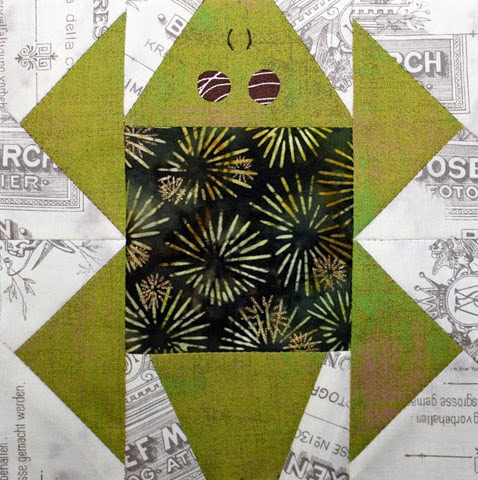
Thanks for following along and I hope you enjoyed this block tutorial!
Get your FREE printable PDF of this block by heading to my craftsy store. Don’t wait too long…after a month (7/10), the PDF will be $1.
I can’t wait to see what all your blocks look like! Be sure to share you blocks and any projects you make using your blocks onto our flickr group: 52 Blocks Quilt Along
Instagram/Twitter Hashtag: #52bTT
PREVIOUS BLOCKS
Stop back next Wednesday for another twisted traditional block tutorial!


Súper cute and original.Firt time I ser it.Thanks for the tuto!