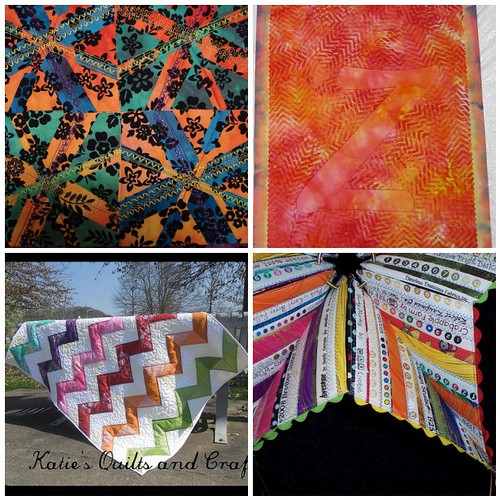
So many great quilts were created for the Zig Zag Challenge – I can wait to share with you their closer looks! I will be doing four a day for the next five days so be sure to check back later to see what others have made! 1. Close up Lost & Found, 2. Zee End, 3. Project Quilting Challenge "ZigZag", 4. ZigZag Star – detail Created with fd’s Flickr Toys
Quilter: Nancy’s Unique Boutique
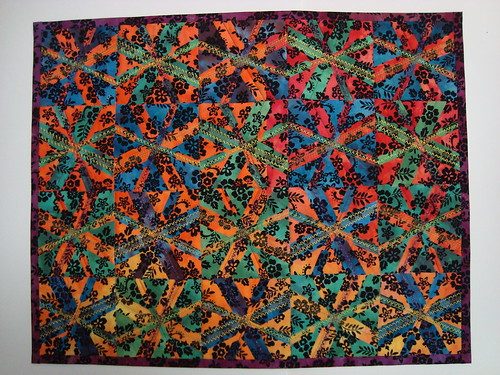
Lost & Found
 Here is my piece for the Zig Zag challenge. It is 20"x25" and made in DeKalb, IL. I challenged myself to use 3 fabrics that had the same print on them. It was originally a black flower on white fabric and I had over dyed with some color graduations awhile ago. I wanted to create a pattern in which the zig zag could not easily be seen – ‘Lost’ – and then use thread stitching to define the zig zag again ‘Found’. I think it is a bit too busy for me but my teens both gave it 2 thumbs up so probably will hang it in the house where they can see it frequently! Also uploaded a close-up and the back side which I think shows the pattern well. This is fused and stitched by machine with a fused binding. Although it’s not my favorite I enjoyed making it and am pleased with the results meeting my objectives.
Quilter: tesuquewho
Zee End
 Zig Zag challenge: Wholecloth, 13- by 18-inch, random stenciling with textile paint on hand-dyed fabric, fused binding; crafted in Bismarck, ND. I knew instantly that this is how I wanted to execute the final challenge. We began with architecture (A) and are ending with zigzag (Z), so the letter Z became my focal point.
I like making stencils and screens, but on a whim I recently ordered a couple of stencils, including a little zigzaggy one — perfect for creating a background. The Z was protected by freezer paper during the stenciling, then outlined with straight stitching.
The quilting has bursts of random-sized zigzags.
This is the first time I’ve done fused binding; I want to try a mitered look next time.
Quilter: Katie’s Quilts and Crafts
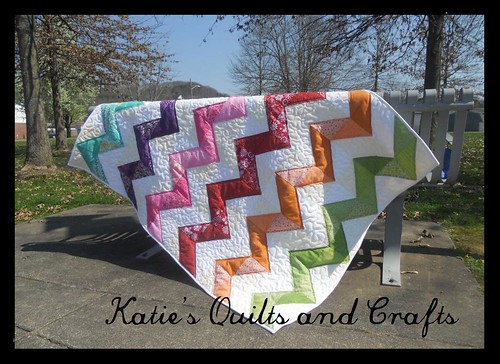
"Berries & Cream"

45" x 60" Made with love, in Milton WV, USA I will admit I am not the most creative person in the world. BUT, I have never made a zigzag quilt before so I tried to keep it simple. The thing that should impress everyone is that I made this in just a matter of hours. I started Tuesday evening and finished Wednesday afternoon. I picked out scraps from my stash paired with neutral scraps (white/beige/creams) For each "zigzag" i used colors from the same family. In the neutral areas I stipple quilted. After I finished with the stippling I LOVED how the colored areas looked all puffy. So I just did an outline about 1/4" from the edges of the colored zigzags to keep the "puffiness." For the back I used super soft Minky Fleece. Batting-100% polyester(high-loft), but everything else is 100% cotton. Bound with Kona pure white.
More photos here: katiesquiltsandcrafts.blogspot.com/2012/03/project-quilti…
Quilter: SewLizz
ZigZag Star
 Project Quilting #3-6: Zig Zag challenge Loved this challenge! I sew 3-D stars and this challenge was made for "Stardom"! I made 10 "blades" and sewed 5 with a zig and 5 with a zag using selvedge strips and a sewing themed fabric on the backs. I use Peltex for the batting giving the construction the body it needs for shape. The outside 2 blades have velcro to close the star shut. The other blades are then paired up and sewn thru their centers and attached to 2 brass rings. I hand sew every other blade to each other at their sides and the star is ready to hang. It measures 18" across and is about 4" wide.
Lizz Ploppert Sycamore, IL  Since SewLizz’s piece is so 3-dimensional I wanted to make sure you could see all the elements of it!

Leave a Reply